Do you want to quickly scan a document on your Mac, but you don’t have a scanner available? No worries if you have an iPhone on hand! Thanks to Continuity Camera, a sub-feature of Continuity, your Mac will be able to use your iPhone’s camera to scan documents in the blink of an eye.
Continuity, or Continuity in English, allows a growing symbiosis between your different Apple devices. You probably use this feature without knowing it if you answer your texts or calls on the Mac.
We’ll start by taking stock of compatible Apple applications and devices. Next, we’ll tell you how to scan documents on a Mac with the iPhone or iPad camera using Continuity.
Compatible apps and devices
Being able to scan documents or take a photo on a Mac using the iPhone camera thanks to Continuity is not entirely new, since this feature has been available since September 2018.
All iPhone, iPad and iPod touch running iOS 12 are compatible. Regarding Macs, it’s a little more complex, because having macOS Mojave 10.14 is not enough. You need at least one:
- MacBook from 2015
- 2012 MacBook Pro
- 2012 MacBook Air
- Mac mini from 2012
- iMac from 2012
- iMac Pro
- Mac Pro from 2013
- Mac Studio
You can insert a document scanned with your iPhone directly onto your Mac with these Apple applications:
- Finder (also Desktop)
- Messages
- Notes
- TextEdit
- Pages 7.2
- Keynote 8.2
- Numbers 5.2
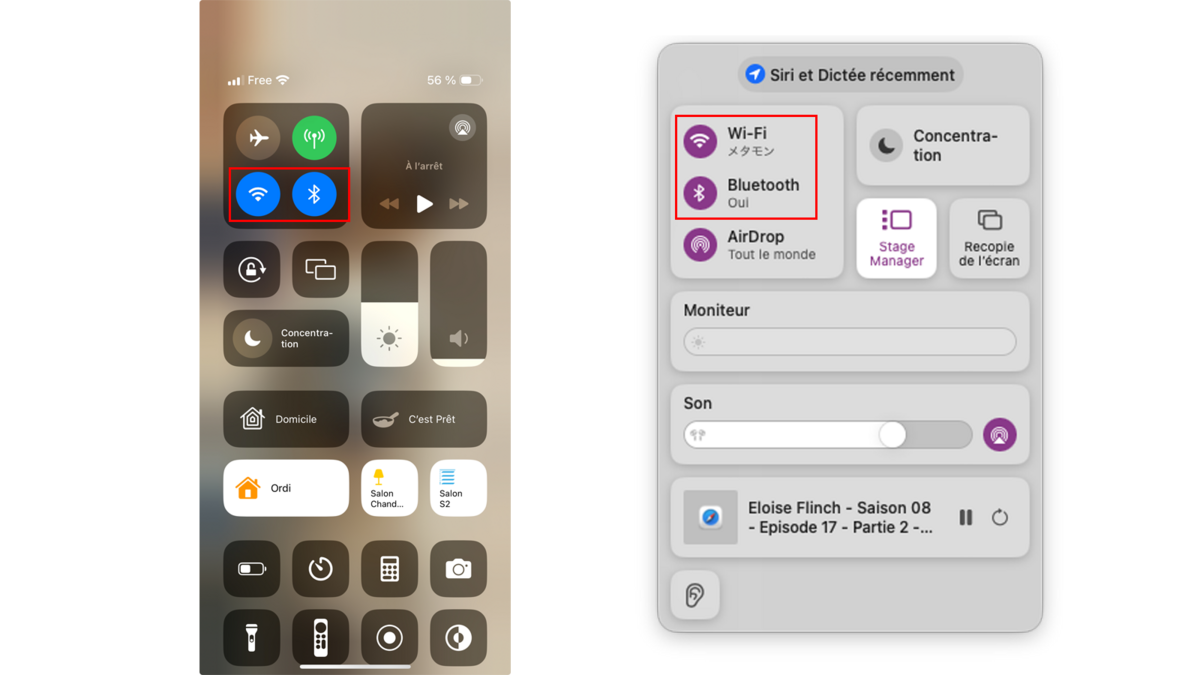
Both of your devices must be signed into the same iCloud ID, and you must make sure you have Wi-Fi and Bluetooth enabled.
Scan documents on a Mac with the iPhone camera using Continuity
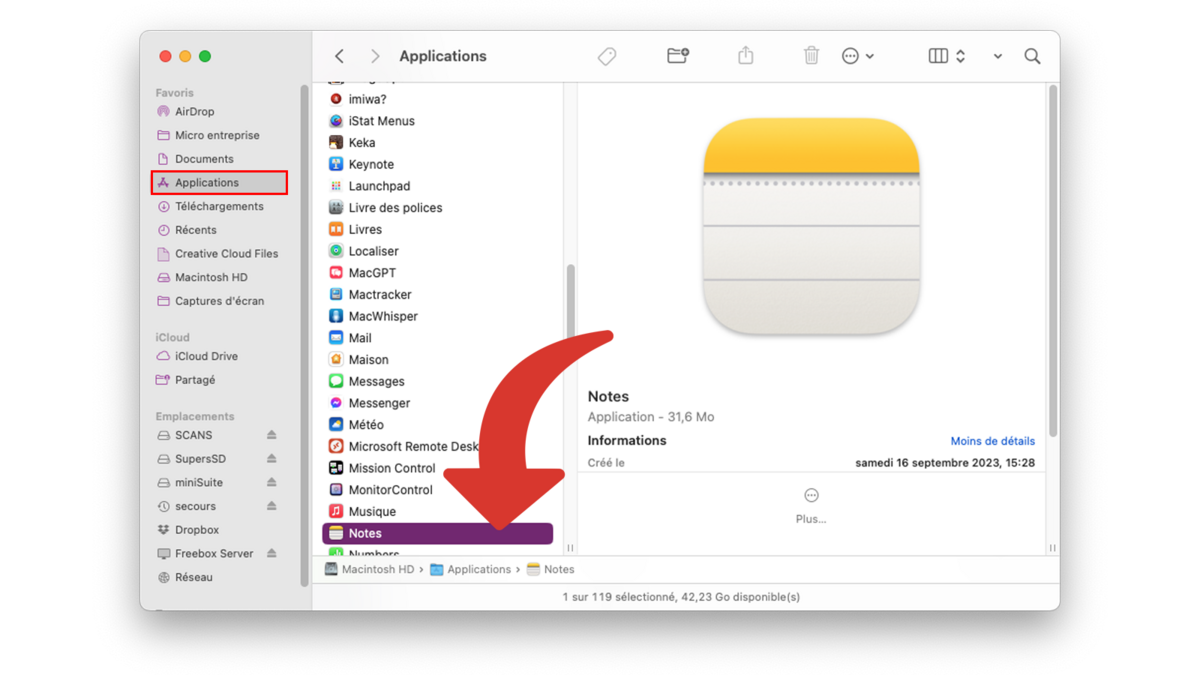
1. Open a compatible app
The first step is to open a compatible application. Open Finder, then go to the Applications folder. For the example, we will open Notes, but the operation is the same for all the other applications mentioned above.
2. Choose the location
Visualize where you want to insert the document. If you’re in Finder, make sure you’re not in the Applications folder or selecting an item.
Right-click, choose “Insert from iPhone,” then “Scan Documents.” Depending on the application you are using, the term may vary between “Insert” or “Import”. Additionally, if you have multiple devices, you will be free to choose which one to use.
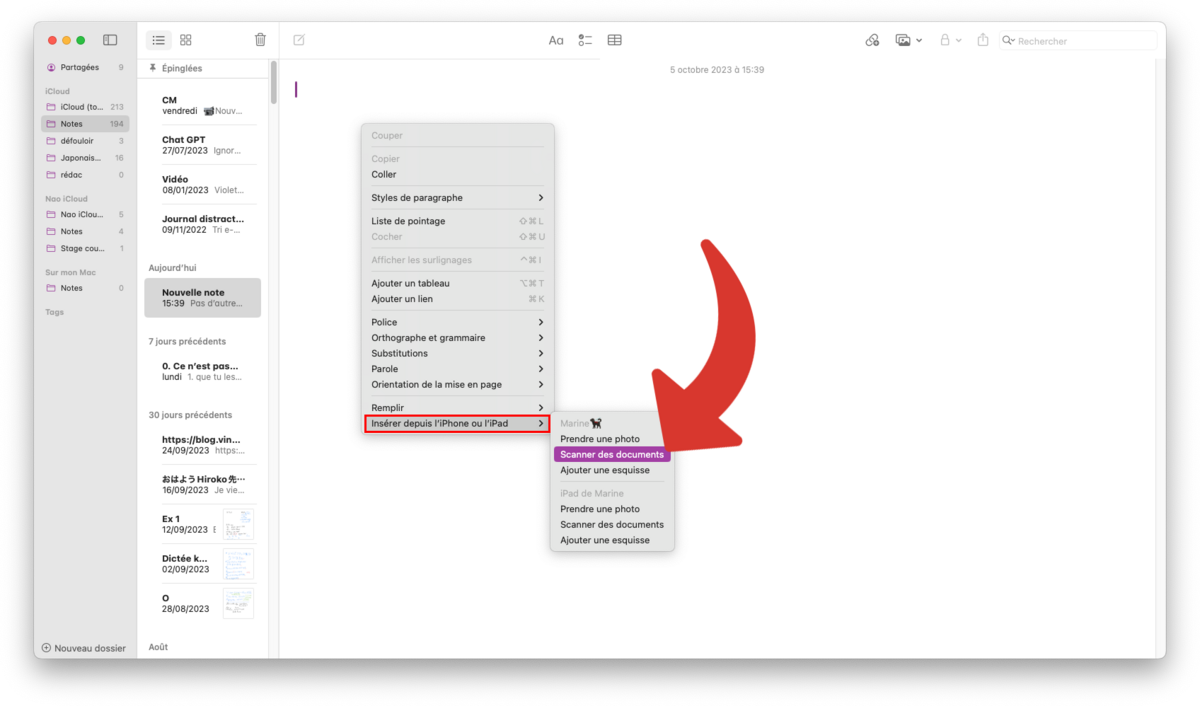
In this example we see that it detects both the iPhone and the iPad. We chose to use the iPhone named “Marine🐕🦺”. The app on Mac prompts you to use your iPhone.
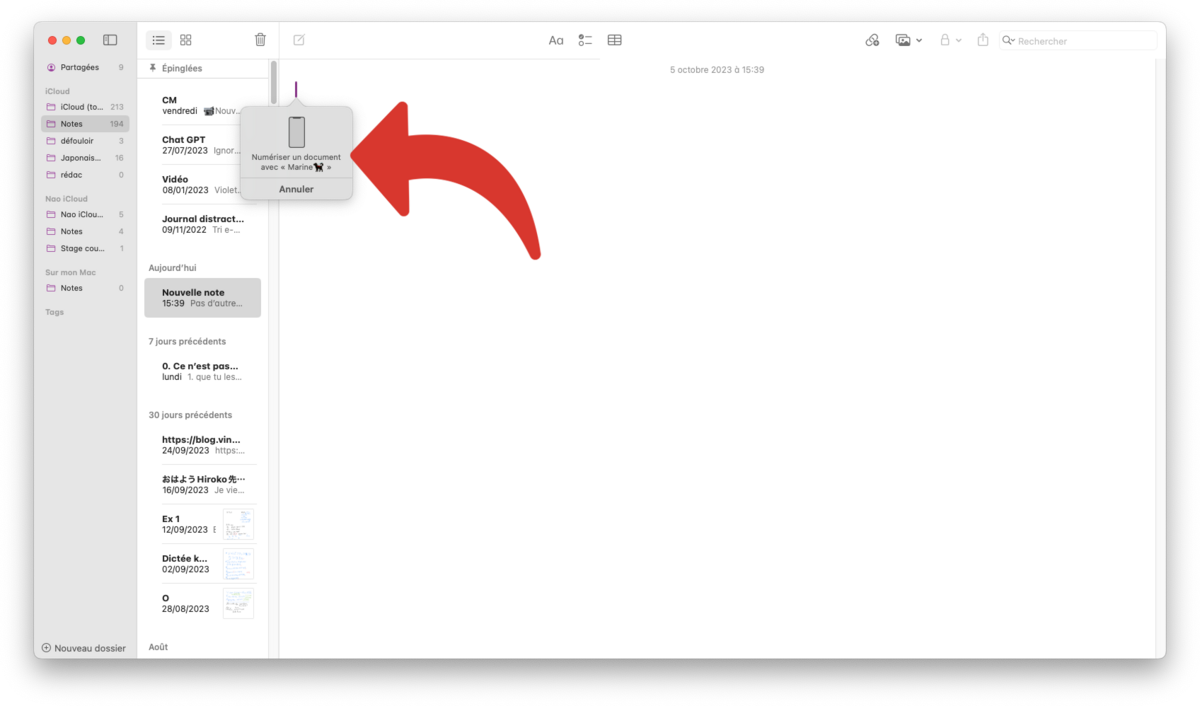
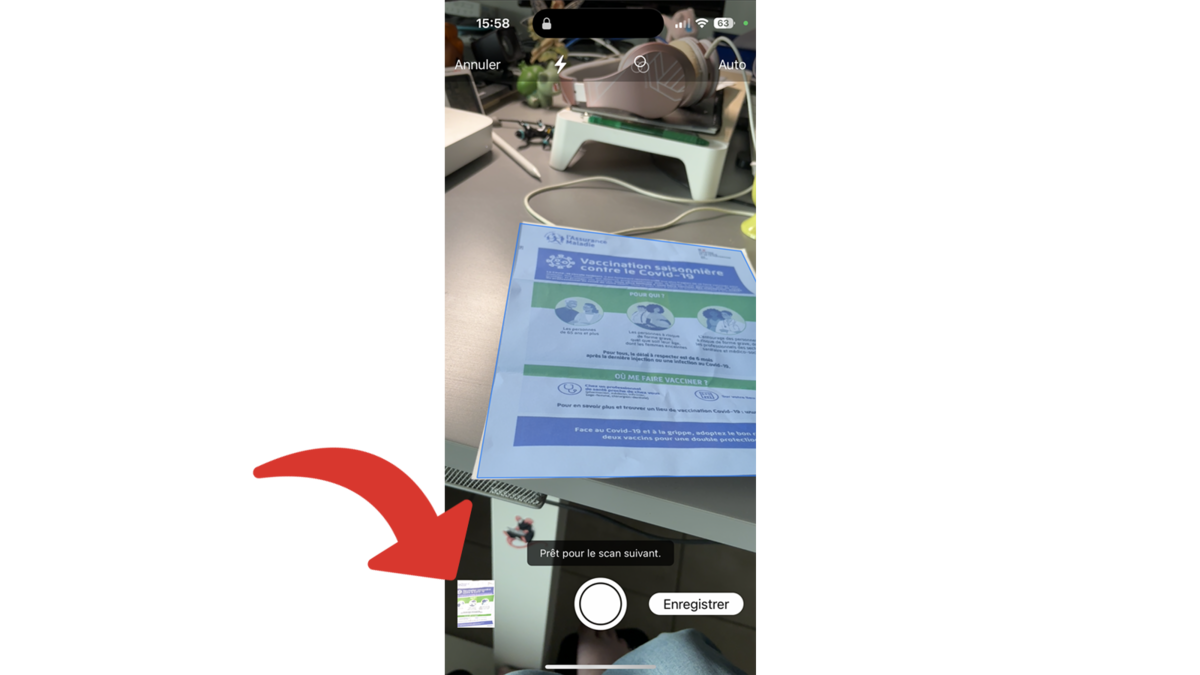
3. Scan with iPhone
While your Mac tells you to scan a document from your iPhone, the iPhone screen turns on directly, ready to scan. Even if the iPhone was locked.
With the camera, aim at your document. The edges should be automatically detected, and the photo will be taken. If not, press the shutter, the button in the middle and bottom of the screen, the same one you use to take a photo.
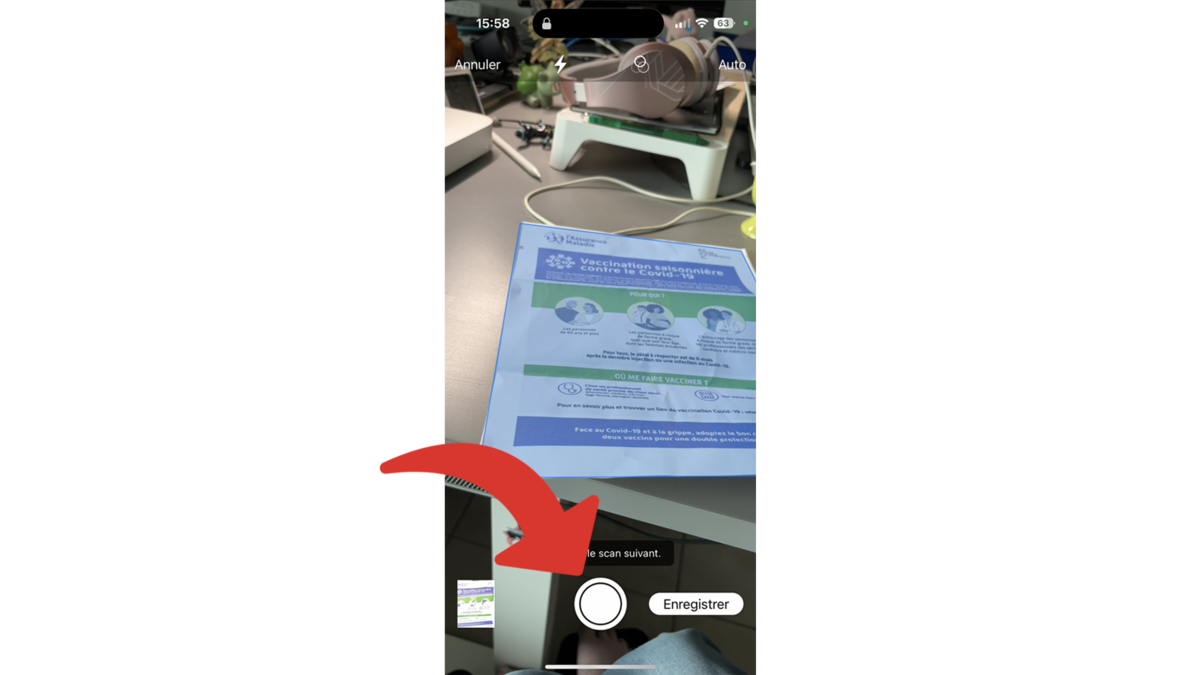
You can take several.
4. Make edits to the scanned document
After you have taken at least one photo, you can view and edit it.
Tap the preview, bottom left.
At the bottom of the screen, you can crop your document, add a filter, flip it, or delete it if it doesn’t suit you. Drag sideways to move from one image to another and keep only the ones you want.
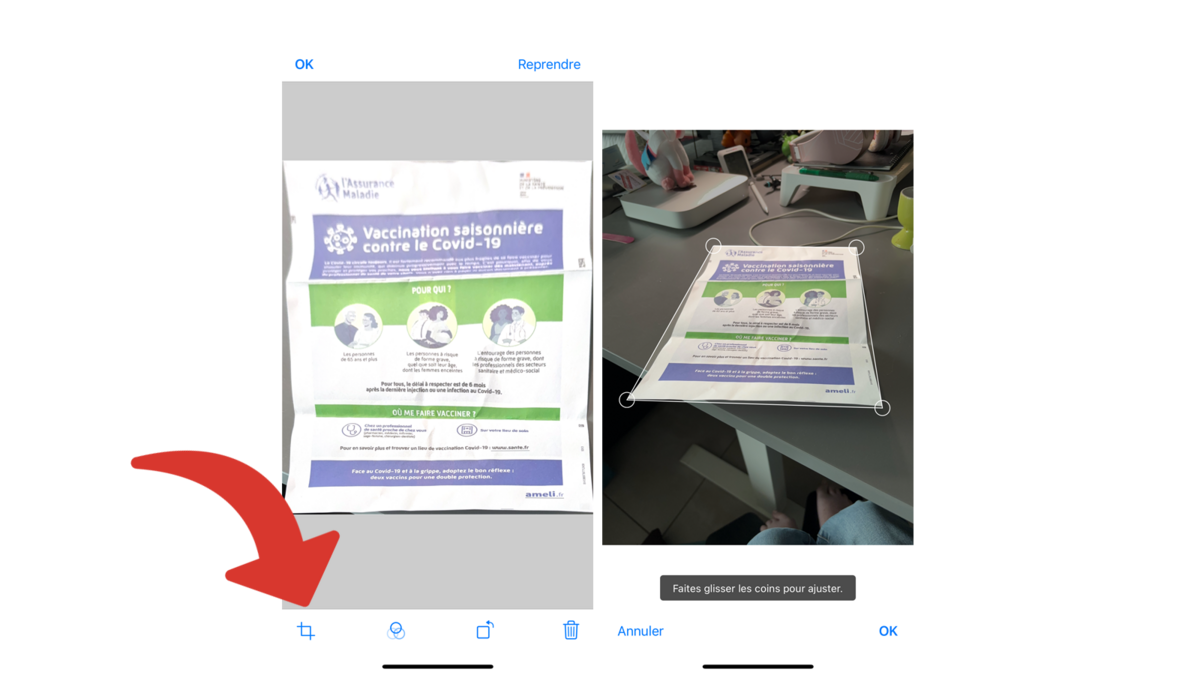
When you’re finished, tap “OK” at the top left.

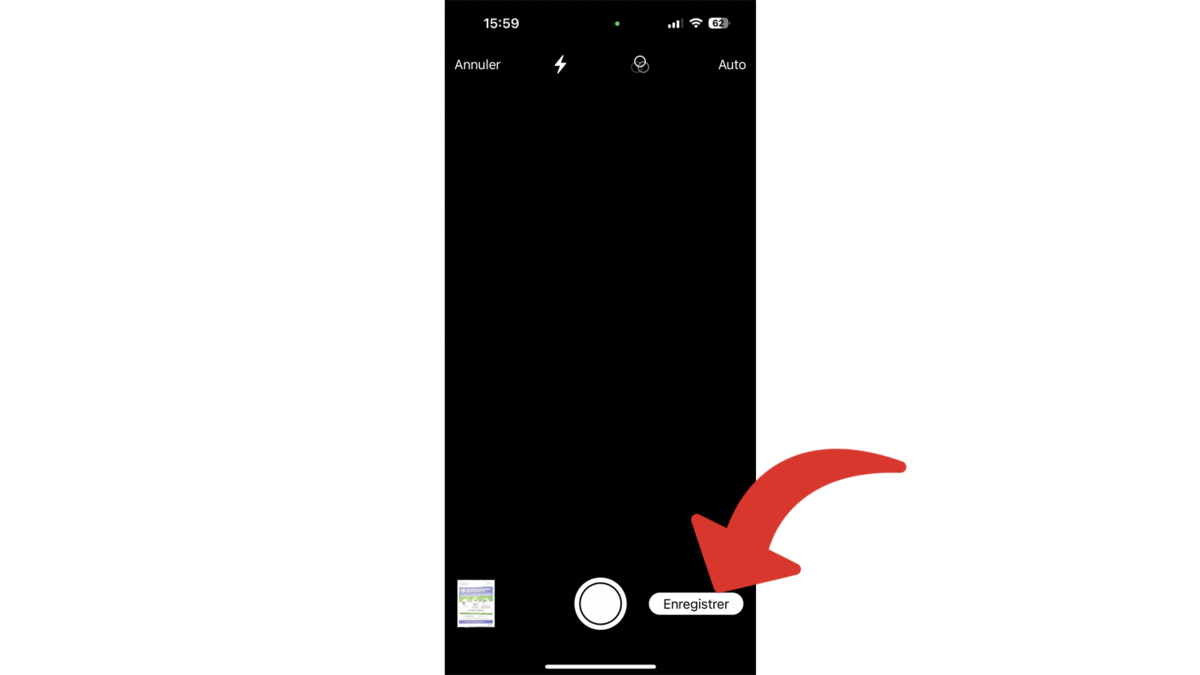
5. Send the scanned document to Mac
Now that the document is successfully scanned, it is ready to send to the Mac. Tap “Save” at the bottom right.
6. See the result
Return to your Mac, and you will see the document(s) you scanned with your iPhone using Continuity Camera.
Scanning documents on a Mac with the iPhone camera using Continuity is a convenient feature. It’s distinct from another Apple sub-feature, which also lets you use your iPhone’s camera as a webcam for your Mac. Although both use Continuity Camera, they do not serve the same purpose and do not have the same prerequisites. In particular, you will need a more recent version of iOS and macOS.