Tired of having to juggle between your windows to work more efficiently on your Mac? This little tip is for you and will allow you to organize yourself better, for much better productivity.
You know as we do, we spend our time stacking software and windows during our working day. Whether it’s the browser, with 24 tabs permanently open, the word processor, the calendar or even the mailbox, it is often very difficult to find your way after a few hours of work.
Fortunately, an option available in macOS for several years allows you to clean up and keep only two applications on the screen, arranged side by side, to concentrate on your current tasks. We’ll explain how to split your Mac’s screen in just a few seconds.
How to split your Mac screen in macOS?
1. Open the two apps you want to place next to each other
This may sound silly, but macOS only offers this option for software that is already open and running. It is not possible to request the addition of software if it is inactive.
Open the two applications by clicking on their icon in the Dock, from the “Applications” folder in the Finder or from Lauchpad, the macOS application launcher.
2. Click the expand window button
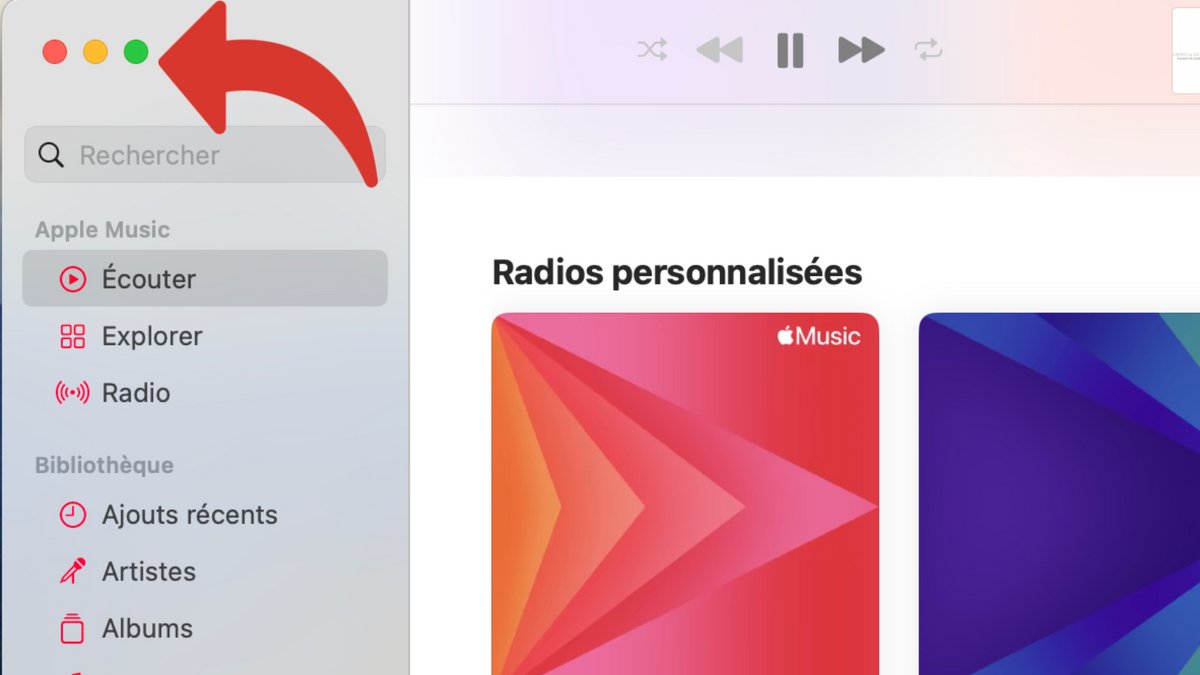
On macOS, you find three colored buttons at the top left of each window. The red button closes the window, the yellow button minimizes it in the Dock, and the green button switches to full screen.
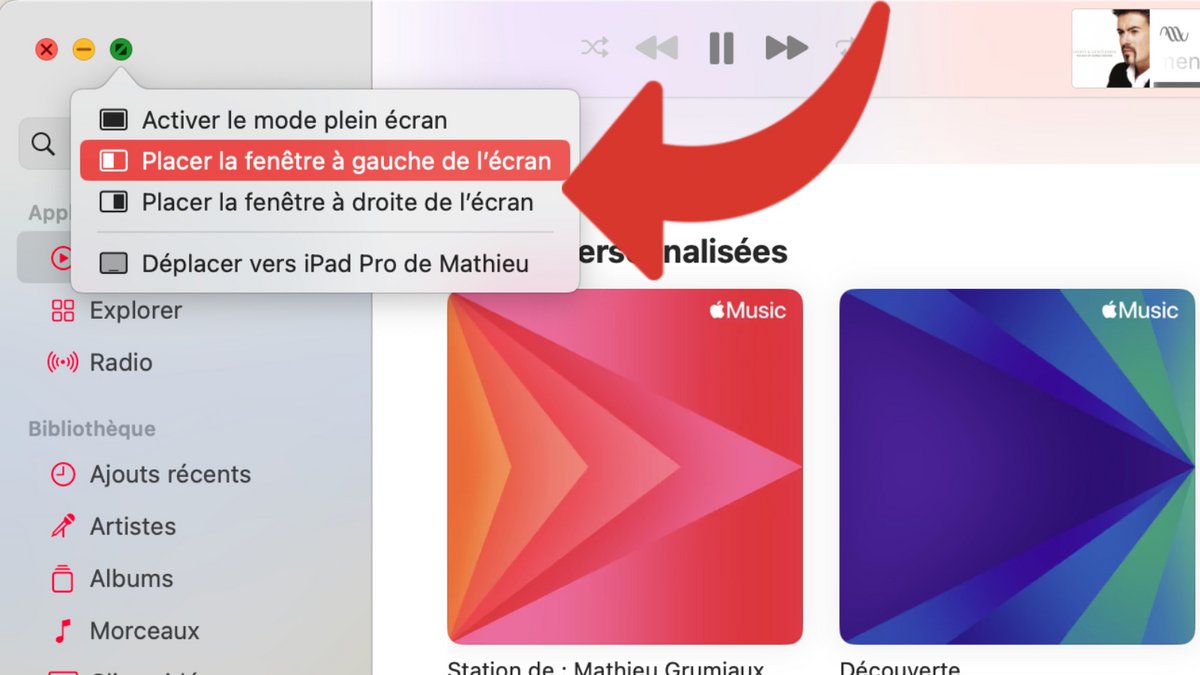
Here, hold down the green button using your Mac’s mouse or trackpad for a few moments to see a context menu appear.

3. Place your window on the right-left side of the screen
macOS gives you the choice of placing your window on the right and left of the screen. It’s up to you to choose which position suits you best. Please note: it will not be possible to subsequently swap the position of your two software programs. To do this, you will have to start all over again.

4. Choose your second application to display on the screen
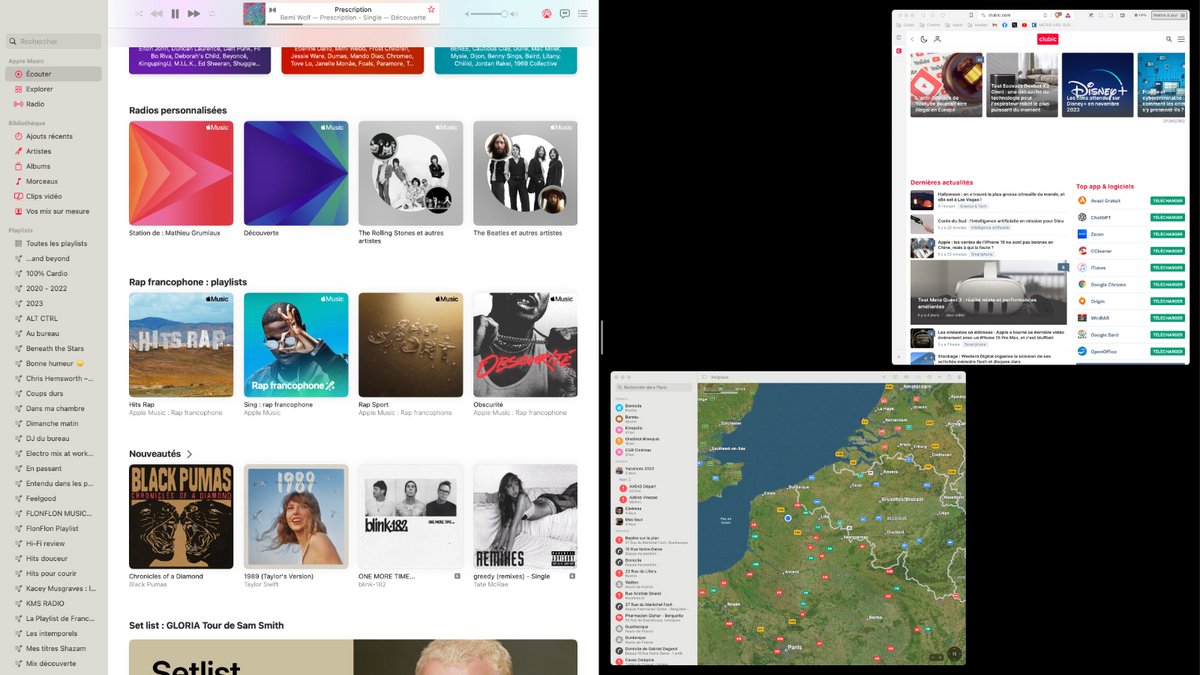
Once your app is placed on either side of the screen, you’ll see all of your remaining apps arranged in an exploded view (called Split View by Apple). Choose from this mosaic the application you want to add to your split screen by clicking on it. The window adjusts automatically.

The two applications form a virtual desktop, and you can return to your other running applications by switching between desktops, or by clicking their icon in the Dock. The latter is also automatically hidden to maximize your concentration. To display it again, hover your mouse over the bottom of the screen.
It is also possible to drag documents (photos, videos, etc.) from one window to another by dragging and dropping them.

5. Change the app displayed on split screen
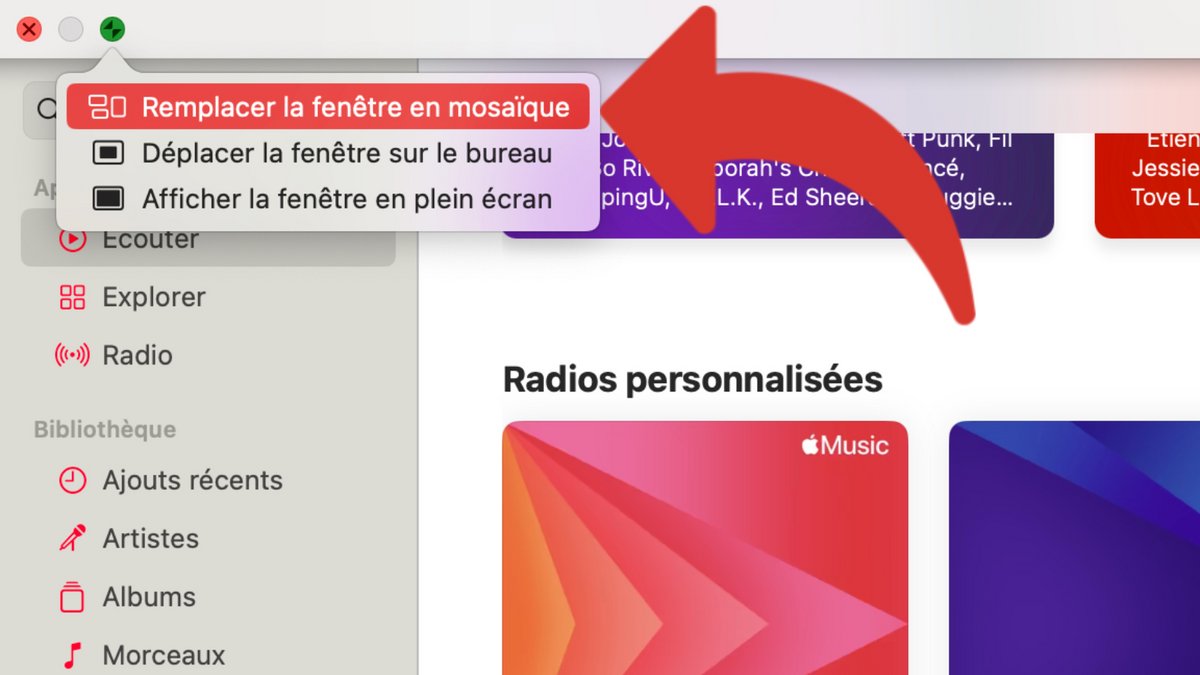
It is possible to change software during use, if you need another application to accomplish your tasks. To do this, hover the mouse cursor over the top of the window, then click the green button. Hold down for a few moments, and click on “Replace tiled window”. All open software will be displayed again, and simply click on the window you want to open to integrate it into the split screen.
You can also return to “Full screen” mode from this menu, if you no longer need the split screen and two applications displayed simultaneously.
