There will soon be many falling stars again! Do you want to photograph these stars with your iPhone? That’s how you do the best.
Photographing stars with iPhone
August is the month every year to photograph falling stars with your iPhone. The Perseids then appear that a large and often clear meteor shower is. In 2025 the highlight of the Perseids Wednesday 13 Augustaround 3.00 in the night. So take the time to look at the starry sky in the night from Tuesday to Wednesday, because the chance that you will see a falling star is much greater than normal. This way you can photograph the best stars!
1. Find a dark place for the best star photos
A great danger to photographing falling stars with your iPhone is light pollution. The less ambient light, the better your star photos become. So go away from street lamps, buildings and cars, look up a dark and quiet environment instead. It is then not only easier to see falling stars with the naked eye, but also to capture them with your iPhone.
2. Night mode of the iPhone
Do you have an iPhone 11 or newer? Then the camera of your iPhone has a night mode. With the night mode switched on, the iPhone uses longer shutter speeds. This function comes in handy when photographing stars, because with a longer shutter speed, more stars are visible in the photo. Please note that you really keep the iPhone silent when taking the photo, to prevent noise. You turn on the night mode as follows:
- Open the camera app and swipe to ‘photo’;
- Tap the arrow at the top to open the extra settings;
- Set night mode to maximum (this is the ball with the moon).

3. Put your iPhone on a tripod for razor -sharp images
Have you set the night mode of the camera to maximum? It is then advisable to put the iPhone on a tripod. Star photos almost always fail when you photograph out of hand, because the camera then records movements. Use a small tripod or put your iPhone on a stable surface. Then activate the timer (three or ten seconds) to prevent vibrations when pressing the shutter.
4. Fart the camera
Focusing the camera is extremely important when photographing stars with your iPhone. Therefore, tap a clear star or on the air on the screen once and hold the screen briefly to switch on the AE/finish. With this lock, your iPhone remains focused on the stars and the exposure does not change during photography. That way you know for sure that you are taking sharp photos.
5. Make multiple recordings and reduce noise
The circumstances when photographing stars with your iPhone are usually difficult. Even with a tripod and the right camera settings, photos remain sensitive to noise in low light. Therefore take several photos in succession. You can later combine them in an editing program for less noise and sharper stars. Moreover, when making multiple images, it is not a disaster if one has failed.
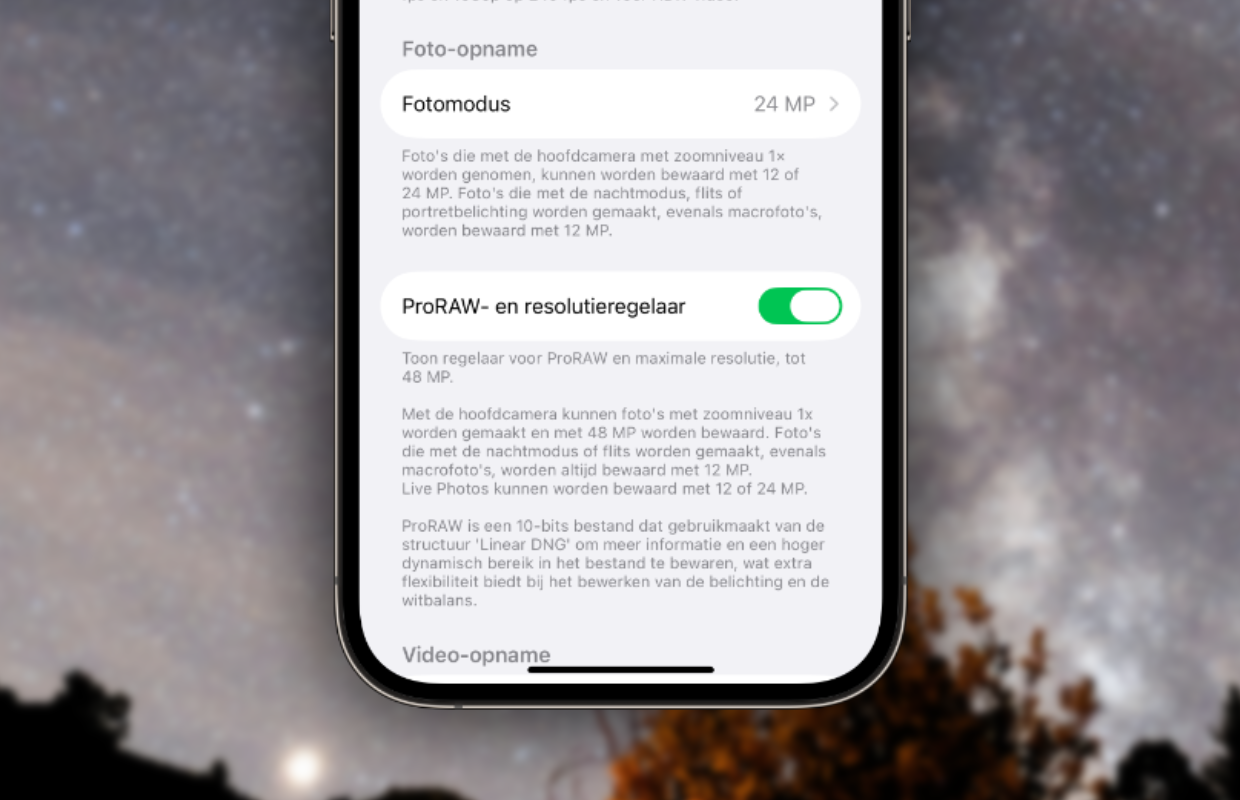
6. Photograph in maximum quality
The cameras of the iPhone 12 Pro (Max) and newer Pro models have the Proraw function. With this feature you record many more details and color information, but then you have to switch on Proraw. To do this, go to ‘Settings> Camera> File structures’ and turn on the switch behind ‘Proraw and resolution inverter’. Photos are then taken in the highest resolution with the 48-megapixel camera.
7. Plan your star photos in advance
Do you know in advance that you are going to photograph falling stars with your iPhone? Then check in advance when and where they are visible. This is often already known and you can see in certain applications. That way you know exactly which part of the starry sky you have to focus on and you have to focus the camera. In the App Store there are various application that help you find constellations and falling stars. Sky Guide is one of them:
More handy photography tips
When photographing (falling) stars with your iPhone, the right camera settings and a stable setup are extremely important. Have you adjusted the settings of the camera and achieved a tripod for your iPhone? Then you are ready to capture the starry sky. Did you find this tip handy and do you want to know more about photographing the air? Then view here how to take the best photos of the moon and the northern lights:

Northern Lights Photographing
