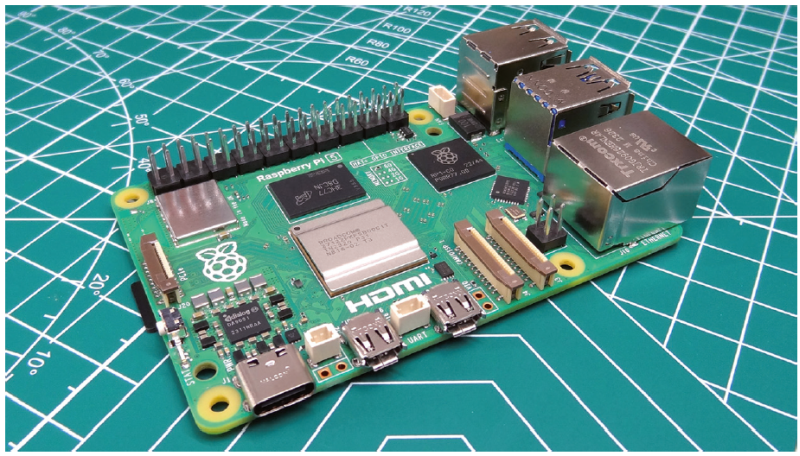
In PC-Active 336 we have installed the Raspberry Pi, placed it in a case and made it workable. Now it is time to start playing with it.
Johan Swenker
![]()
After the physical installation of the Raspberry Pi in the Argon case, I started playing around with it. First the NVMe SSD: does it work and how fast is it? Fortunately, that turned out to be okay. On the internet you can find lists of supported SSDs, usually tested by the supplier of the PCIe to NVMe converter. I bought a small, but otherwise random SSD. The whole thing works, without including a special NVMe or PCIe option in the config file.
The Raspberry Pi 5’s PCIe interface formally complies with the second generation PCIe standards. With a single lane gives a theoretical speed of 500 Mbyte/sec. Simple measurements support this: writing 400 Mbyte/sec and reading 450 Mbyte/sec. But the interface can also handle PCIe-Gen 3.0. That has to be turned on very specifically with the option dtparam=pciex1_gen=3 in the config file. That should be twice as fast. A simple test that reads and writes a lot of data confirms that the speed is almost doubled.
Temperature
I installed the Smartmontools package to query the temperature of the NVMe SSD with the Smartctl program. While writing this article, one of the temperature sensors indicates a temperature of 47 degrees. The bottom of the housing – where the SSD is located – is pleasantly warm. You can warm your hands on it, like on a hot chocolate milk.
My laptop has an old-fashioned (?) Sata SSD. This NVMe SSD in the Raspberry is the first time I can experiment with an NVMe SSD. There is a command nvme, with which you can request information about the NVMe SSD; first nvme-cli install. The most interesting subcommands I found were list, show-topology and id-ns. No, I didn’t dare to remove a namespace and create two new ones. The latter wouldn’t have worked either, consumer NVMe controllers can only handle one namespace.
The Raspberry Pi processor also has a temperature sensor. This can be read with vcgencmd measure_temp and is currently giving temp=49.4'C on. With vcgencmd There are even more interesting parameters of the Raspberry Pi that can be requested.
. vcgencmd commands displays all commands;
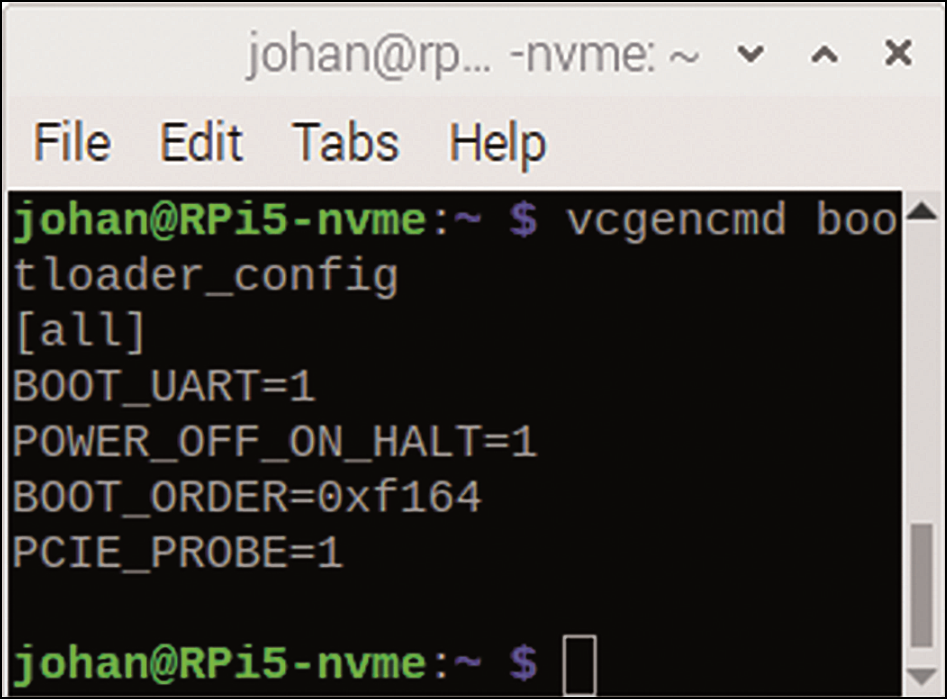
. vcgencmd bootloader_config displays the eeprom configuration.
My Raspberry gives the following output:
Boot parameters
If you shutdown gives on a Raspberry Pi 4 or older, it will continue to use quite a lot of power. With the Raspberry Pi 5 you can choose the old situation: the 3.3 Volt remains active, the processor remains active, and a possible HAT (Hardware Attached on Top) continues to work. You can also choose to have the processor completely de-energized.
NB: Older HATs may get confused if they receive 5 volts but not 3.3 volts.
The difference in power consumption is large: 0.3 A (i.e. 1.5 Watt) in the old situation, compared to less than 0.01 A with POWER_OFF_ON_HALT=1.
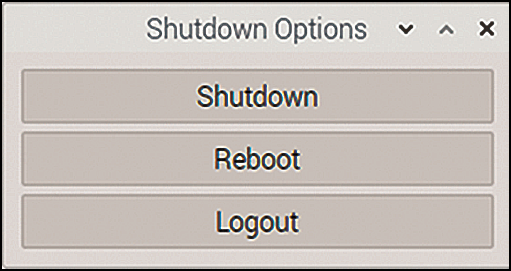
With a simple press of the power switch, which is new on the Raspberry Pi 5, you can bring the Raspberry Pi back to life. If you press this switch while the Raspberry is running, you will get the standard menu with the shutdown-options. And indeed, if you hold the switch down too long, the power goes off, as if you pulled the plug from the socket. You shouldn’t do this too often. The file system doesn’t like it, the SSD doesn’t like it, and the SD cards don’t like it at all. Nothing will break, until you do it at the wrong moment.
The boot sequence 0xf164 is a bit cryptic. You have to read it backwards: first boot with method 4; if that fails, boot with method 6; if that fails, try method 1; and if that fails, start over.
Number Device
1 Boot from SD card
4 Boot from USB disk
6 NVMe Boot
f From behind again
Here (https://www.raspberrypi.com/documentation/computers/raspberry-pi.html#BOOT_ORDER) you can find information about the other numbers.
Changing the bootloader configuration is done with sudo rpi-eeprom-config --edit
I have chosen to always try to boot from a USB stick first. If something goes wrong with the SSD or SD, you can get the Raspberry working again without a screwdriver. You do need to have a USB stick ready with a working Raspberry Pi OS. In my first experiments, my USB SSD had an old Raspberry Pi OS on it, which was suitable for the Pi4, but not for the Pi5. I had to disconnect the NVMe SSD when I had a broken configuration that did not work.
Config file
The first partition of the boot disk was always mounted as /boot. The new version of Raspberry Pi OS mounts the first partition as /boot/firmware. Once you know that, you’re good to go, you just /boot/firmware/config.txt on and everything works as it used to. If you don’t know, then you have a problem: the manuals you can find on the internet are all wrong.
In one of my experiments the ssd stopped working, I can’t reproduce it now of course. I also don’t know why it works now. The descriptions on the internet indicate that pcie_probe=1 should be in the eeprom, and that dtparam=nvme should be in the config file. I just removed them and after reboot everything still works.
I made two changes to the config file. As described earlier, I changed the line dtparam=pciex1_gen=3 added. This makes the ssd faster. See also: https://community.volumio.com/t/prepare-raspberry-pi-for-boot-from-usb-nvme/65700 (step 5 Use NVMe).
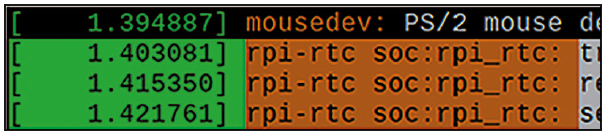
The Raspberry Pi 5 has a Real Time Clock. When the Raspberry Pi is off, this RTC gets power from a small battery, which you have to buy separately. But then the battery has to be charged every now and then and you have to explicitly enable that in the config file. The documentation at raspberrypi.com (https://www.raspberrypi.com/documentation/computers/raspberry-pi.html#enable-battery-charging) says that dtparam=rtc_bbat_vchg=3000000 is needed, but they don’t tell why.
The RTC is doing its job. The easiest way to check this is to look at the kernel log with the dmesg command:
Copy SD to SSD
I liked the installation on the SD card. So I wanted to copy it to the NVMe SSD. There are some descriptions on how to do that. I couldn’t do it. So I just do what it says: apt update && apt upgrade. That went fast enough. The Raspberry is fast, and the SD card is fast enough. It only went wrong when the package tungsten engine upgraded. Unpacked this package is 4 GB. There was not that much space left on the SD card. Now that is not so bad, just uninstall that package, but it is not fun. But I still did not have a working Raspbery Pi OS on my NVMe SSD. All kinds of other tricks did not work either.
As stated in the other article, I have the imager used to put the Raspberry Pi OS on the ssd. The recommended version is the 64-bit OS, 1.1 GB in size. I didn’t like it: I had no working sound and my favorite performance monitor xosview didn’t do it either. At the full-2.7 GB version I didn’t have those problems.
Focus Follows Mouse
Under Linux I have been using ‘focus follows mouse’ for years. When I move the mouse to another window, that window immediately becomes the active window. I can start typing in it right away, even if it is partly covered by other windows. Exactly the same way all the loose papers on my real desk work. Many people are used to click to focus. Then you first have to click on the mouse in the new window, before you can work in it. Moreover, that new window immediately comes to the front.
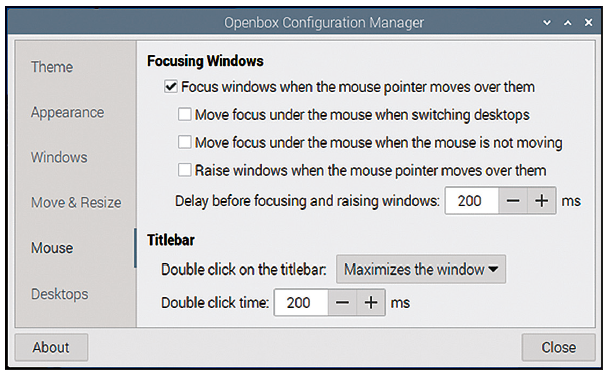
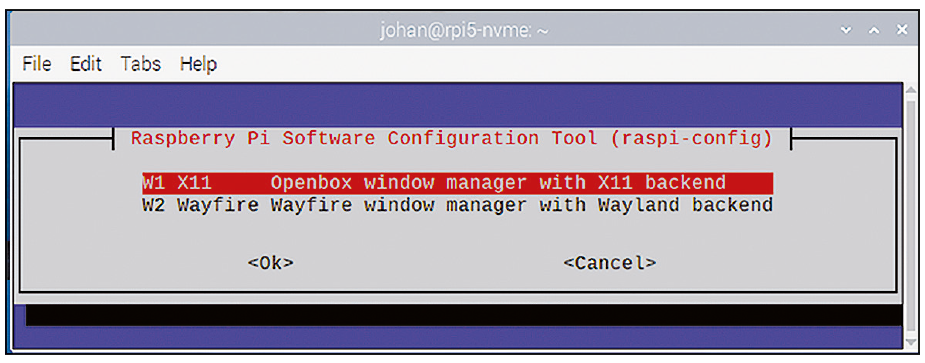
Focus follows mouse can you use the command obconf set up… except it didn’t work. Makes sense, I didn’t use Openbox as window managerbut what then? The window manager of Wayland is Wayfire. I have not found how to use Wayfire focus follows mouse can set. I did find how to replace the modern Wayland with the old-fashioned X11 (raspi-config ⇒ advanced ⇒ wayland ⇒ X11).
In addition, two other problems have now been solved: I have a visual feedback (an hourglass) for example if I start Firefox from the menu bar and if I have two or more terminal windows open, they come next to each other and not on top of each other. Apparently I’m not ready for Wayland yet.