The kill switch is undoubtedly one of the essential criteria to take into account before opting for a virtual private network rather than another. An essential security option, it is what guarantees the integrity of your traffic and your personal data when the VPN connection is compromised. Here’s how to enable it on Surfshark.
Considered one of the best VPNs today, Surfshark continues to develop tools dedicated to the security of personal data and the protection of anonymity online. Antivirus and antimalware solutions, Alternative ID, dynamic Multi-Hop, private search engine and even alert system concerning data leaks on the Dark Web undeniably reinforce the solidity of its infrastructure and the cybersecurity technologies supporting its virtual private network . It also has a kill switch, an extremely essential option for any serious VPN.
What is the kill switch?
In VPN jargon, the kill switch is like an emergency stop button that instantly blocks all incoming and outgoing Internet traffic when the VPN connection drops.
Generally, in order to prevent accidents, the kill switch is activated by default. When the VPN connection drops unexpectedly and unintentionally, it automatically triggers to prevent traffic leaks outside the VPN tunnel.
The cause of an interruption in the VPN connection is mainly ordinary events, most often going unnoticed, such as temporary Internet outages, micro power outages, poorly managed network changes or restarts of VPN servers. And it is precisely because the Internet user generally does not notice it that the danger is greater.
We therefore understand why the kill switch is essential.
What are the risks if I don’t activate the kill switch?
The main risks obviously concern the exposure of personal data and the lifting of the anonymity that the VPN connection is supposed to protect.
As a reminder, when connecting to the Internet via a Virtual Private Network, the traffic is encrypted on the device and routed to the VPN server through a secure tunnel, isolated from other public Internet traffic. The information passing through the VPN tunnel therefore benefits from double protection: it is both invisible, therefore difficult to intercept, and indecipherable, therefore unusable. Once received by the VPN server, the data packets are decrypted and sent back to the web servers initially requested by the Internet user’s request via the HTTP/HTTPS network.
When the VPN goes down, the first segment of the original connection is no longer protected by the secure tunnel and is automatically redirected to the public Internet. This is called a data leak.
This has harmful consequences for the privacy and anonymity of the Internet user since their data is inevitably exposed, from the most basic (IP address, ISP, geolocation, navigation path, equipment used to connect to the Internet) to the most confidential. (usernames, passwords, bank details, credit card numbers), especially if they consult HTTP websites, not secured by HTTPS, connect to public hotspots or use very busy semi-private networks (hotel , university, businesses).
In short, not activating your VPN’s kill switch is as much of a risk as browsing online without a VPN at all.
Activate the kill switch on Surfshark
In theory, Surfshark’s kill switch is indeed activated by default. Two precautions are better than one, it is better to check that everything is in order before initiating a first VPN connection.
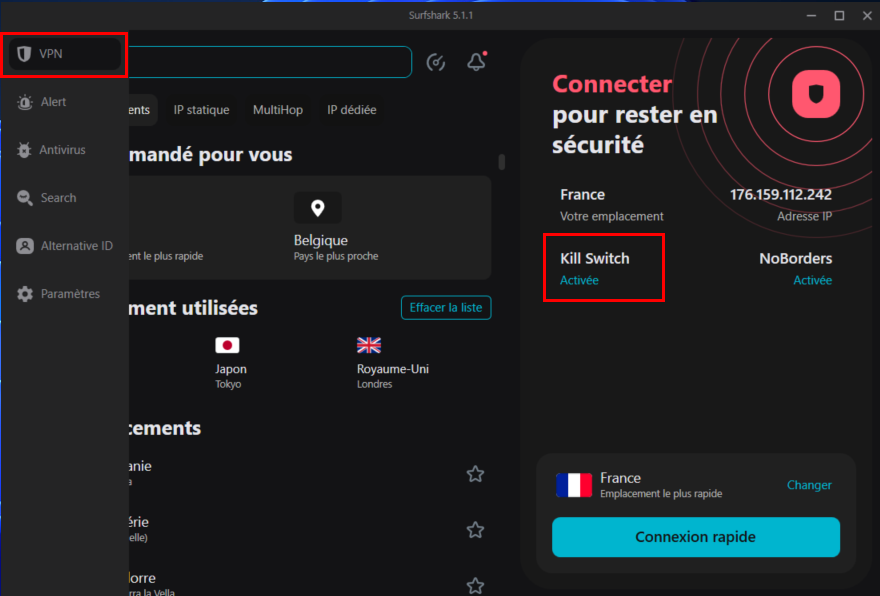
Configure the Kill Switch on Windows
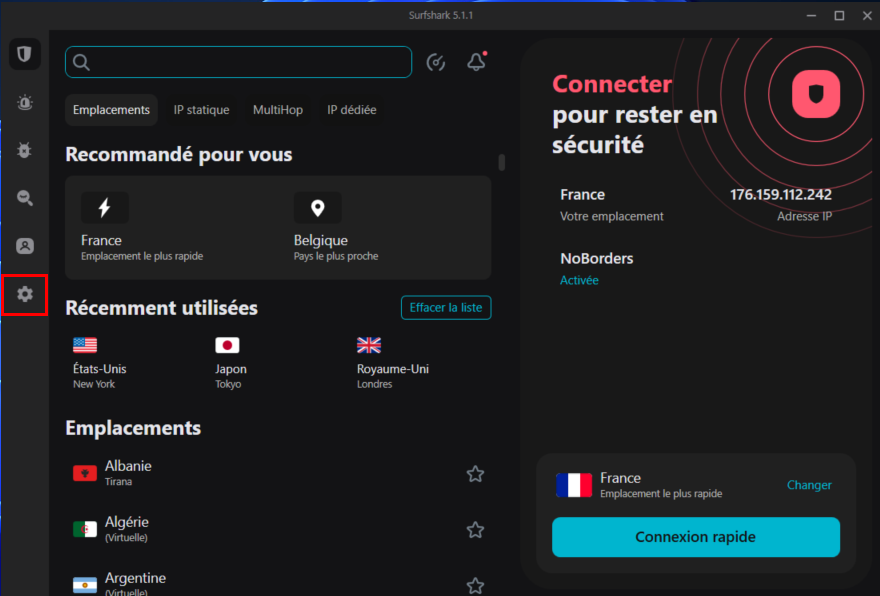
Run Surfshark and log in to the software client using your personal credentials (email address and password).
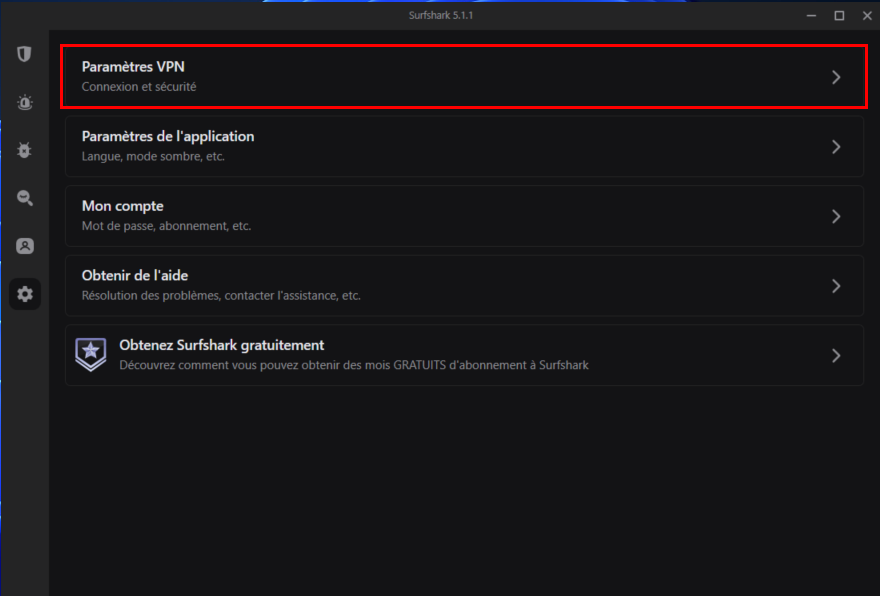
From the home page, you can already check the status of the kill switch, in the block located to the right of the interface. If the option does not appear, it is disabled. Select Settings (gear icon) in the left column, then VPN Settings.
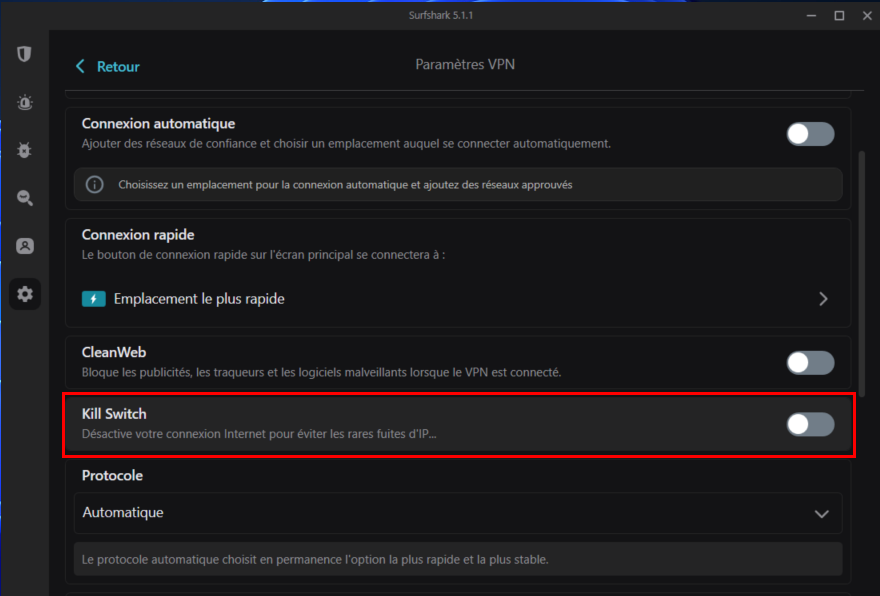
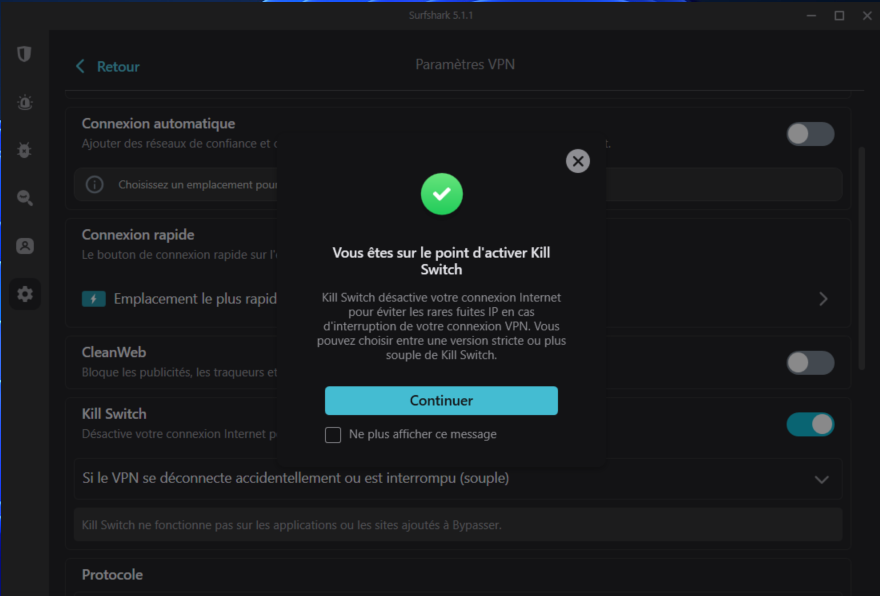
In the list of available options, locate Kill Switch and activate the switch.
In the left column, click on VPN (shield icon) to return to the Surfshark home page and verify that the kill switch is activated. You can now initiate a VPN connection securely.
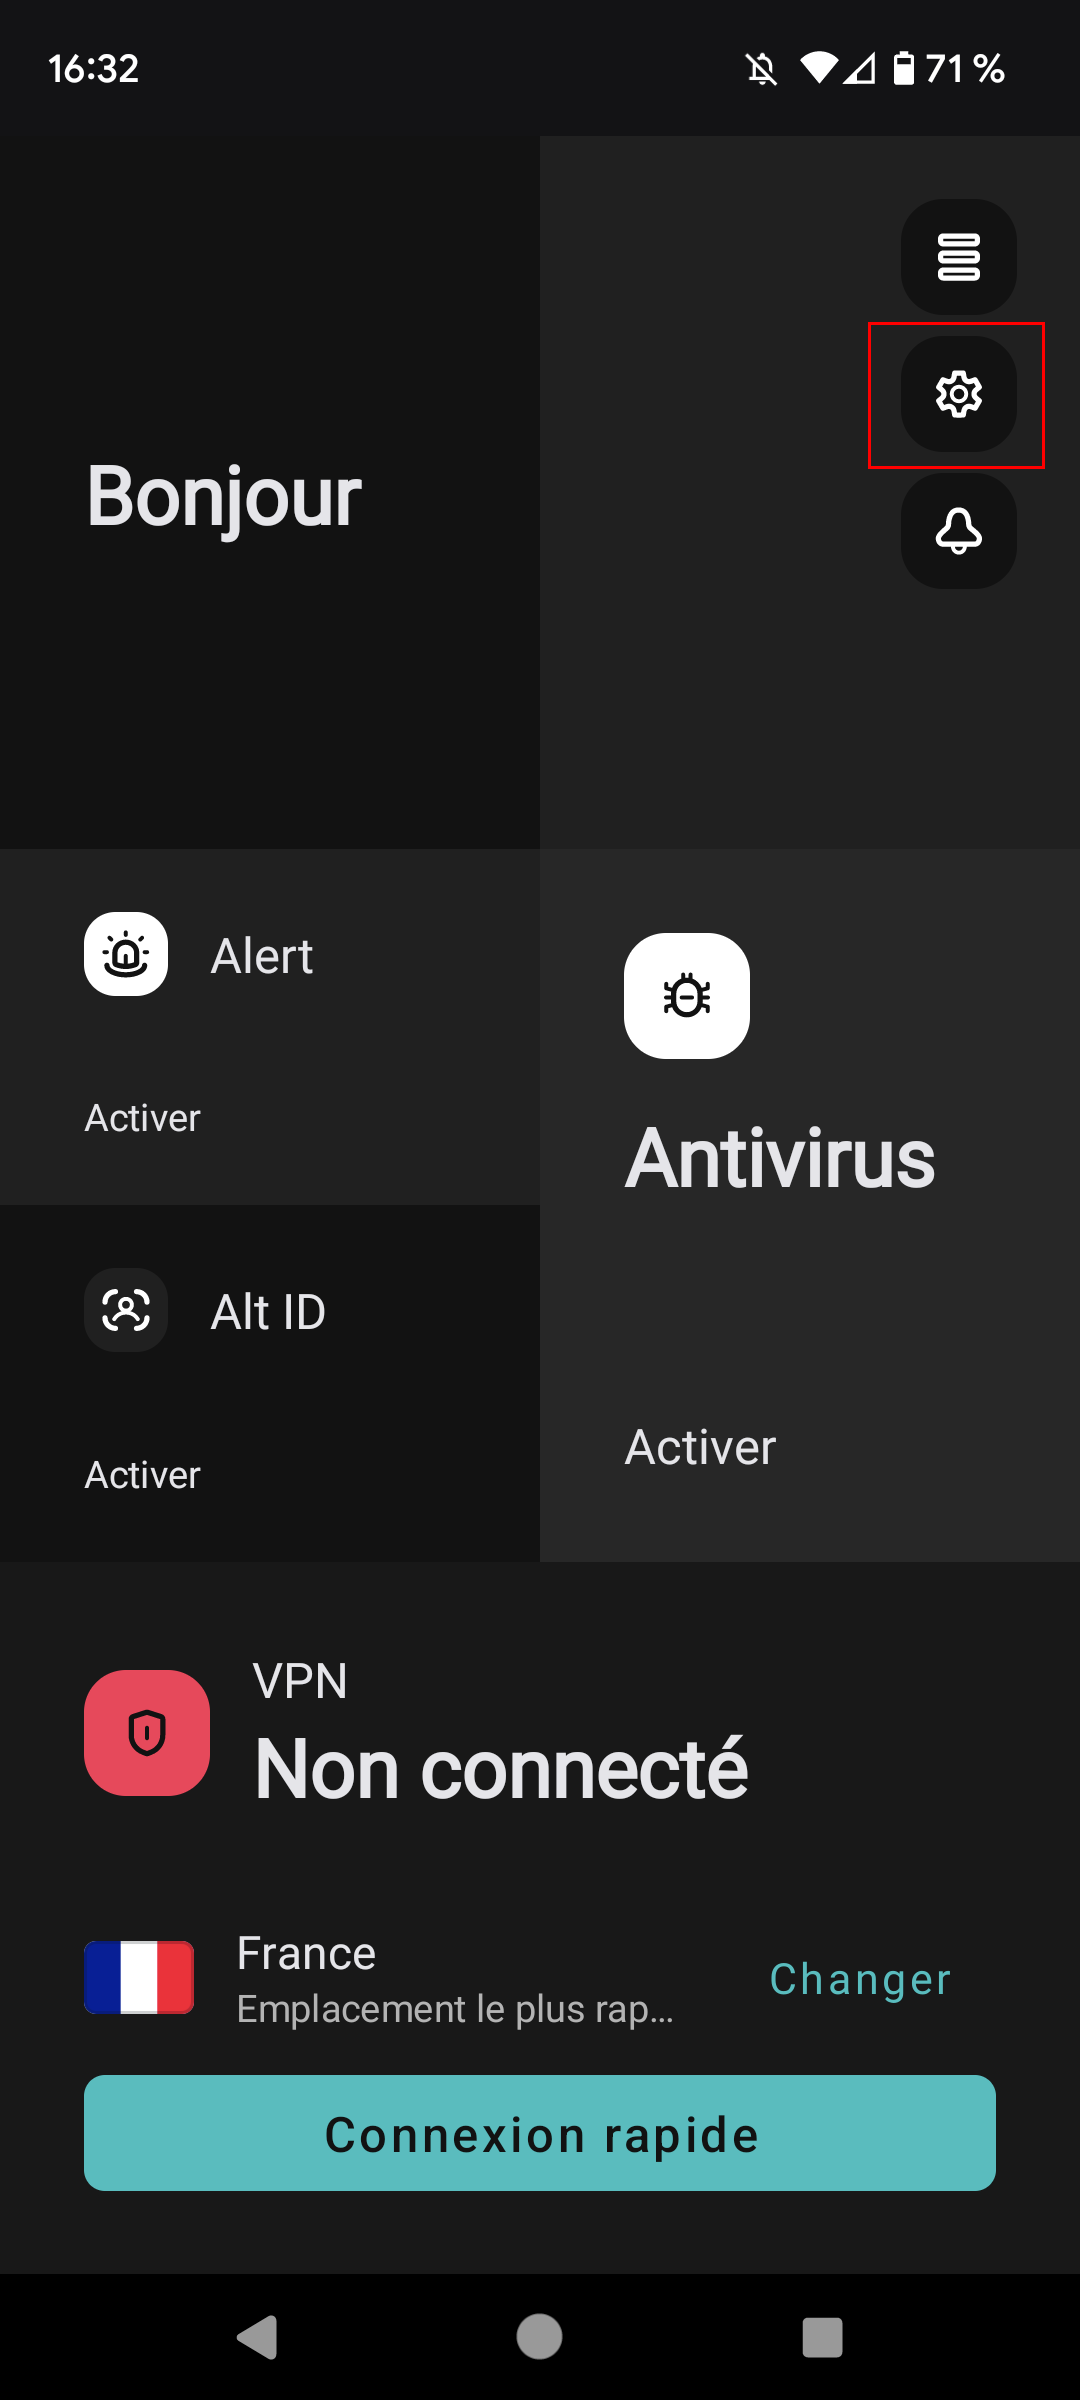
Configure the Kill Switch on Android
Conversely, on Android, the Surfshark kill switch is not activated by default. It is therefore necessary to remedy the situation even before using the VPN for the first time.
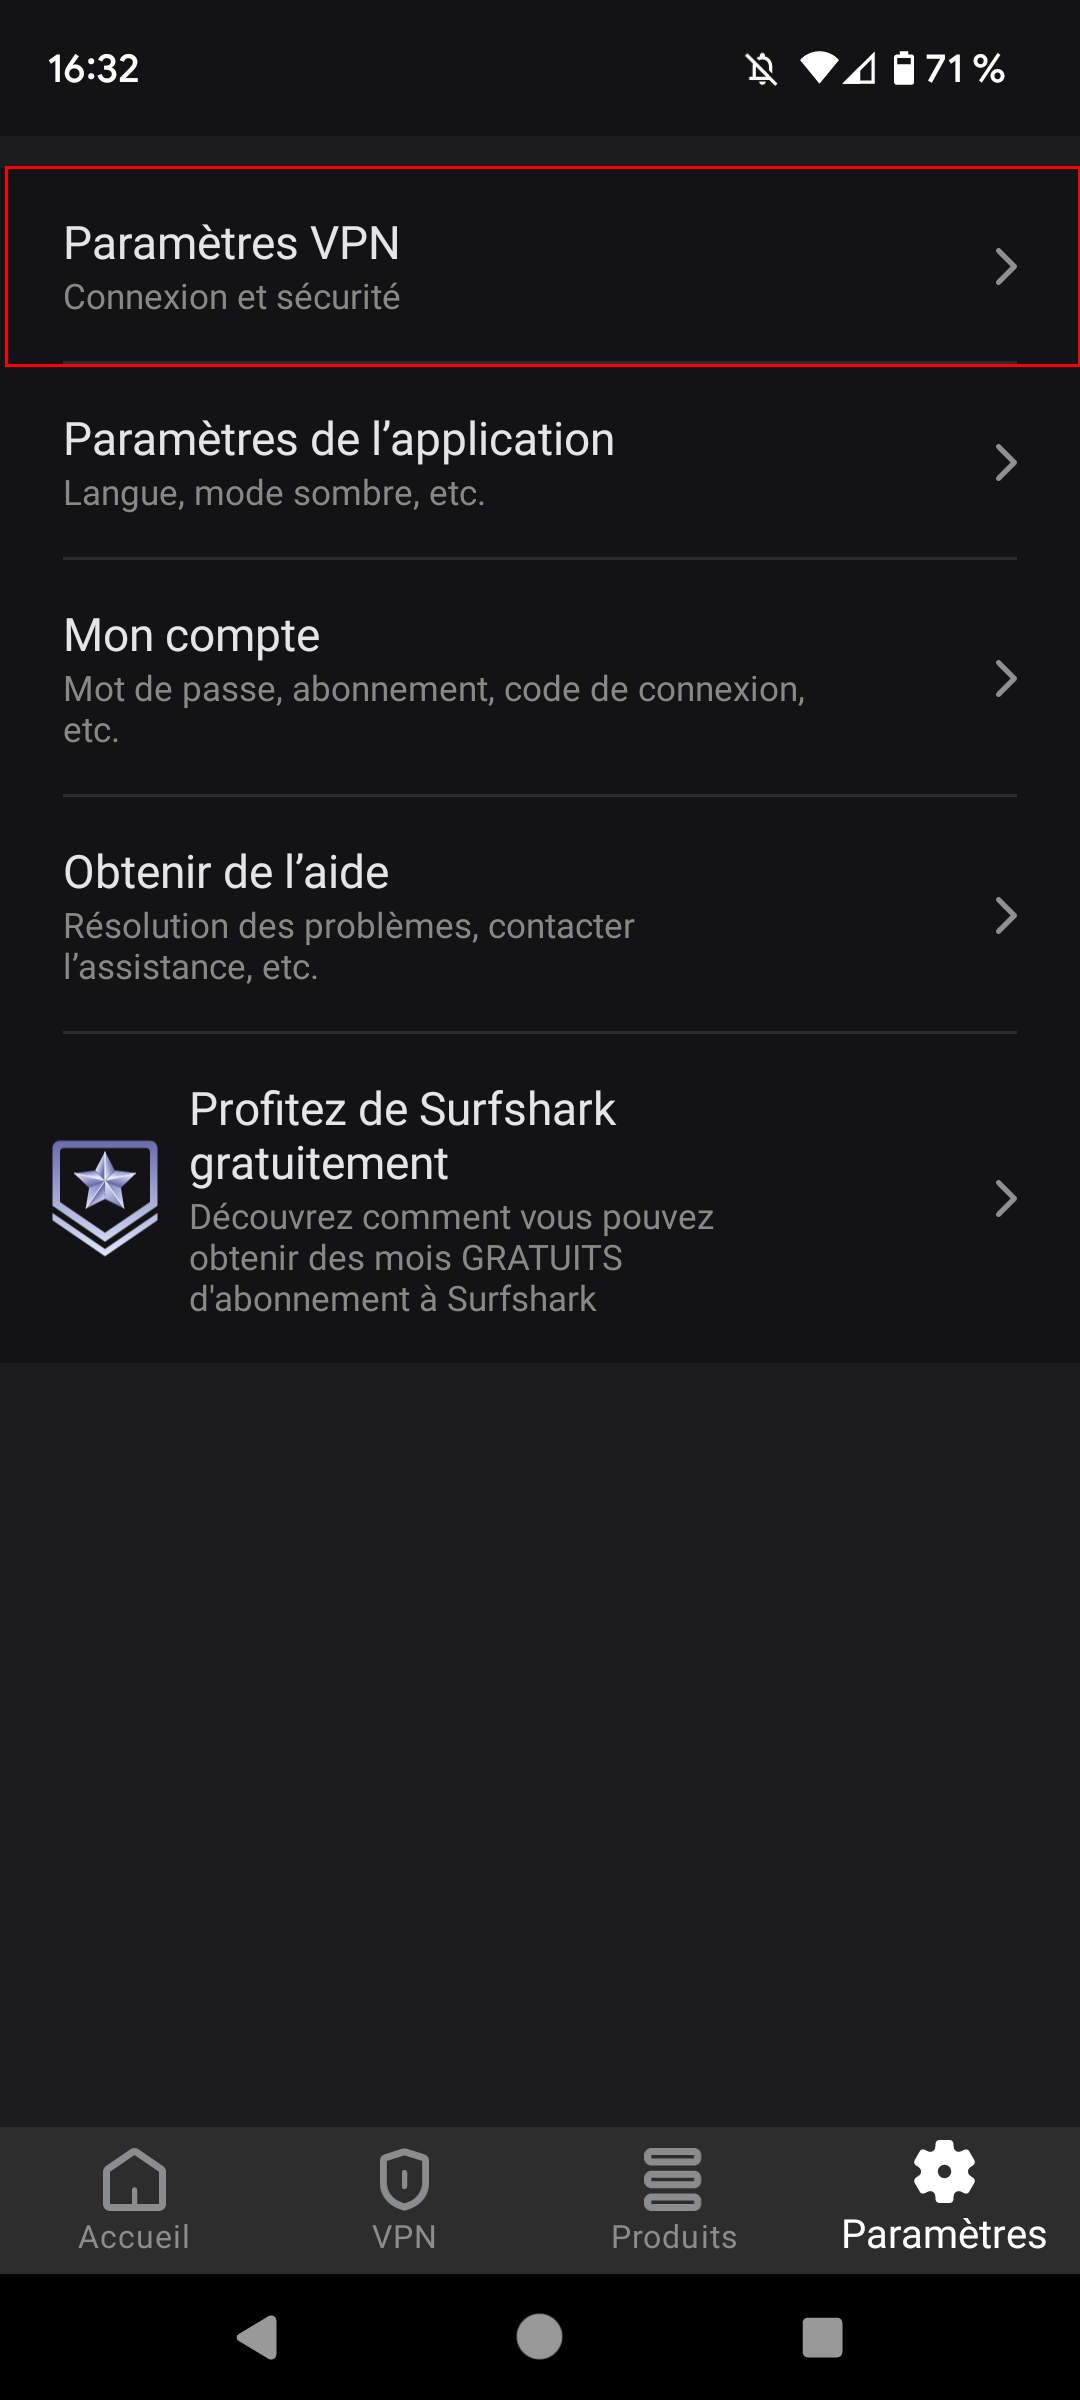
Launch the app and log in to your user account if you haven’t already. From the home page, select the Settings icon at the top right of the interface. Go to VPN Settings, locate the VPN’s Kill Switch and enable the switch.
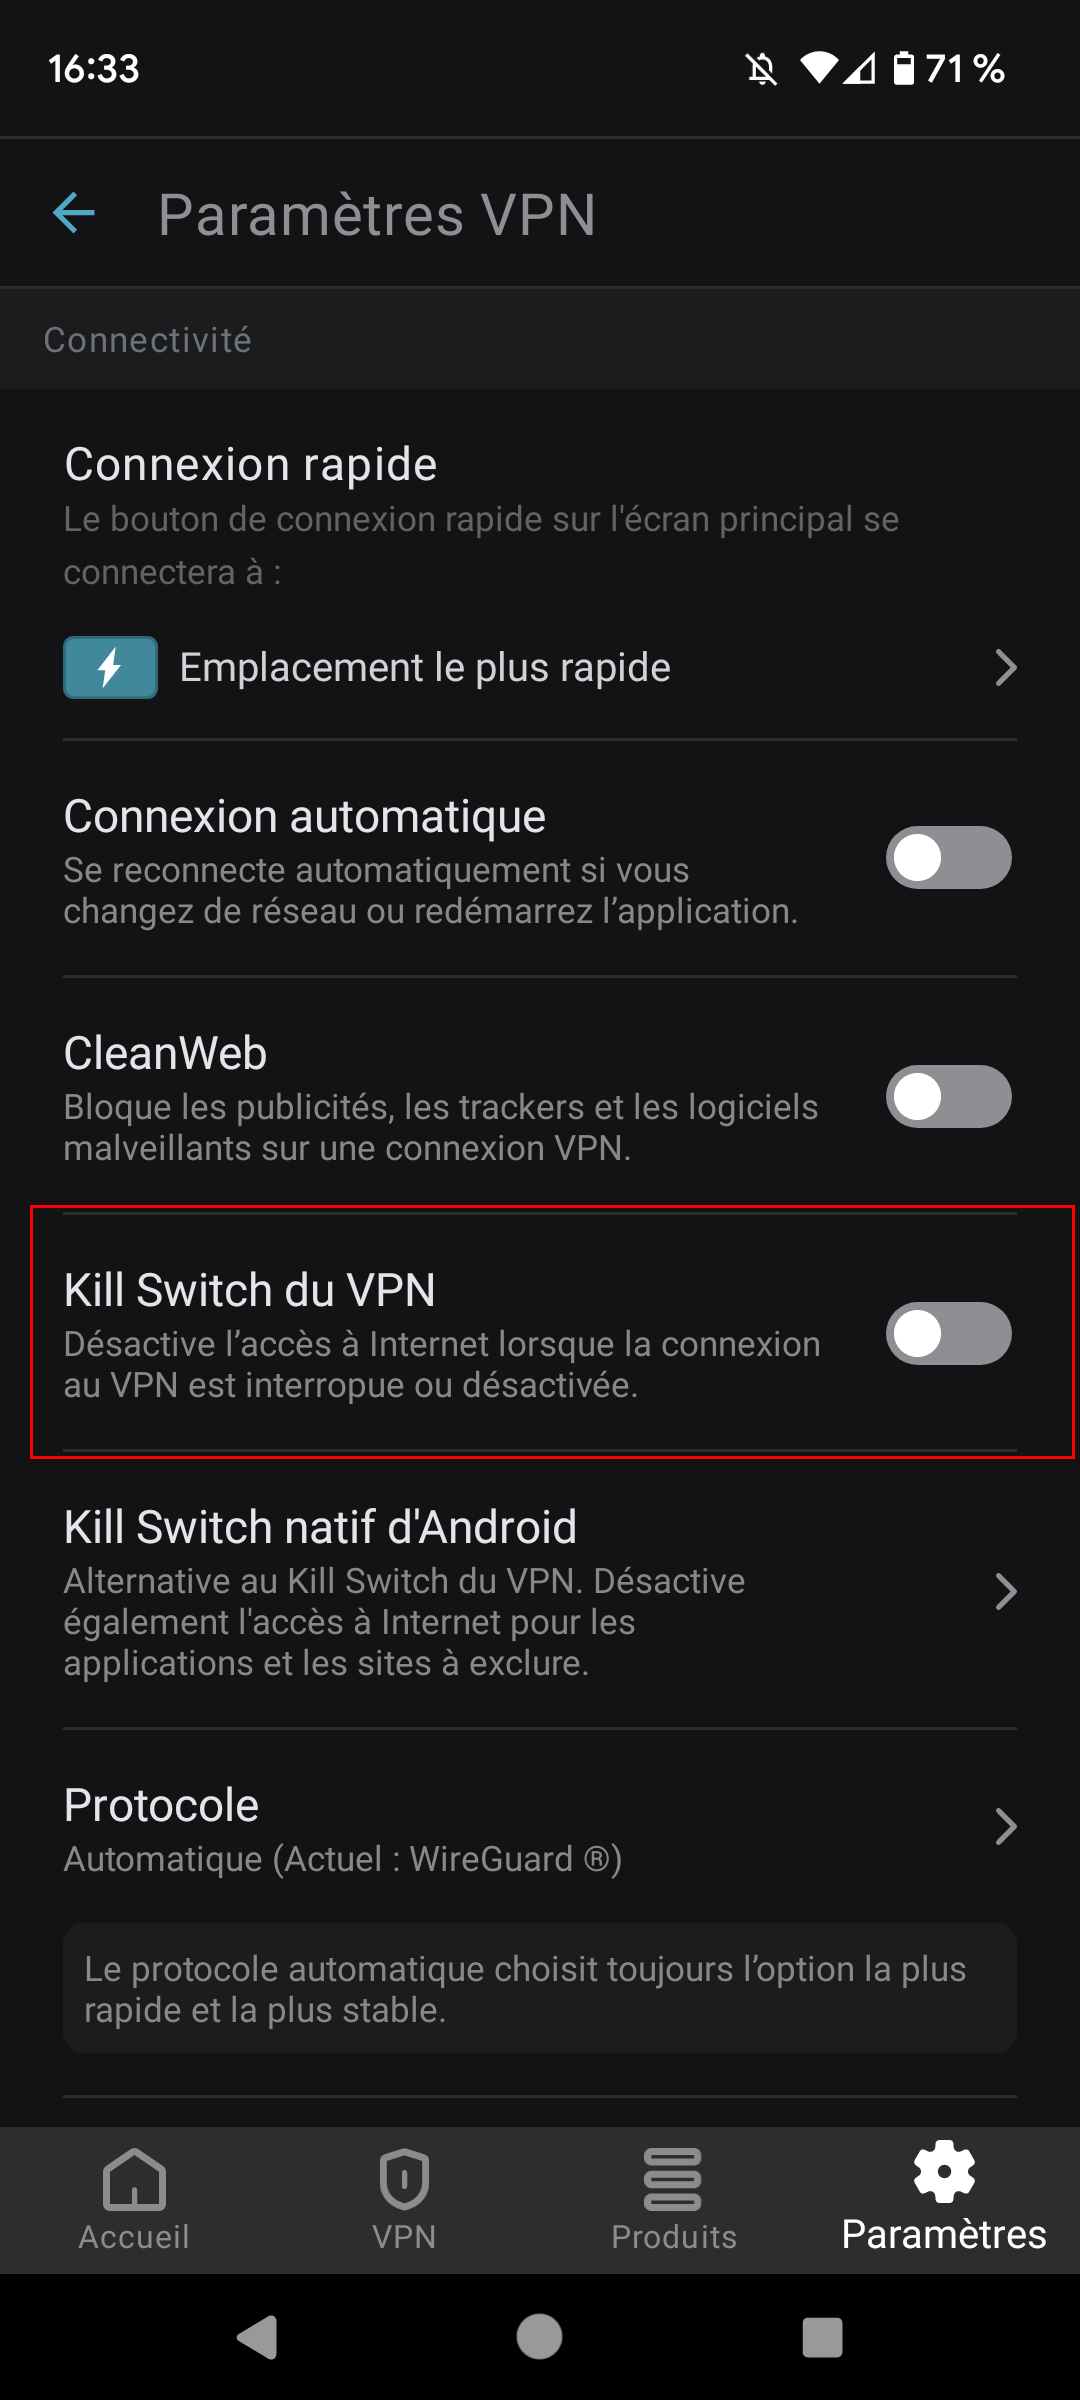
If you want, you can also activate the kill switch built into the Android system. Still in the VPN Settings, select Kill Switch native to Android and validate with Continue.

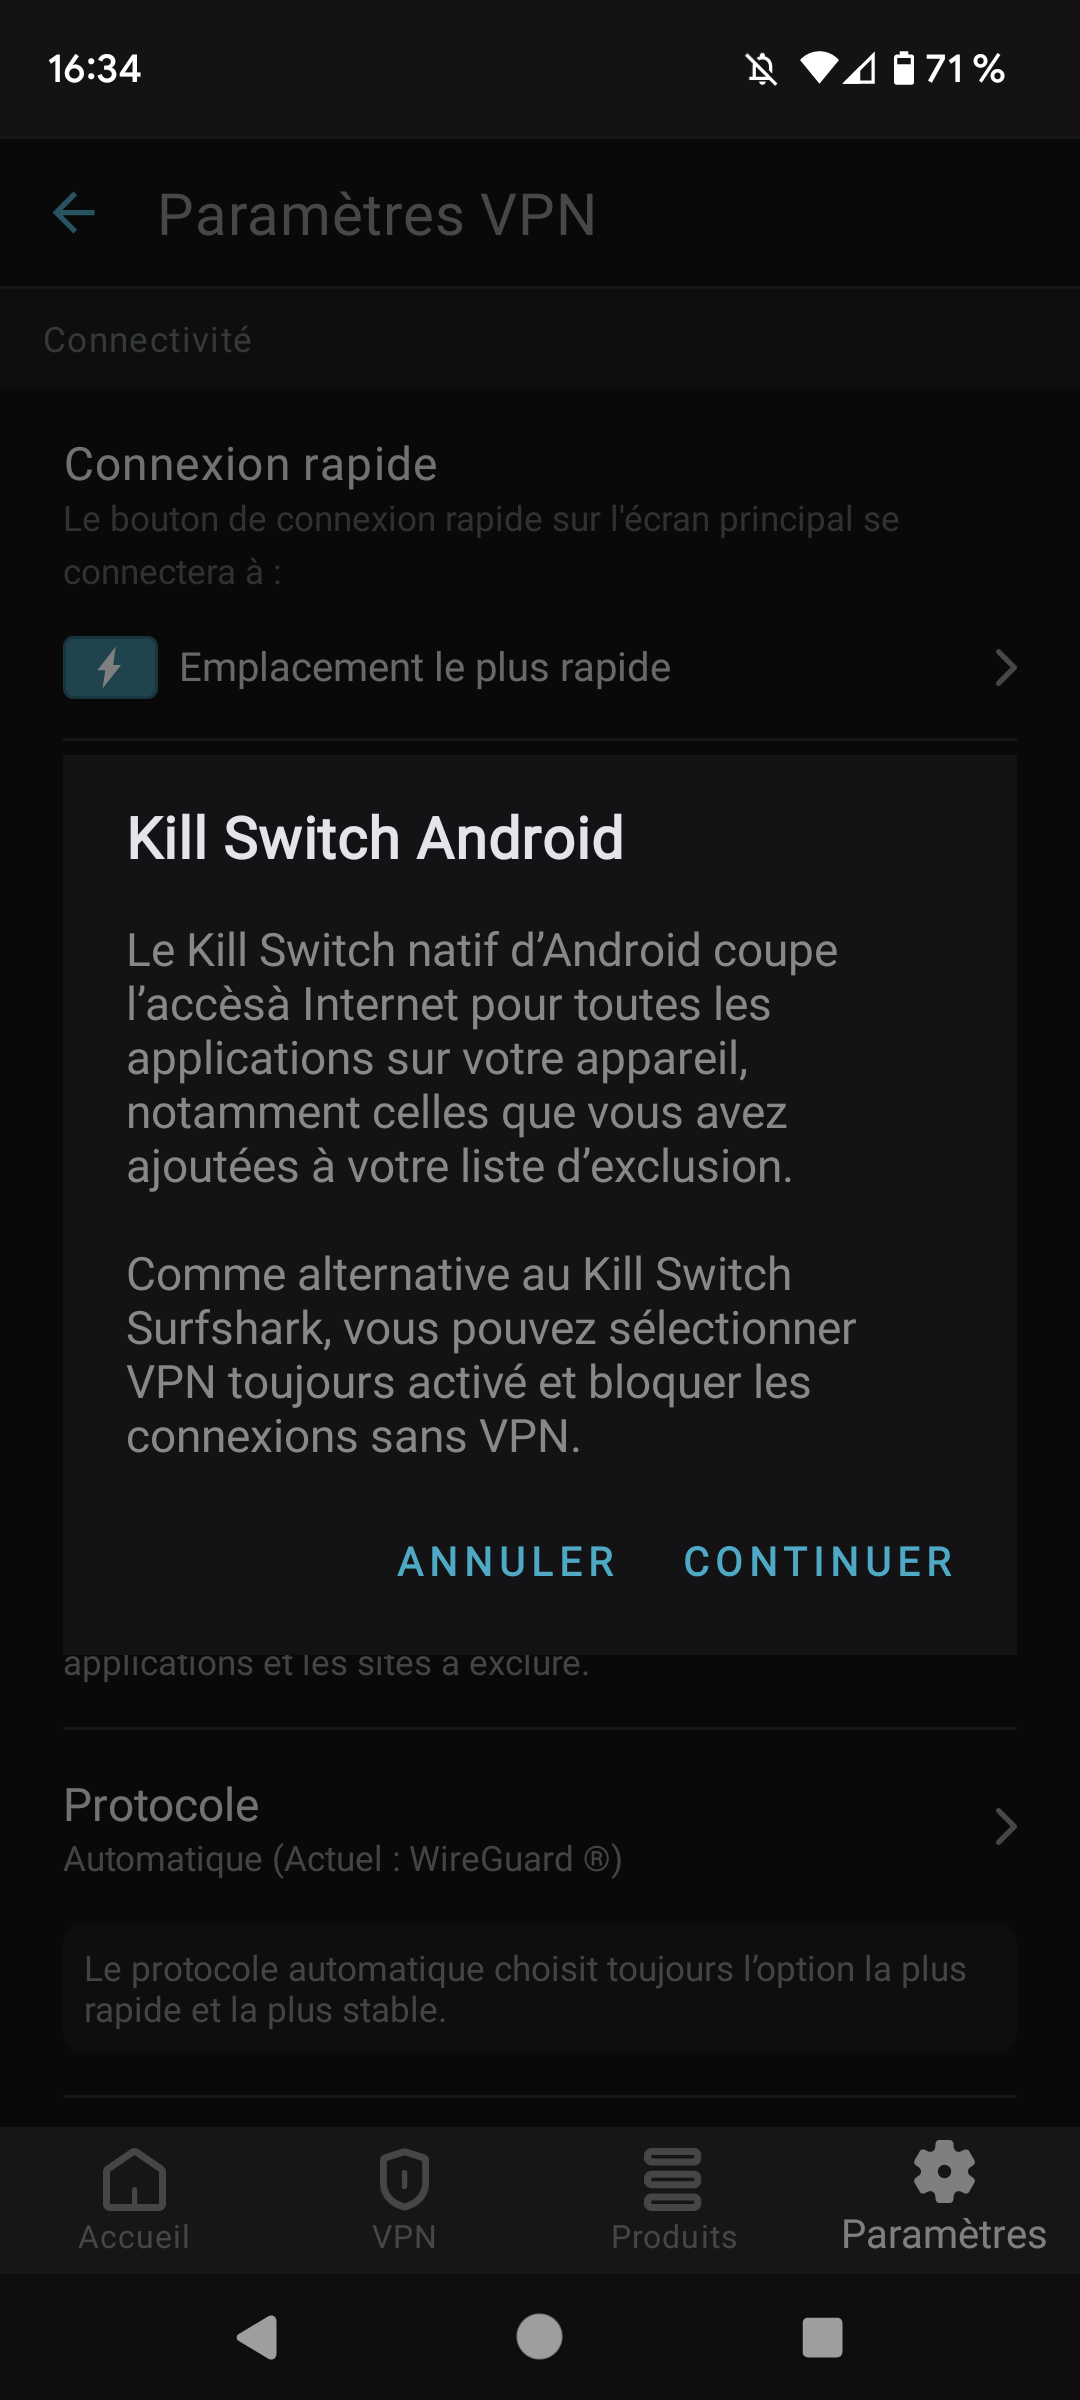
Note that this second method does not take into account any exclusion lists configured on Surfshark. If the VPN is not used, the system cuts off Internet access for all applications installed on the smartphone.

Surfshark VPN
-
storage
3200 servers
-
language
100 countries covered
-
lan
Unlimited simultaneous connections
-
mood
Free trial 30 days
-
description
No data log
8.8
Surfshark is a top-tier service, almost on par with the best VPNs on the market. It stands out by offering an unlimited number of simultaneous connections as well as advanced security tools. It is one of the best possible choices for the general public.
Read the full review Try Surfshark VPN now!
- Above average speeds
- Unlimited number of devices
- Nexus Network
- Dedicated IPs
- Antivirus solution
- Cross-platform coverage to improve
- Unstable web extensions