")
In PC-Active 332 you could read how we designed the cabinet and hardware of our pinball machine. In this second part we focus on the installation of the software.
Wim Dewijngaert
Before the startBefore we start, make sure you have a (free) account on four different websites from which we will soon download a number of things: forums.gameex.com, www.vpforums.org, configtool.vpuniverse.com and vpuniverse.com |
 First we install Visual Pinball X. This is the software that brings the pinball machine to life. Version 10.7.3 of the program can be found at https://github.com/vpinball/vpinball You install the software in C:\Visual Pinball. Important: tick B2S Backglass in the list during installation! Then go to the folder C:\Visual Pinball and right-click on it B2SBackglassServer
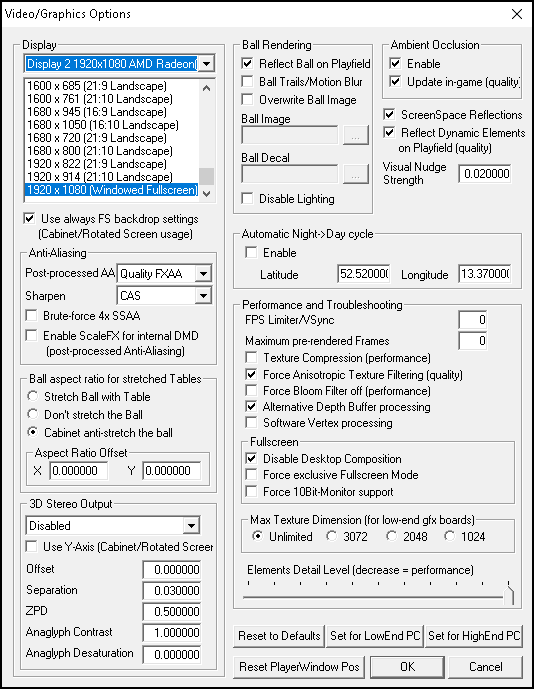
RegisterApp.exe and choose Run As Administrator. Then run VPinballX.exe. Click Cancel to pause the loading of a playfield, select Preferences and then Video/Graphics options. In our own setup we used the values you see in the screenshot, but many settings depend on your own hardware so it often takes some playing around with the settings.
Then go to Audio options. Here you put General output Sound Device on Speakers and for Music on Primary Sound Driver. If multi-channel output you choose Surround (front is rear or cab). We have set the volume in Windows for both the sound through the back box and on the pinball machine itself to 50 percent, and the volume of the Sound Effects in Visual Pinball to 15 percent, but you can of course adjust these values to your own preference.
Bee Preferences/Configure Keys, Nudge and DOF put the correct button numbers below Left Flipper, Right Flipper, Exit Game, Plunger, Add credit, Add credit 2 and Start Game (you should have written down the numbers last time after using the joystick tester program). Close the application again.
 In the folder c:\visual pinball\tables you will find the screenres.txt file, here you can change the resolutions. Playfield and Backglass to 1920 and 1080.
As a front-end we use PinballX, available for free at https://www.pinballx.com Unzip this file and launch the setup. Install everything in the C:\PinballX directory. Finch Install demo media out.
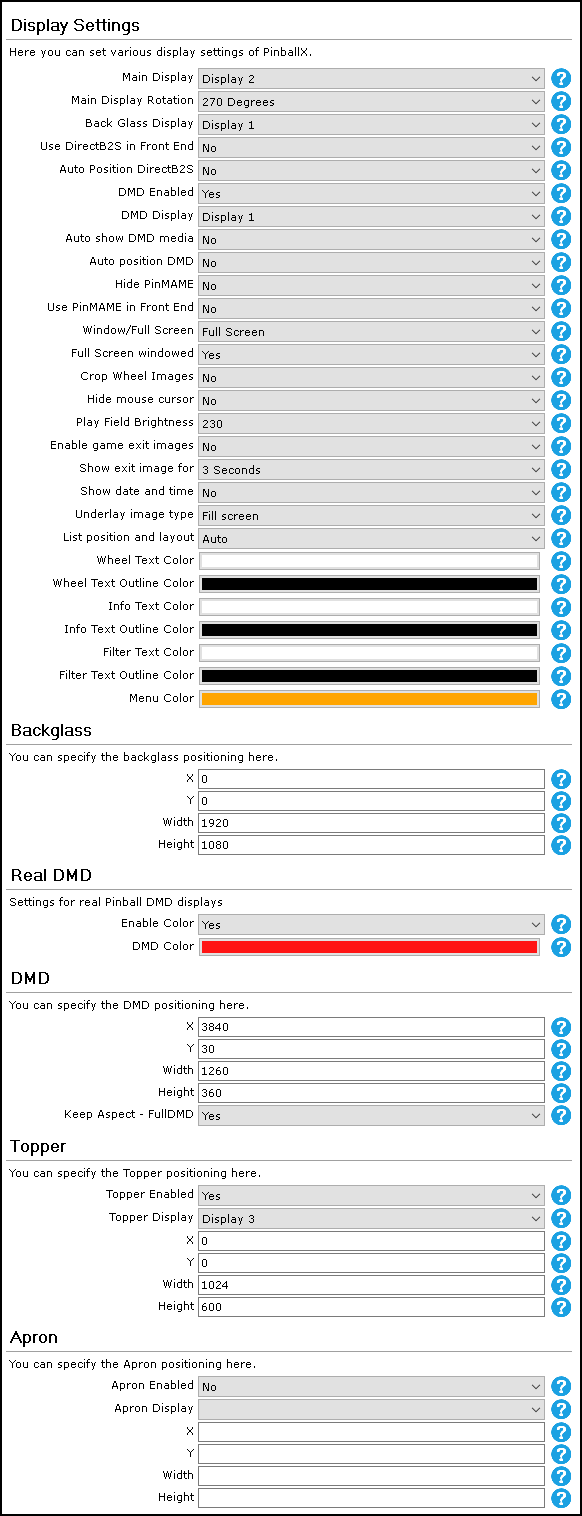
After installation, the wizard opens. Here you adjust values as shown in the image next door.
You can also change these settings:
- On the tab Future Pinball
Enabled: No - On the tab Visual Pinball
Working path: c:\Visual Pinball
Table path: c:\Visual Pinball\Tables
Executable: VPinballX.exe
Parameters: -exit -minimized -play “[TABLEPATH]\[TABLEFILE]” - On the tab General Settings
System Lists: Disabled
Show additional details: No
One click launch Table: Yes - On the tab GameEx Online
Enabled: No - On the tab Joystick Input Settings
Link the buttons of your pinball here
to the actions Left, Right, Select/Start, Quitand Plunger. - On the tab Startup Settings
Enable Startup Sound: No
Many more images, the shopping list with order codes and the construction drawings can be found at
pcactive.nl/pinpperkast
Start with Windows: No
You can close by clicking on the cross.
PinballX also requires a number of codecs to display audio and video. Install it with the file you can find at
https://forums.gameex.com/forums/files/file/2451-lav-video-codecs
The games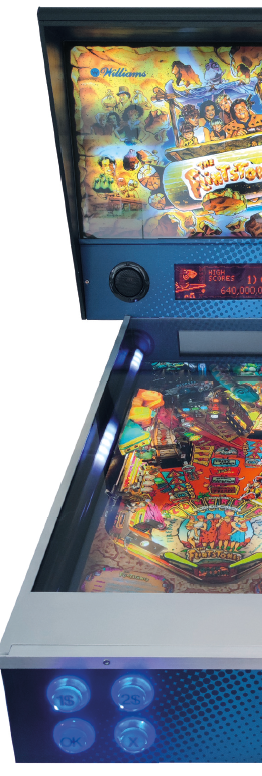
We install four popular games on the cabinet, but of course you can expand this collection later. The files you need can be found here:
The Addams Family
Field: https://vpuniverse.com/files/file/8755-the-addams-family-bally-1992
ROM: https://www.vpforums.org/index.php?app=downloads&showfile=1226
directb2s: https://vpuniverse.com/files/file/5539-the-addams-family-bally-1992-2-3-screens-directb2s-b2s-db2s-and-wheel/ (take the B2S file from The Addams Family (Bally 1992)_2560x2370.zip)
The Flintstones
Field: https://vpuniverse.com/files/file/8763-the-flintstones
ROM: https://www.vpforums.org/index.php?app=downloads&showfile=1286
directb2s: https://vpuniverse.com/files/file/12799-the-flintstones-williams-1994-b2s-with-full-dmd
The Simpsons
Field & directb2s: https://vpuniverse.com/files/file/9823-the-simpsons-data-east-1990
ROM: https://www.vpforums.org/index.php?app=downloads&showfile=824
Theater Of Magic
Field: https://vpuniverse.com/files/file/5499-theatre-of-magic-bally1995
ROM: https://www.vpforums.org/index.php?app=downloads&showfile=5538
directb2s: https://vpuniverse.com/files/file/13575-theatre-of-magic-bally1995-b2s-with-full-dmd
Both the VPX and the directb2s files (which you can sometimes download directly or which sometimes come in a ZIP or RAR file) must be copied to the folder C:\Visual Pinball\Tables. Please note: the name of both files (other than the extension) must be the same, so you may have to rename them all manually. All ROM zip files must be copied to C:\Visual Pinball\VPinMAME\roms (note: DO NOT unzip these files).
We then let Pinball X know that we have downloaded new playing fields. Open gamemanager.exe in the PinballX folder. You will receive the message New or missing tables have been detected. You can now add a logo, an image of the backglass and add a photo of the field. You can find this in the so-called Media Packsavailable for download at https://www.vpforums.org/index.php?app=downloads&showcat=35 It takes some work to configure everything, but it does make the front-end nicer.
D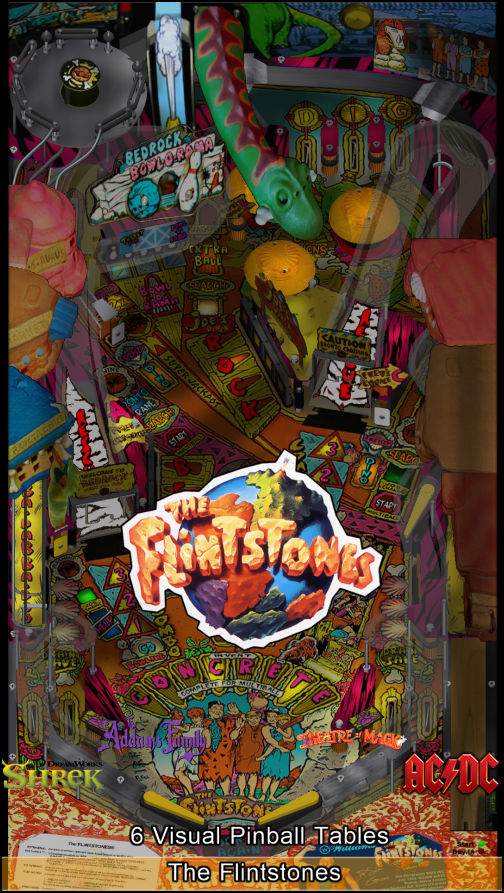 direct output
To control our LED strips, we have it Direct Output framework necessary. You can download this at http://www.mjrnet.org/pinscape/downloads/DirectOutput-mjr-20210416.msi Install the software in c:\DirectOutput. During setup, an error message appears about a setting that cannot be adjusted. This message can be clicked away. Afterwards, check whether there is a shortcut to c:\DirectOutput in c:\Visual Pinball\Plugins
Restart Visual Pinball Right-click anywhere on the backglass screen. Put a check mark next to it Activate plugins, and restart Visual Pinball. When you return to this screen, the button will Plugin settings are accessible. Check there whether the Direct Output framework is active.
Configuring the Direct Output plug-in is not easy, but we have listed it all for you. Go to http://configtool.vpuniverse.com and log in. Then open the tab My Account and put you Number of WS2811 Devices on 1.
In the tab Combine Toys add the following setup:
- Combo 1: Category: RGB Addressable, Toy 1: PF Left Flashers MX, Toy 2: PF Left Effects MX
- Combo 2: Category: RGB Addressable, Toy 1: PF Right Flashers MX, Toy 2: PF Right Effects MX
- Combo 3: Category: RGB Addressable, Toy 1: PF Back Flashers MX, Toy 2: PF Back Strobe MX, Toy 3: PF Back Effects MX, Toy 4: PF Back Beacon MX
In the tab Port Assignments set Port 1 = Combo1, Port 4 = Combo2 and Port 7 = Combo3.
click on Save Config and after that Generate Config. You will now receive a file called directoutputconfig.zip. Unzip the contents in C:\DirectOutput and overwrite the existing files.
Last time we had already installed Arnoz Tiny Tools. Open the program and choose The amazing Cacabinet Generator at the top. Right click on Output 1 and choose three times Add new addressable toy. For toy 0 set the height to 32 (the number of LEDs in our first strip), ColorOrder is becoming GRB, LedArrangement is BottomUpLeftRight, DofOutputPort is 4 and Brightness 80. You choose the name Left strip. Toy 1 receives the same data, only you choose this as the name Right strip and DofOutputPort 1. Toy 2 finally gets as name Top comic. The width here is 29, the ColorOrder is GRB, Brightness 100, DofOutputPort is 7 and LedArrangement LeftRightTopDown. Press the button Export to cabinet.xml and save the file as c:\directoutput\config\cabinet.xml Afterwards, check the COM port of the Teensy that is at the top of the configuration file – we still had to set it up manually COM3 to make.
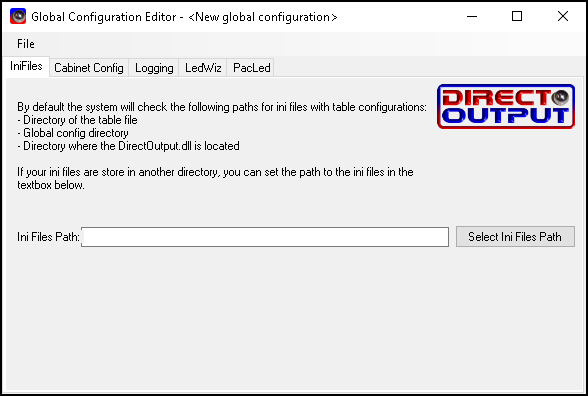
Then double-click GlobalConfigEditor.exe in c:\DirectOutput. Select File, Load and choose GlobalConfig_B2SServer.xml from the Config/Examples folder. In the tab Cabinet Config you press the button Select File and choose the cabinet.xml file you just created. Then File, Save As and choose GlobalConfig.xml as the file name (in the config directory). Finally again File, Save As and select GlobalConfig_B2SServer.xml as the name (also in the config directory).
Finally
We still have to place the scoreboard on the third screen. We use the program for this SetDMD (https://www.pinballbulbs.com/files/setdmd.html). No installation is required, you can open the software straight away. Click on the button Preview. Drag the orange window onto the small screen we use as DMD, and enlarge it until it takes up the entire screen area. Then click Update All Installed Roms. For us, the values X=3855, Y=30, W=1260 and H=360 gave the best results.
To completely hide Windows and give our machine a more professional look, is Instant Sheller indispensable (https://www.gameex.info/forums/files/file/2465-instant-sheller). This allows you to hide all Windows screens and sounds. If Application to shell choose your Pinball X (c:\PinballX\PinballX.exe).
We also want to forward all the bass from the sound card to our resonance speaker. Download for this APO (https://sourceforge.net/projects/equalizerapo). Choose during installation Speakers and PL2292 (the name of the audio output of the second screen). Then place the following configuration file in c:\Program Files\EqualizerAPO\config\config.txt:
Copy: LFE=L+R+SL+SR
Channel: LFE
Preamp: 20 dB
Filter: ON LP Fc 120 Hz
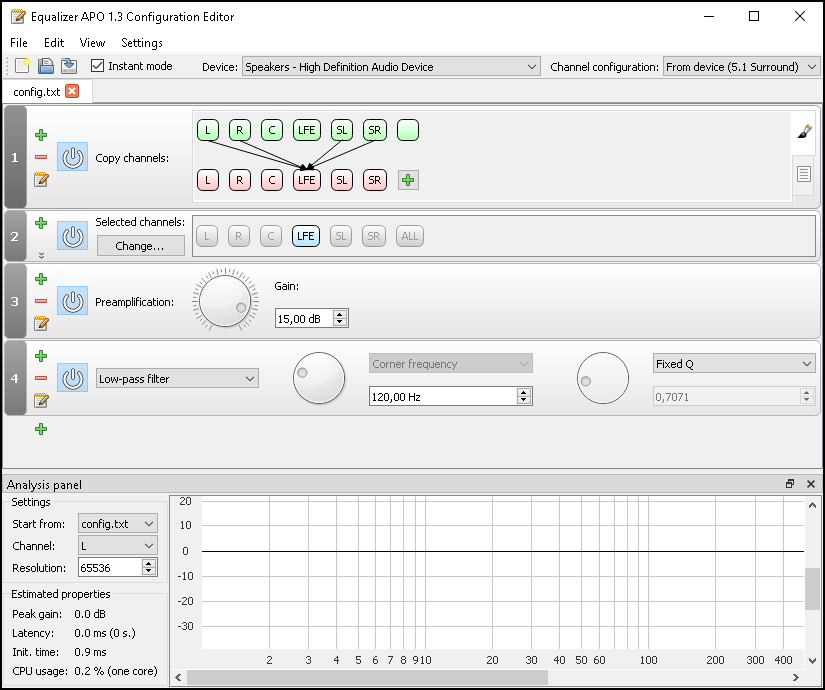
Start the program and open this configuration file to make it active. And now: let’s play!
Even more challenge
Those who would like to expand their pinball machine even further can use a so-called topper connection, on which PinballX can display logos or other graphic material. A 7-inch screen from Hetech – with a resolution of 1024 x 600 pixels – is perfectly suitable for this.
If you still have some LED strips left, you can light additional lights to the left and right of the topper. You can then add two more via the Arnoz Tiny Tools addressable toys to. One with a name Left top and if width 9, ColorOrder GRB, LedArrangement Bottomupleftright and DofOutputPort 10 and one with a name Right top with as width 9, ColorOrder GRB, LedArrangement Bottomupleftright and DofOutputPort 13.
Then you can use the VP Universe config tool Combo 3 to:
Category: RGB Addressable, Toy 1: PF Back Strobe MX, Toy 2: PF Back Effects MX, Toy 3: PF Back Beacon MX.
In the tab Port assignments put it on ports 10 and 13 PF Back Flashers MX. Then you do an export and unzip the content in C:\DirectOutput.
Have fun pinball!