In PC-Active 331 you learned everything about backing up and restoring files in Windows. Now you can read how to restore your system and also if you want to set up OneDrive for your backups.
Edited by Petra Waaijer and Rob Coenraads

You may need system restore points if, for example, you install a new app, a new driver or a Windows update. If an installation error then occurs, System recovery restore a system to its working state without having to reinstall the operating system. Restoring your system will not affect your personal files. It sometimes takes more time than you have, but that varies per computer. If it is a laptop, make sure it is connected to power. Do not interrupt the system restore and it will take approximately ten minutes on average. That’s not too bad, right? You can always set OneDrive as a backup location afterwards. So it (almost) always turns out fine!
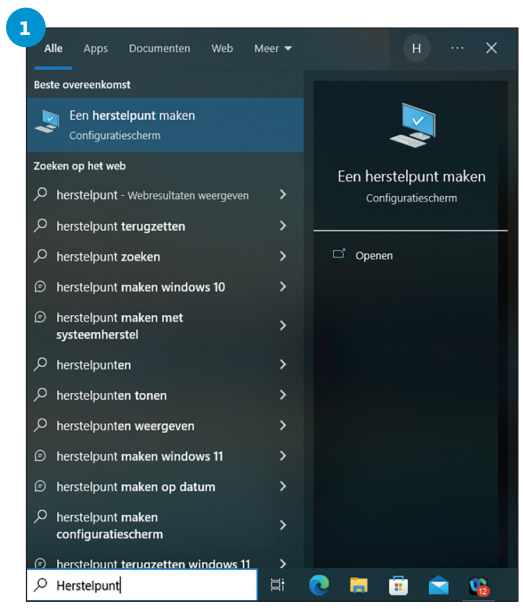
1 Create restore point
To create a restore point, first click on the magnifying glass to the right of the Start button at the bottom left of the desktop and enter ‘restore point’ there. Then click on option Create a restore point.
 |
 |
|
2 Activate
You will then arrive at the tab System security. Choose your local
system disk from the overview and press the button
Configure to proceed to
|
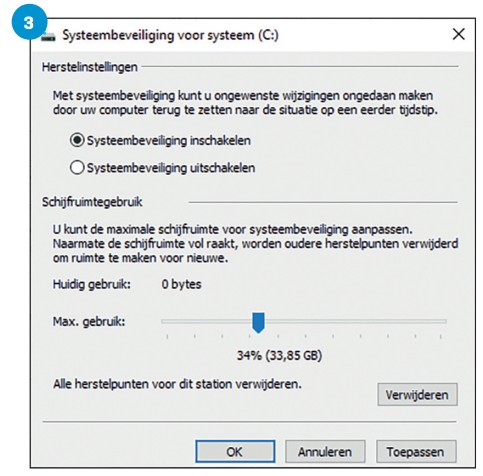
3 Power on and disk space
Switch System recovery by selecting the appropriate option
click, and move the slider at the bottom to create a
set disk space that can be used.
Confirm with To apply and press OK.
|
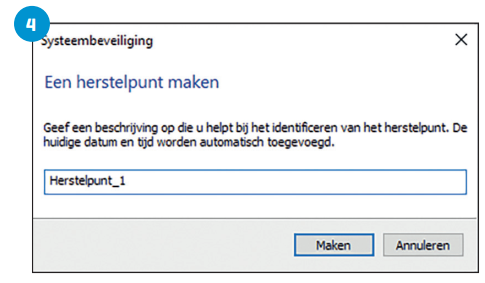
4 Create a restore point immediately
You can with To make create a restore point immediately.
You can provide a description for a restore point
easier to identify.
The date and time are added automatically. |
 |
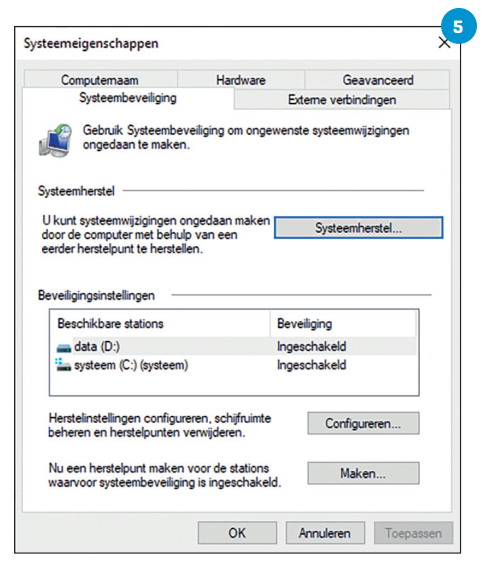 |
5 System restore available
Once a restore point is available, the option is
System recovery on the tab System security
no longer gray and you can select it
to click on a desired restore point.
|
|
.
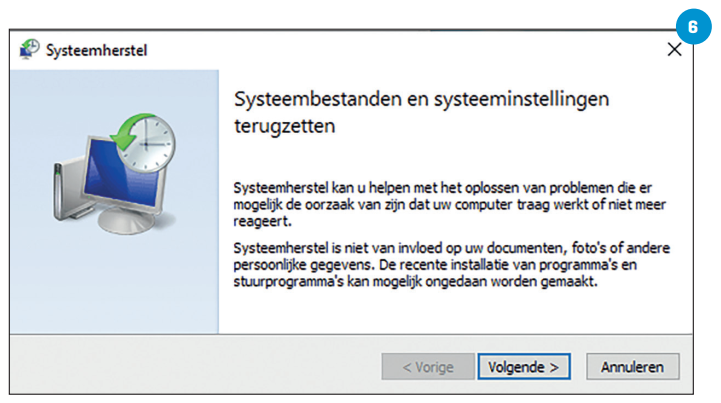
6 Activate system restore
As soon as you System recovery activates,
you will get a window with more information.
This is mainly intended as an aid
if your computer stops working
as it should be and none
file backup is .
|
 |
|
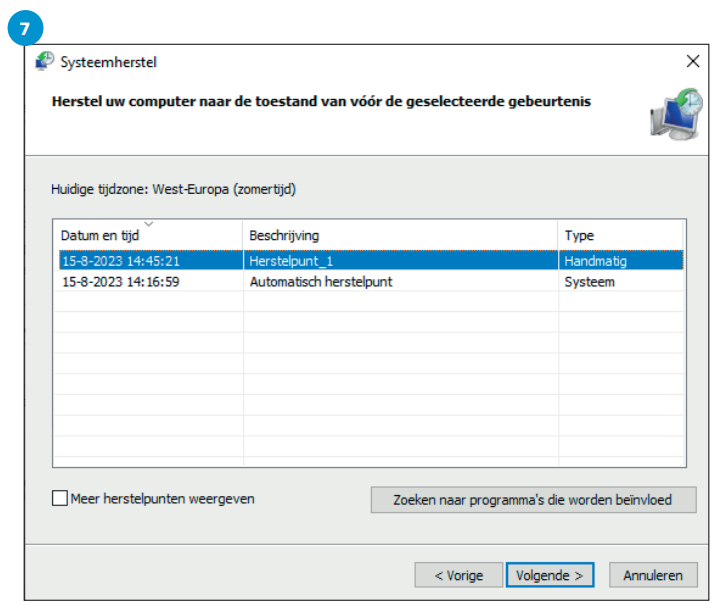
7 Choose restore point
After the information screen appears
the window containing the available ones
recovery points. Choose the correct one from the list
and click Next one.
|
 |
|
|
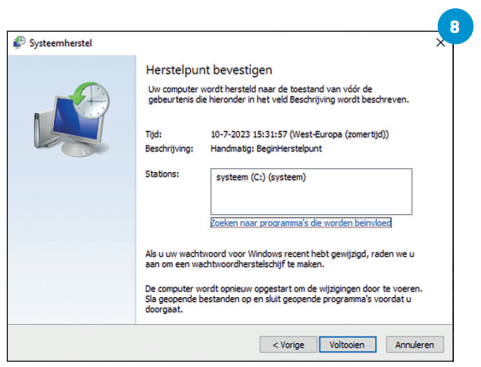
8 Confirm restore point
Once you have chosen the restore point,
you will be asked for confirmation.
You will see which restore point you have chosen
and which disk it refers to.
Choose Completeand press Yes.
|
————————————————– ————————————————– ————————————————– ———
OneDrive for your backups
|
|
|
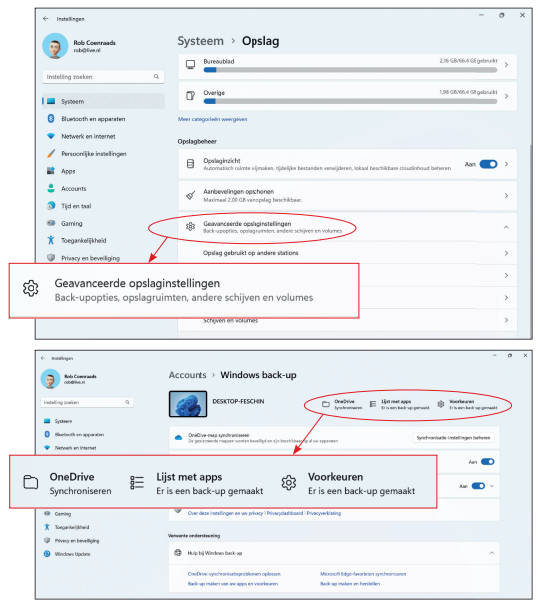
a Set up afterwards
While installing
Windows 11 you get the option to
OneDrive as a backup location
to use. This can also be done afterwards:
search for the term
Storage settings through
the Start button or the search function.
You then come to System > Storage,
where halfway in this
overview the heading
Storage management stands.
Choose this Advanced
storage settings and after that
for Backup options.
b Set up synchronization
The overview shown now shows
see if OneDrive is being synced
synchronized, there is a backup
created and your list of apps
has been secured.
Enable synchronization via
Set up synchronization and choose
then the folders.
Be specific folders
secured by them
sync with OneDrive
and these are already selected.
Deselect folders if necessary
and start the backup via
Start backup.
|
