 The cloud service OneDrive is useful for storing files online. Manage and edit the files with the OneDrive for Android devices app.
Supplies
OneDrive users need an internet connection and a free Microsoft account. OneDrive also has a app for Android devices. The app is already installed on some Android devices. Check that as follows:
- Tap on apps or from Android 8.0 swipe up or down on the screen to open the overview of all apps.
- A search bar appears at the top of the screen. Tap in it Find phone (Android 8.0) or Search for apps (Android 7.0).
- Type ‘OneDrive’.
If the app is already installed, the app icon will now be in the suggestions.
Also read:
- create a Microsoft account
- OneDrive app for Android
- Download App from Play Store
login
To work with the OneDrive app, the user must first sign in with the Microsoft account:
- Tap on apps or from Android 8.0 swipe up or down on the screen to open the overview of all apps.
- Tap the app OneDrive.
- Tap on To register.
- Optionally, tap the ‘Email or phone’ field to bring up the keyboard.
- Type the email address associated with the Microsoft account.
- On the keyboard, tap Ger. or on the arrow to the right of your e-mail address.
- Optionally, tap in the ‘Password’ field to bring up the keyboard and type the corresponding password.
- Tap on To register.
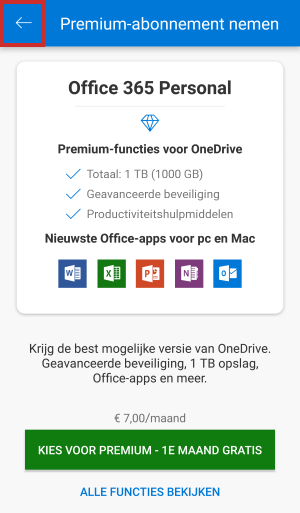
- Tap the arrow at the top left to not use a paid version of OneDrive.

- Tap on stay basic.
- You can now enable camera upload so that every photo you take is instantly saved to OneDrive. We choose Not now. In the section ‘Upload photos’ we explain how you can turn this on at a later time.
The overview with the files opens.
View file
The cloud service allows the user to store and view all kinds of files. Open a file in the app like this:
- Tap a file in the app to open it, or tap a folder first.
- Tap the arrow at the top left to return to the overview.
Create folder
Folders are useful for organizing files. Create a new folder like this:
- Tap the tab at the bottom of the screen Files
- If necessary, browse to the folder where you want to put the new folder.
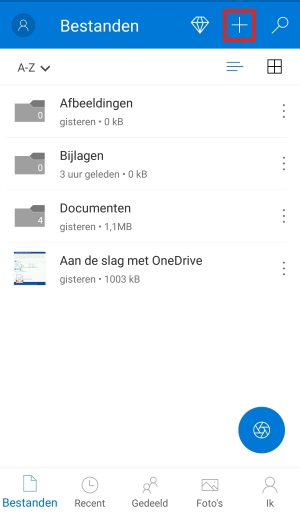
- Tap the plus sign at the top right.
- Tap on Create folder.
- Type the name of the folder and tap OK.
The folder has been created and opens immediately.
upload file
User cannot upload folders from Android app. You can upload a file.
- If necessary, tap the menu item first Files.
- Tap the plus sign in the top left.

- Tap on upload.
- Choose from where on the phone you want to upload the file.
- Tap the three stripes icon at the top left.
- Tap a folder, for example Pictures.
- Tap the desired file.
The file is stored with OneDrive.
upload photos
Uploading a photo works the same as uploading other files. However, OneDrive has an extra function for photos, which is ‘Camera upload’. This automatically saves all photos on the smartphone or tablet to the cloud service. Turn the feature on like this:
- Tap the tab at the bottom photos.
- If the option is not already on, it will say ‘Camera upload is disabled’. Tap below that Switch.
- Tap the slider behind ‘Camera upload’. If the slider is (already) blue, the function is on.
- Choose whether or not to save videos automatically. Tap the slider behind ‘Also videos’ to turn this on or off. If the slider is blue, the function is on.
- Tap the arrow at the top left. Changes are saved automatically.
- OneDrive wants to immediately arrange that the photos are well organized. This is not necessary and can be done later. We tap Later on.
- Optionally, give OneDrive access to the photos on the device. When prompted, tap To allow.
All photos and videos are put in the OneDrive account. This will take a while. You can find the images on the tab photos.
Move file
To move files to a folder in OneDrive:
- Tap the tab at the bottom of the screen Files.
- If necessary, browse to the folder containing the file you want to move.
- After a file’s name, tap the three-dot icon
 .
. - Tap on move.
- Tap the desired folder.
- Tap on Move here.
The file is now in the selected folder.
Delete file
Delete files you don’t want to keep from OneDrive. This frees up space for other files.
- Tap the tab at the bottom of the screen Files.
- If necessary, browse to the folder containing the file you want to delete.
- After a file’s name, tap the three-dot icon
 .
. - Tap on remove.
- Tap on OK.
The file will remain in the “Trash” folder for another 30 days.
Recover Deleted File
Deleted files remain in the “Recycle Bin” folder for another 30 days. With a work or school account, the files are automatically deleted after 93 days. Do you want to keep the file anyway? Then put it back.
- Tap the tab at the bottom of the screen I.
- Tap on Garbage can.
- Tap the icon with three dots after the file name.
- Tap on Put back.
The file is now back in its original location.
Share file
The user can share files and folders with others. Someone then gets access to the shared item. Share a file or folder via the app as follows:
- Tap the tab at the bottom of the screen Files.
- Optionally, browse to the folder containing the document you want to share.
- Tap the three-dot icon after a file or folder name

- Tap on To share.
- With a paid subscription, people can set an expiration date. Tap next to the notification to close the message about it.
- Choose from:
- Copy link: copy a link that you can paste somewhere yourself (in a WhatsApp message for example).
- Invite people: Allow others to access a file or folder.
- Send files or Outlook: Send a file as an attachment (there is no longer a connection to the document stored with OneDrive).
- We choose Invite people. Then sender and receiver can work on the document together.
- Tap the ‘Add email to share with’ field. Enter the recipient’s email address here.
- Tap the paper airplane icon in the top right to send the invitation.
The recipient will be notified that a file or folder has been shared.
Stop sharing file
If you no longer wish to share a shared file or folder, revoke the permission.
- If necessary, first tap Files.
- If necessary, browse to the folder containing the file you no longer want to share.
- Tap the icon with three dots below the file.
- Tap on Details.
- Under ‘Shared with’ you can see which people have access or if you have shared a link.
- Click under the name Can edit.
- click on Stop sharing > OK.