 A digital agenda has many advantages. As long as there is an internet connection, you have the planner at hand. How exactly does the Outlook calendar work?
Keeping a digital agenda
Would you like to exchange the paper agenda for a digital version? Anyone who already uses Outlook for e-mail has set up the calendar in no time.
A number of advantages of a digital agenda:
- It opens on multiple devices: computer, tablet or smartphone.
- Smartphone always in your pocket? Then you always have the agenda at hand.
- Move an appointment easily, without scratching or streaking.
- Set a reminder so you never forget an appointment.
- Invite others so that the appointment is immediately in everyone’s agenda.
- Is there an appointment that comes back every week? Add a whole series at once.
The Outlook calendar is available through the Outlook app on the computer, through Outlook.com (https://outlook.live.com/calendar/) and via the Outlook app on tablet and smartphone. In this article, we’ll be using the Outlook.com version.
Outlook calendar view
For starters, it is useful to know how the Outlook calendar navigation works.
- Go to https://outlook.live.com/calendar/
- Sign in with your Outlook account.

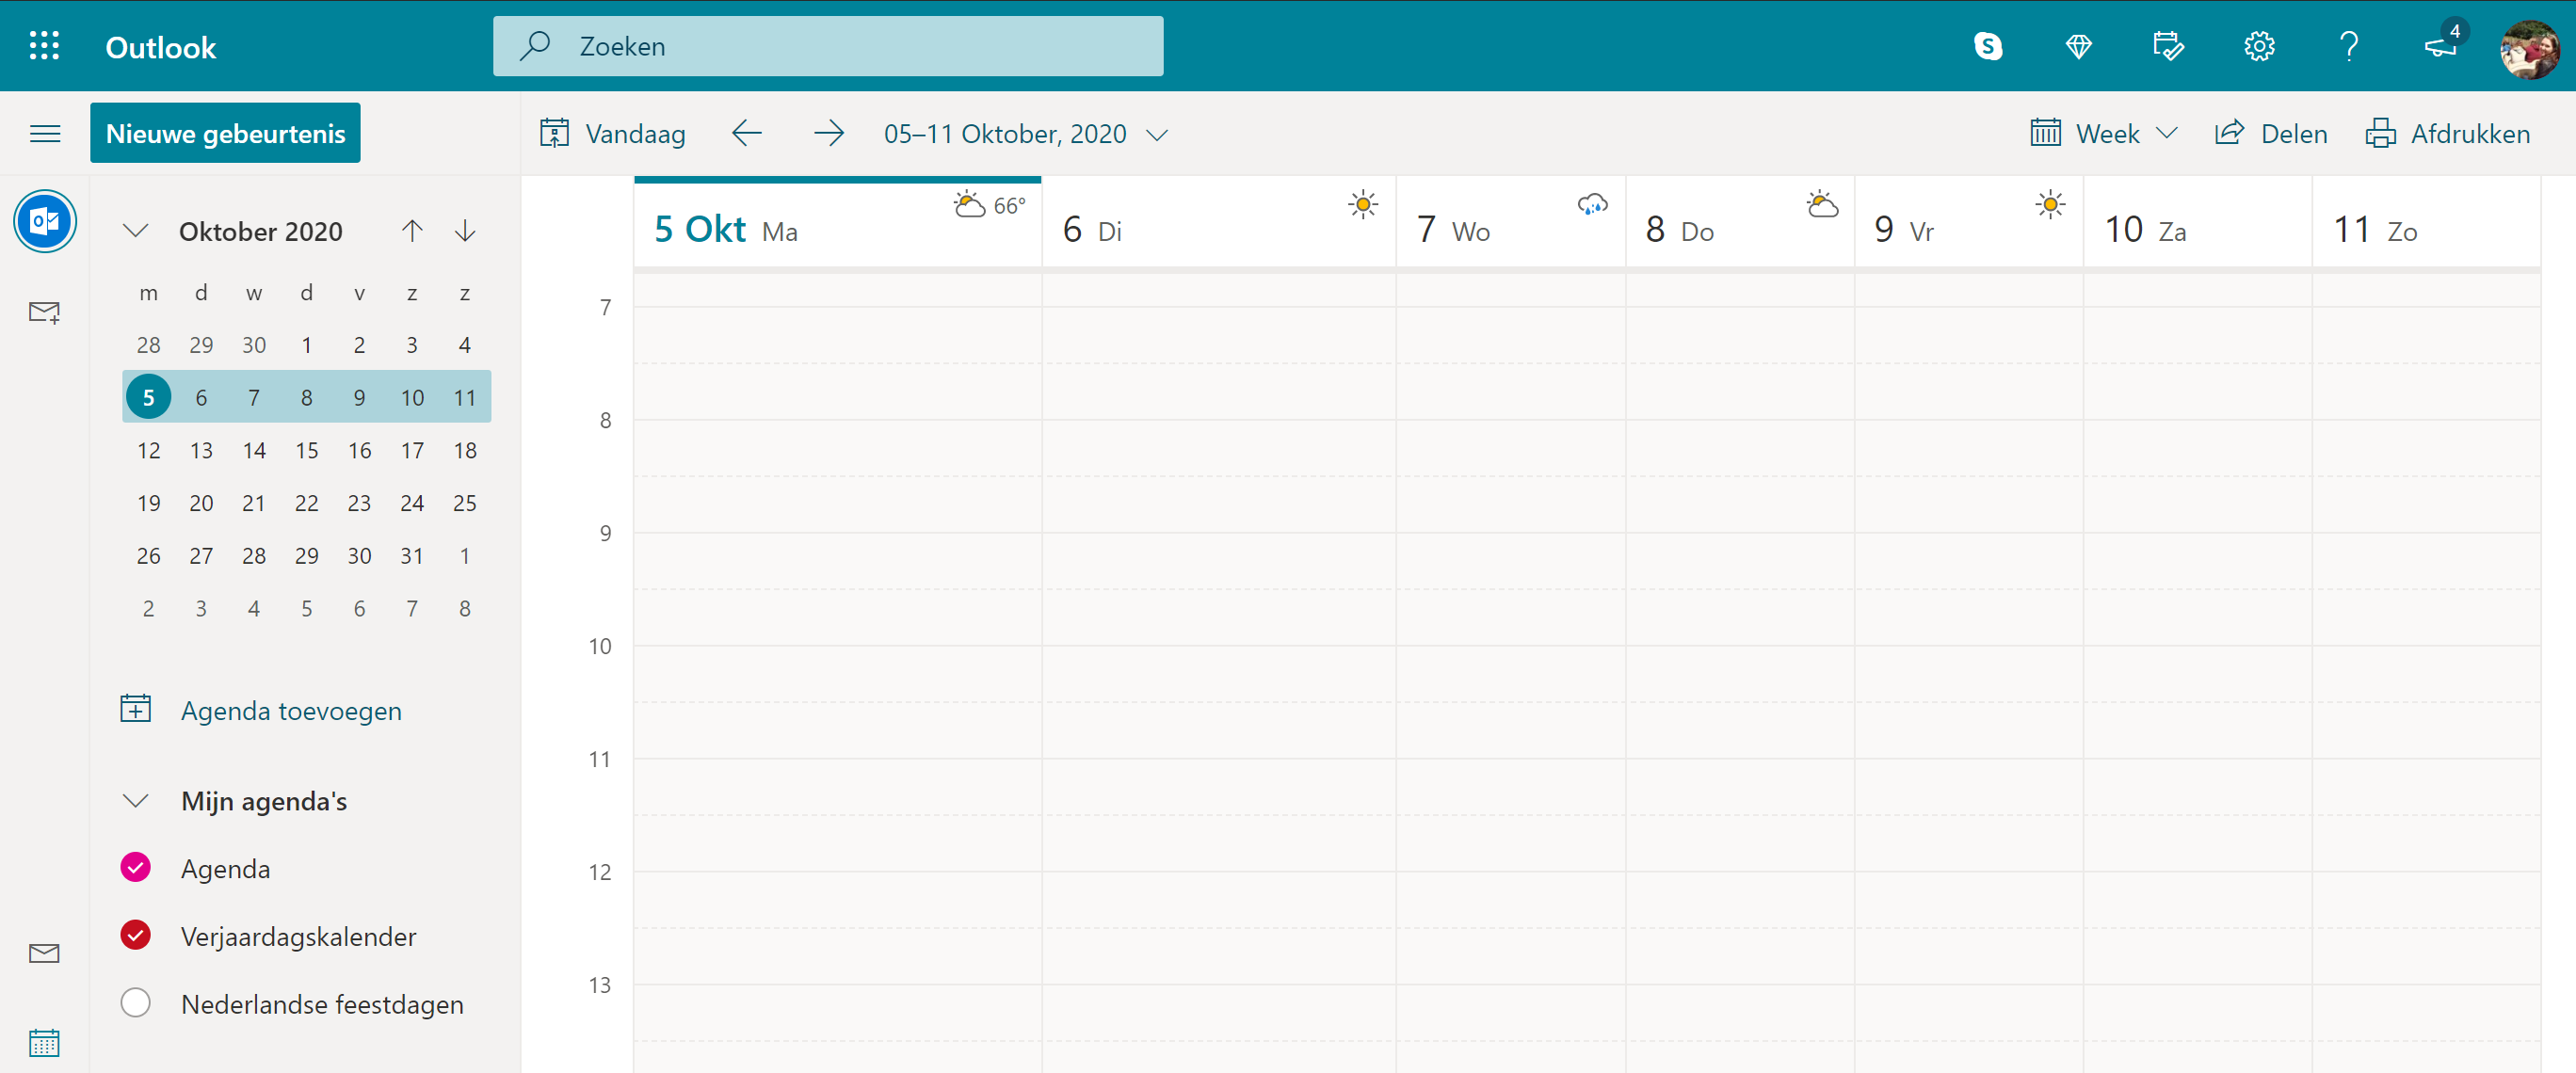
- On the left is a small overview of the month. Click on a date to quickly jump to that day.
- Below is an overview of your calendars. Think of a personal agenda, a birthday calendar and a shared agenda. Click on the bubble in front of the name of the agenda to check or uncheck it.
- The search bar is at the top. Type in the name of an appointment to search for it.
- Click the arrows below the search bar to switch between weeks. The left arrow goes to the previous week, the right arrow goes to the next week.
- Press the button Today to go back to the current date.
- In the top bar on the right it says Week (or Day, Work Week, or Month). Click on it to switch overview. Switch easily between week and month, for example.
- click on To share to give someone access to your calendar by e-mail.
- click on Print to print the current overview.
Put an appointment in Outlook
Made an appointment? Put it in the agenda like this:
- Go to the Outlook calendar.
- Click on the top left new event.

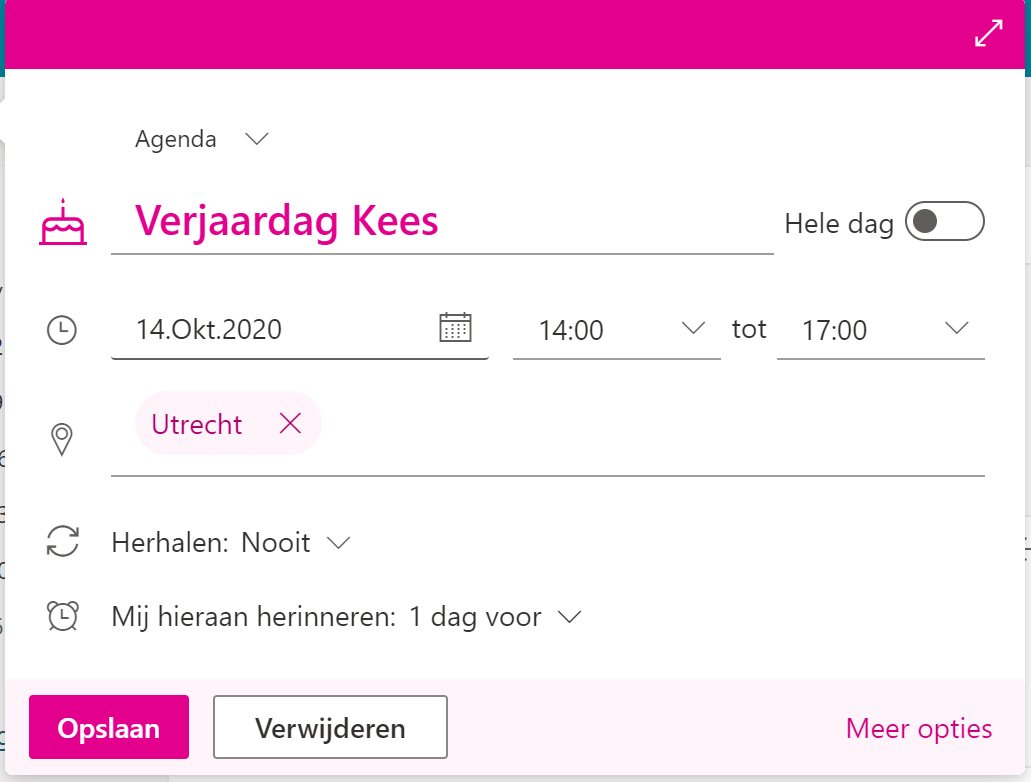
- Enter a title.
- Choose the date and a start and end time. Click on the date to open a drop-down menu. Click on the day and time you want to make the appointment.
- The following are optional:
- Enter a location. If you use the same location more than once, it will be suggested.
- Click on ‘Recurrence’ to have the appointment recur daily, weekly, monthly, or at a different rhythm. If necessary, also set an end date.
- Click on ‘More options’ to add even more information, such as a description. Or invite contacts.
- Set a reminder. For example 1 hour before the appointment, or 1 day, or none at all.
- Finished? Then click on Save.
The appointment can now be seen in the overview of the agenda.
Move or delete appointment
Rescheduling or deleting an appointment is no problem.
- Go to the Outlook calendar and go to the week where the appointment is.
- Use the two circles to adjust the start time (upper circle) or end time (lower circle). Click on a circle, drag to the desired time and release.
.png)
- Click and drag the entire appointment to another day or time by clicking the center of the box and dragging from there.
- Click on the appointment > To process to adjust more details. click on Save when you are done.
- Click on the appointment > remove if you want to delete the entire appointment. Click again remove for confirmation.