
On the pages above you can read more about tracking techniques in browsers and how you can prevent them. However, it is a lot trickier to block the trackers that are woven into many Android apps unless you bother installing the free open source Blokada app.
With (free) software, the user is often the product himself: he often plays personal information without knowing it where advertising agencies make the most of it. The same goes for numerous Android apps, even paid ones. Just save the database Exodus after: type in the name of an app or open at the very bottom of the list with Most Trackers. You can also download the Exodus Privacy app: it checks which trackers and permissions are embedded in your installed apps. On our own smartphone, for example, the app detected no fewer than 117 trackers, an average of 1 tracker per app.
The big question now is: how can you counteract those trackers efficiently? The answer: with the free open source app Blokada. However, it will come as little surprise that you cannot find this app in the Google Play Store.
01 Installation
So you will have to get Blokada on your device in a different way. Root rights are not required for this. Download the apk file to your android device from the official site from the makers. Click here Download Blokada (version 4.4 or higher). Normally, your browser will now show a warning and you must grant your permission for the installation. If you are using Blokada for the first time, you will be asked for permission to set up a VPN connection. As soon as the app is active, it sends all data traffic to a local VPN service to intercept the DNS requests from your apps.
If it turns out that the requested IP address is blacklisted by Blokada, Blokada will return an invalid address to those apps, such as 0.0.0.0, so that those apps cannot connect to the IP address of the ad network or other data collectors ( see also box ‘VPN service’).
02 Filtering
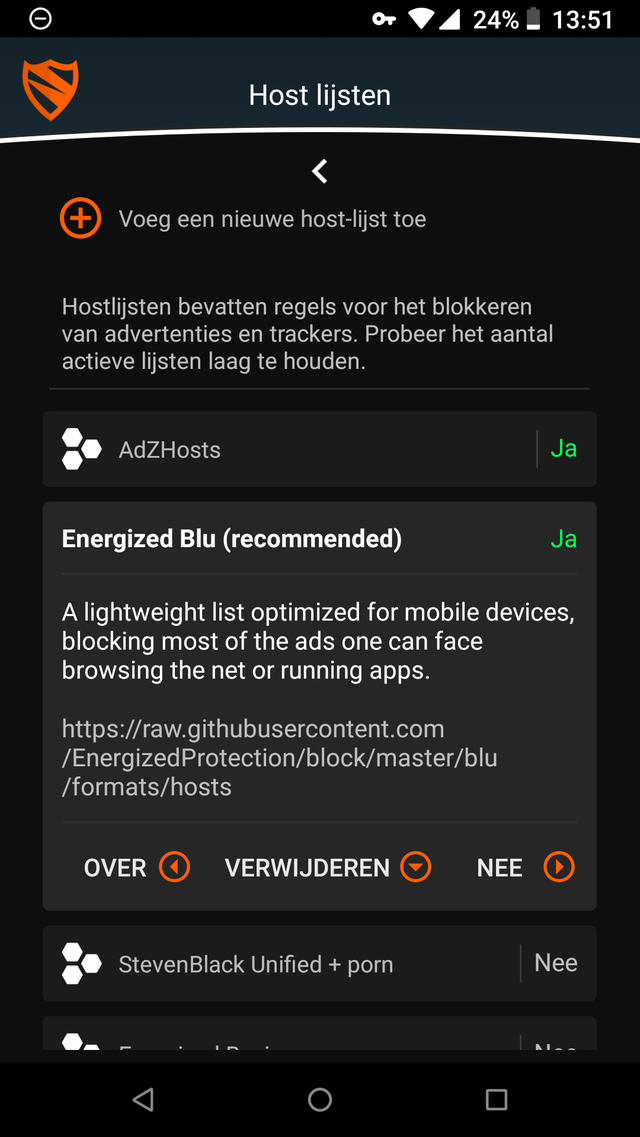
In the main Blokada window, you can immediately see how many trackers and ads the app has blocked. And that counter can quickly add up: with moderate use, 1,000 blockades per day on our smartphone were the rule rather than the exception. Tap the hamburger menu at the bottom of this window to land in the control panel. At the top, tap Block ads and then on Host log: Here you can see which hosts were recently blocked – although unfortunately you don’t see which apps are responsible for these requests. These blocks are based on block lists, which you can set yourself via Host lists. The makers recommend at least the Energized Blulist. Tap this list to see the corresponding url: it appears to be tens of thousands of (sub) domains. In the same way you can also view the other lists and the one with No or Yes (de) activate. You can also add hosts that Blokada must always let through (Allowed Hosts) or block (Blocked Hosts).
Blokada proves to be very economical in its battery use, but with older smartphones you might be well advised not to activate too many lists.
03 Configuration
To view Blokada’s settings, click at the bottom of the main window App settings. If you want to be sure that Blokada is and remains active, then you move Start at startup and Active stay on Yes. If that doesn’t work, you can do it too Aggressive activation switch. Set the slide to Notifications you will get a notification every time Blokada blocks a host, but since a lot of trackers are blocked, you will probably find this very annoying.
In the main screen you will also find the option DNS On. If you activate this, you allow the regular dns servers to be bypassed and one of the seventeen dns servers that Blokada offers may be selected. Through Add new DNS you can set other – or your own – dns servers.
VPN service

An annoying side effect of the free version of Blokada is that the local VPN server excludes the use of another external VPN service. The paid edition of Blokada, however, provides its own VPN service that of course works nicely with the filter function. There are VPN gateways in New York, London and Stockholm, among others.
Select for this Blokada tunnel in the main screen, choose My Blokada tunnel and choose Activate account. One month of VPN use costs five euros. To not automatically be stuck with the next payment, you can set the slider Auto renew from. Payment is via Google Pay, PayPal or with cryptocurrency.
.