You can work more productively with a tidy desk. It works the same with the Desktop on the computer! With these tips you can make the desktop in Windows neat and tidy.
Cleaning up the Desktop
You do almost everything on the computer from the Desktop. So the aim is for this to be an uncluttered place, with all your favorite shortcuts to hand. It is also nice if it looks calm. This ensures that you spend less time looking for a program. We create a calm and clear desktop in three steps.
Step 1: Throw out the unnecessary
After logging in to the computer, you will immediately see the Desktop. Some will recognize this image: a sheet full of links, icons and everything mixed up. Take a critical look at this. Are there shortcuts that you never use? Or maybe some programs are duplicated? Remove it as follows:
- Right-click on the shortcut you want to remove.
- In Windows 10, click remove. In Windows 11, click the icon remove (trash can icon).
Step 2: Add New Shortcut
Is there a program or file that you use often, but is not yet on the Desktop? Then add it as a shortcut. That can be done like this:
- Right-click on an empty spot on the Desktop.
- click on New > Shortcut.
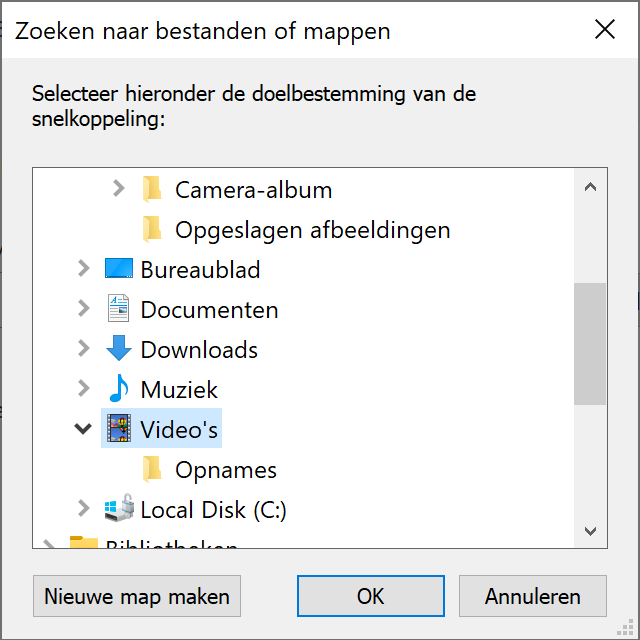
- click on To leaf through.
- Choose a folder, file or program. The name of the selected file has a blue background. click on OK to confirm.
- click on Next one.
- Rename the shortcut if necessary and click Complete.

Another way you can add shortcuts is via the search function in the Taskbar:
- Click on the search function in the taskbar, it has a magnifying glass icon
 .
. - Type the name of the program or file you want to put on your Desktop, for example Word.
- Right-click the program in the search results.
- click on Open file location.
- Now you will see the folder where the program or file is stored.
- Right click on the program.
- In Windows 10, click Copy to > Desktop (create shortcut). In Windows 11, click Show more options > Copy to > Desktop (create shortcut).
You can also create a shortcut to a website. You can read how to do this in the article ‘Putting a website on your desktop’.
Step 3: Sort
Now that the unnecessary shortcuts have been removed and the useful ones added, you can sort them. Windows has an automatic option for that.
- Right-click on an empty spot on the Desktop.
- click on Sort by.
- Sort by Name: The shortcuts are sorted in alphabetical order.
- Sort by Size: The shortcuts are sorted from smallest to largest.
- Sort by Item Type: Files of the same type are grouped together, such as Word files.
- Sort by Changed by: The files are sorted by when they were last used. The most recent programs are at the top.
Of course you can also sort shortcuts manually:
- Click on a shortcut and hold down the mouse button.
- Drag the shortcut to the desired spot and release.
Tips for a clear layout
When sorting, keep this in mind:
- Give the most used programs a central place. Put less used programs at the bottom.
- Group programs that you use together. Such as the photos folder and a photo editing program. Or email and calendar.
- Still too many shortcuts? Then create a new folder and put certain shortcuts in it.
- You can create a new folder by right-clicking on an empty spot on the Desktop. Then click New > folder. You can drag shortcuts from your Desktop here.
- If necessary, change the name of a shortcut for more clarity.
- Right-click on the desired shortcut. click on Renaming (Windows 10)or Show more options > Rename (Windows 11). Enter a new name. Then press Enter.
- Resize the icons to your liking:
- Right-click on an empty spot on the Desktop. click on Image. Choose large, normal or small icons.