
Create labels in Word from an address list in Excel. That will save you a lot of typing!
Create labels
Uses labels to send cards to groups of people without getting a cripple arm from writing envelopes. Create an address list once and update it periodically. And print the list in one go when it’s time for a ticket.
What it takes: an address list in Excel and a recent version of Word. Sheets with labels should of course not be missing. Don’t have an address list in Excel yet? Read how to create one in the article ‘Create a mailing list in Excel’.
Do you have labels but no addresses?
Don’t want to create labels with addresses, but with other information? The article ‘Creating labels in Word’ explains how you can text labels one by one in Word, and how they should be printed.
Step 1: Set up labels
Use the Mail Merge function to get addresses from Excel onto labels. The merging consists of three steps: there is a master document with labels, the addresses are added there and the whole is merged from the printer. Basically this goes like this:
- Launch Word.
- click on Empty document.
- Click on the tab Mailing Lists.
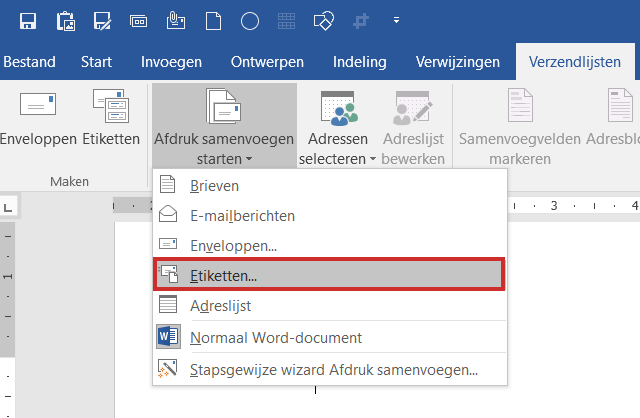
- In the ‘Start Mail Merge’ bar, click on the black triangle to the right of Start Mail Merge.
- Click in the menu on labels.
- The ‘Options’ window appears. Set the type of labels here. Do you know the manufacturer of the labels? Click the drop-down menu to the right of “Label Manufacturer” and click the manufacturer’s name. The available sheet types are now listed in the box under ‘Product number’.
- click on OK.
Step 2: Labels in the picture
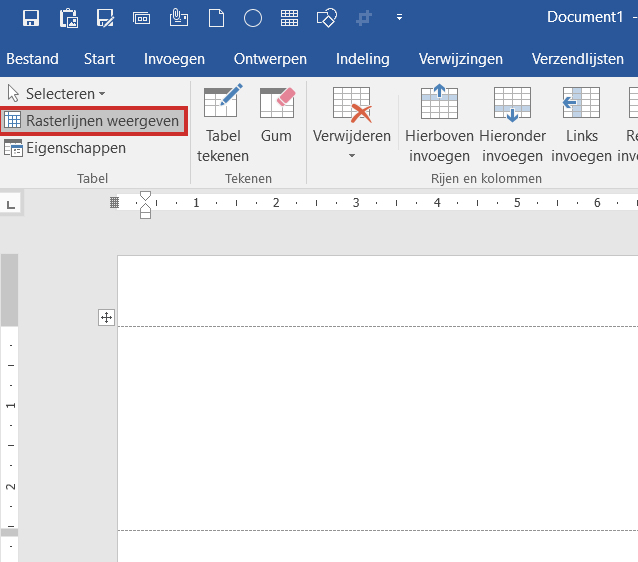
Word is now formatted as a label template. Do you not see any help lines and the like on the screen? Click on the tab Layout. There are two ‘Layout’ tabs. Choose the rightmost one. Do you see only one? First click on the white paper of Word. The extra tab will then appear to the right of the existing tabs. Click at ‘Table’ on Show gridlines. The dotted lines indicate the edges of the labels.
Step 3: linking addresses
Now it’s time to associate the address list with the labels that have just been set up.
- Click on the tab Mailing Lists.
- Click on ‘Start Mail Merge’ Select addresses.
- click on Use existing list.
- An Explorer window will appear. Browse to the folder containing the address list.
- Click the name of the address list and then click To open.
- The ‘Select table’ window appears. By default, the first row of the Excel document is checked to contain column headings. That’s right, there are keywords like ‘Name’, ‘Address’ and the like. Does your document contain names and addresses directly from the first row? Then remove the checkmark for The first row of data contains column headings by clicking on it.
- click on OK.
Step 4: Add addresses to labels
Word has created address fields for the data from the list. All labels now read <
- Click on the tab Mailing Lists.
- Click on ‘Describe and insert fields’ on Address block.
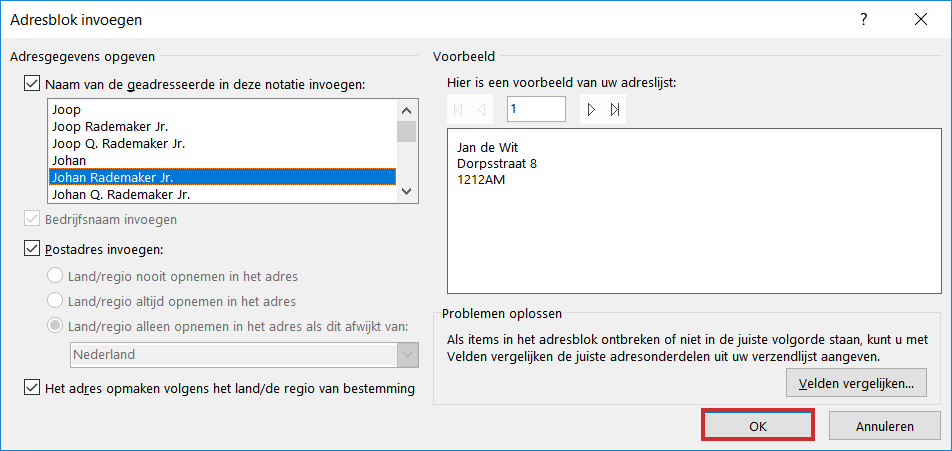
- The ‘Insert address block’ window appears. Under ‘Insert recipient’s name in this format’, there are several options for the addresses. The default option is sufficient for us.
- An example is shown on the right. Is this to your liking? click on OK.
- The cursor will automatically be in the first label. <> now appears here.
Help, data is missing!
Word tries to recognize the data from Excel as best it can. Sometimes this goes wrong and data is missing. For example, when inserting the address block, it appears that the place of residence is missing from our address list. That is because it is not recognized. That can be remedied:
- Delete the text ‘<
>’ by selecting the text and pressing the Backspace button. - Click again at ‘Describe and insert fields’ on Address block.
- click on Compare fields.
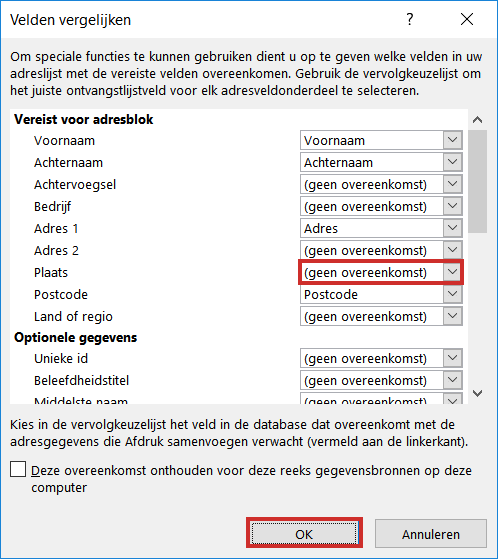
- The ‘Compare fields’ window appears. On the left are the fields that Word needs for an address block, such as first name and city. To the right of it you can see which parts from Excel have been used for this. Missing data is marked with ‘(no match)’.
- Click on ‘(no match)’ to the right of a missing item to fix it. We are missing the places of residence, so we click behind ‘Place’ (no match).
- In the drop-down menu, you will recognize the keywords you entered in Excel. Does your Excel document not start with keywords but directly with address data? Then you will see the details of the first person in your list in the drop-down menu.
- Click on the corresponding information in the drop-down menu. In our example, this is the term ‘Residence’ as we called it in Excel.
- click on OK.
- The data is now there. click on OK to close the window. <> appears again in the first label.
Step 5: View and Print Labels
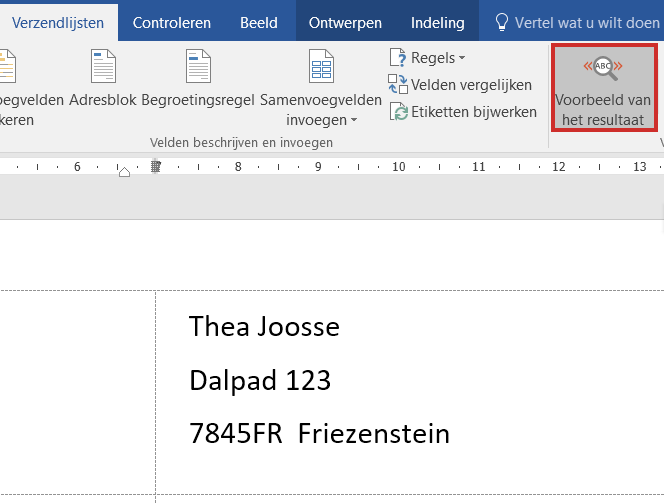
The whole thing still looks abstract, with only terms like <
> and <- On the ‘Mailings’ tab, click Example of the result and you will see an address appear.
- Click on ‘Describe and insert fields’ on Update labels. If you don’t see this, there may only be a paper icon with two green arrows in a circular motion
 .
.
- Now all addresses from your list are in a label. Is everything as you had in mind? Then it’s time to print the labels.
- In the ‘Mailings’ tab, click on ‘Finish’ on Finish and Merge.
- click on Print documents.
- By default, Word is set to print the entire document. click on OK.
- The printer settings window appears. Normally it is not necessary to change anything here. click on OK.
The labels will roll out of the printer. You are done creating labels. Close Word via the cross at the top right of the screen. Or save the labels for later use, via the menu File > Save as > To leaf through.