A romantic tune when your friend calls you and drum roll when your boss calls? With the right apps, you can create your very own ringtones for specific contacts, both for Android and iOS.
Show Van Dale
Almost every mobile phone allows you to set a different ringtone for your contacts. In the iTunes Store app, for example, you choose this More / Show (a ringtone here usually costs about 1 to 1.3 euros). But it is even more fun when you use your own ringtones, for example a fragment from a song or a YouTube video, or a self-recorded message. We first show you how to do this in an easy way on an Android device and then how to do this on an iPhone, both with and without iTunes. Keep in mind that a ringtone should not last longer than 15 to 30 seconds.
Android
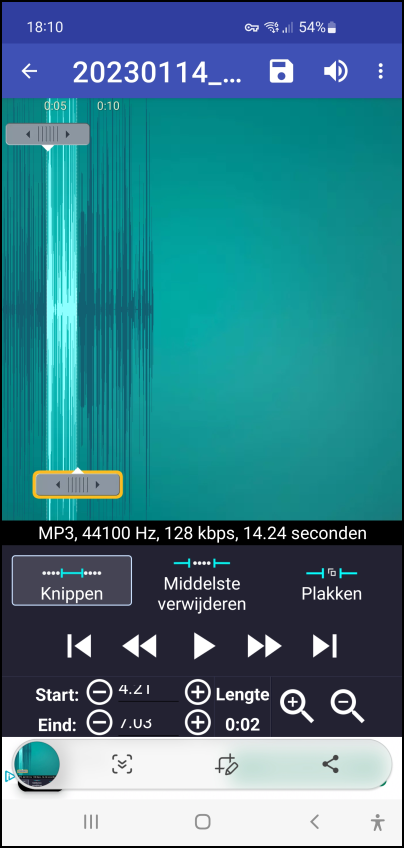 |
| You can upload your recording (or any other track) still crop to a manageable 15 to 30 seconds |
Own recording
Making your own ringtone for an Android smartphone is quite easy, especially with an app like Ringtone Maker from Big Bang Inc. You download it for free from the Play Store. Install the app and open it. Select Allow to indicate that the app can access the media files on your device. You can simply ignore the ad line at the bottom of the app window.
To make a recording yourself, in the main Ringtone Maker window, tap the hamburger button in the top left and choose New recording. Tap the record button – confirm with While using the app – and record your message.
Finished? Then press the stop button and confirm with Readyor tap Throw away and start again. Your recordings appear with two sliders on either side to determine the start and end of the recording. You can listen to the result via the button bar at the bottom. Tap the floppy disk icon to save the clip with an appropriate name. Leave Type set to ringtone (other options are: Music, Alarm and Notification) and confirm with Keep.
A few options will now appear, including Make as default ringtone and Assign to contact. In the first case, you still have to allow the required permission for Ringtone Maker via a slider System settings (this window opens automatically). In the second case, first confirm with Allow and then indicate the intended contact. The new ringtone is immediately active.
Other sound sources
Of course you don’t necessarily have to record your own message. It is just as possible to start from an imported or downloaded audio file and then optionally trim it with Ringtone Maker.
 |
|
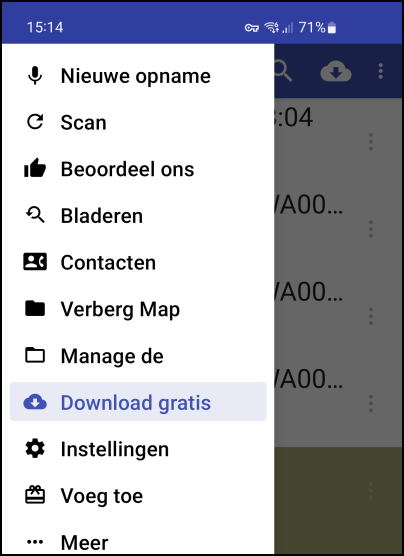
| Ringtone Maker offers different options |
To do this also tap on the hamburger icon, choose To leaf through and navigate to the desired folder; press the up arrow button to move up the folder hierarchy. Are you looking for a previously recorded message? By default, Ringtone Maker saves it in the folder /storage/emulated/0/Ringtones. By the way, you can still change this default location via Institutions.
You will also find the option in this same menu Download for free On. This one takes you to a whole collection of free tunes. To download one, select a song, tap the button with the three dots and then tap the download button. You can also trim these tunes further in Ringtone Maker.
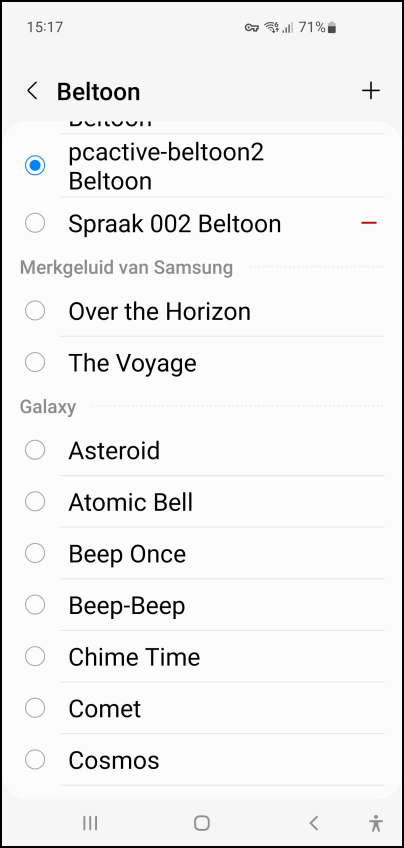 |
| You will usually find your own ringtones at the top of the list |
Set up Android
To set a ringtone without Ringtone Maker or any other app as the default ringtone on your Android, go to Settings / Sounds and vibration. Here you choose ringtone and select the desired ringtone from the list.
To link a certain ringtone to a specific contact, open the app Contacts (not via the Phone app) and tap the target contact to reveal more information. Tap at the bottom To process and then on Show more. Scroll all the way to ringtone and possibly too Vibration pattern for to call. You can now select and set the desired sound for this contact.
iPhone: mobile apps
Creating and linking your own ringtones on an iPhone is a bit more laborious than with Android. We approach this in two different ways: on the one hand we stick to mobile apps, on the other hand we also bring in our computer (Mac or PC) and link it to our iPhone via the iTunes app.
We’ll start with the mobile apps.
Import audio
An easy way to create ringtones is to use the free mobile app RingtoneMaker (from Sujuan Chen), in combination with Garageband (from Apple). You can find both in the official App Store. Install both apps on your iPhone and grant the requested or necessary permissions.
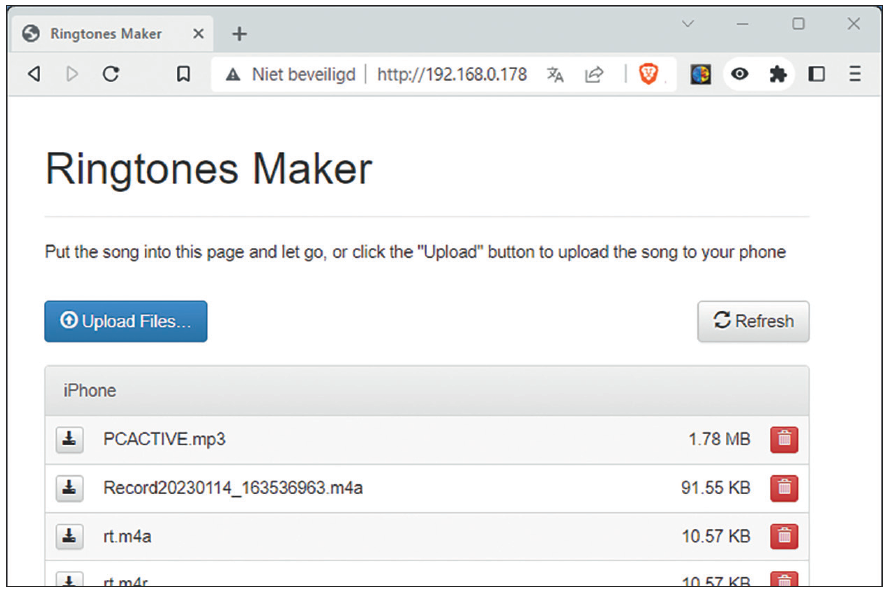
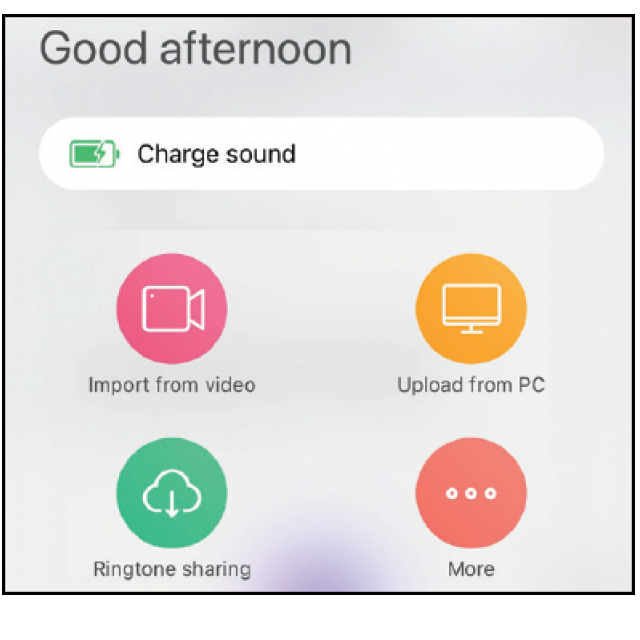
Then you start Ringtone Maker. You can simply ignore the often intrusive advertisements. Tap the plus button at the bottom to get a sound. There are several buttons available including Import from video, which allows the app – upon your permission – to retrieve videos from your local collection. Interesting too Upload from pc. In this case, Ringtone Maker starts up a web server and shows you the local IP address of that server. When you enter this address in a browser on a PC that is connected to the same network, you can use the button in that browser to Upload Files Transfer audio files from your PC to your iPhone.
|
|
|
| Ringtake Maker deploys its own web server to easily upload media files from your PC as well |
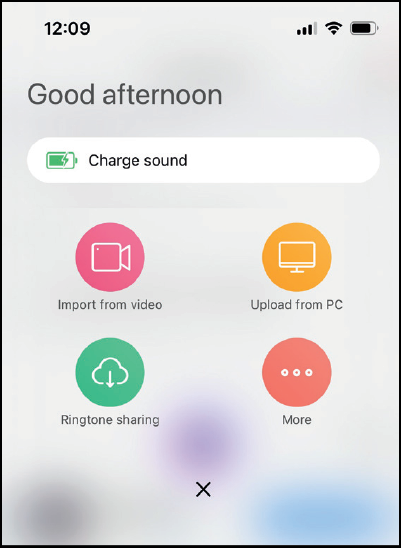 |
| Ringtone Maker lets you retrieve audio in various ways |
Edit audio
There is also the button More with options like Record (for direct voice recordings), Text to speech (to have English text spoken by the app) and a few more buttons to import audio files from sources such as AppleMusic (only without DRM protection), other apps, or your local file collections.
The selected audio automatically appears in the window My Ringtone and you can listen here. When you tap the arrow button next to such an item, options such as Rename (rename), Make and clip. The latter allows you to optionally trim the audio by setting new start and end points and also lets you create a fade in– and a fade outset effect. Confirm with Done to add the edited sound clips to your list.
Audio
If your audio is to your liking, tap the button Make and launch the (now installed) app Garage Band on. Granted, the features of this app are overkill for our purposes, but it does work. You should immediately see the selected audio file in the window My Songs – Recent in Garageband. When you select this number, the corresponding sound waves appear and you can optionally perform all kinds of operations on it. When you are done with this, tap the arrow button on the left and choose Mine numbers.
Now keep holding your finger on the audio file for a few moments until a pop-up menu appears, with options like Show info, Change name, copy and Part. Here you choose Partafter which three options will appear again: Number, ringtone and project. We are of course particularly interested in the second option. Give a suitable name to your new ringtone and confirm with Export. If all goes well, the window will appear a moment later Export ringtone successful and you can be here right away Use sound as select after which three options appear: Default ringtone, Default SMS tone and Show ready for contact. In the latter case, you only have to select a contact to link the ringtone to it.
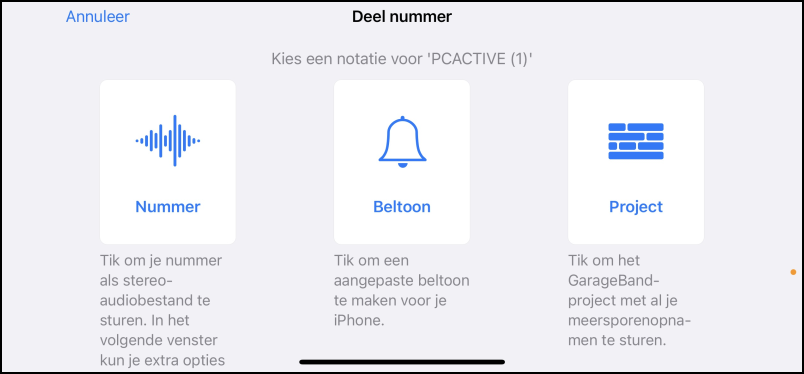 |
|
| From Garageband you can immediately save the audio file as a ringtone |
iPhone: via computer
If you prefer not to work with (these) mobile apps, there is another method: via the iTunes application, available for macOS and Windows. This method can also be useful if you want to creatively edit the audio first with applications you have on your computer – such as the acclaimed free sound editor Audacity (www.audacityteam.org).
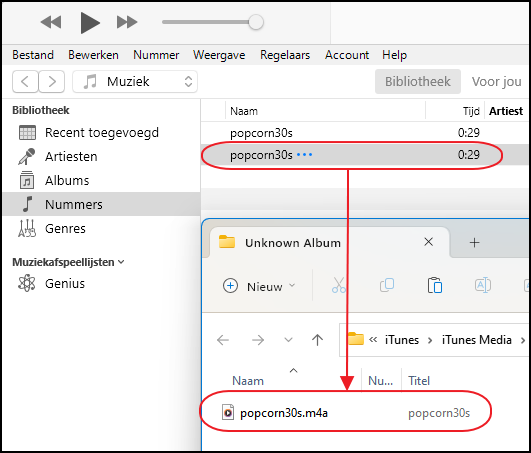 |
| Drag and drop your m4r file from the Explorer to your iTunes library |
iTunes library
You can find iTunes at www.apple.com/itunes or in the Microsoft Store (we’ll take a Windows PC as an example here). Download and install the app and launch it. Go to File and choose Add file to library, after which you point to the desired audio file. Open Numbers in the side panel Library and right-click on the imported audio file. Choose Info numberopen the tab Options and, if desired, adjust the start and end time by entering values at start and fuses. As mentioned, it is best to limit your ringtone to about 30 seconds (in any case, do not exceed 40 seconds). Confirm with OK. Select the number, go to File and choose Convert / Create AAC version so that the resulting aac file also appears in the list, under the original number. Right click on this aac file and choose Show in Windows Explorer. If you do not see the file extension (.m4a) appear in the Explorer, then press the button with the three dots in the Explorer and choose Options. On the tab Display then remove the check mark Hide extensions for known file types and confirm with OK.
Now right click on the .m4a file, choose Renaming and change the extension .m4a in .m4r; confirm with Yes. Leave the File Explorer window open.
Connect iPhone
You are now ready to transfer the file to your iPhone as a ringtone. Connect your iPhone to your PC via a Lightning-to-USB cable and switch on the iPhone. Normally, a pop-up will now appear on your iPhone asking whether you trust the linked PC. After your confirmation, your iPhone should appear as a smartphone icon in the iTunes window at the top left.
 |
|
| Drag the audio file to ‘Show’ and iTunes takes care of the synchronization right away |
Click on this icon and select at Institutions the category Overview. In the right pane, scroll to Options and add a check mark Manage music and videos manually. Confirm with the button Ready (bottom right).
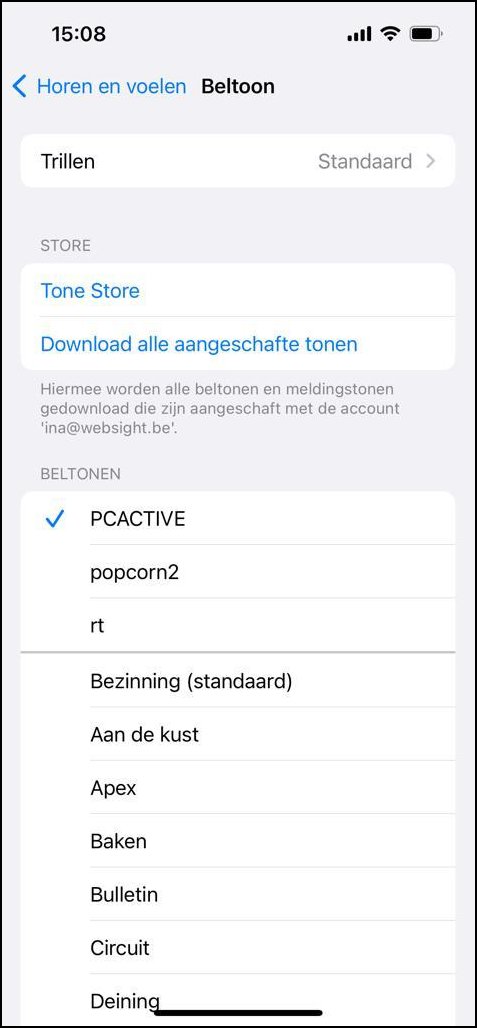 |
| You can change this from Settings your default ringtone |
Then open the rubric in the right panel To show bee Devices and drag the m4r file from the Explorer window here so that the word Clutch appears. Release the mouse button so that the file is added to the list and synced to your iPhone.
Set up iPhone
You may close iTunes and disconnect it from your PC. On your iPhone, go to Settings / Hear & Feel / Ringtone. You should now see the ringtone you just uploaded at the top of the list. Tap it to listen to it and set it as your default ringtone.
Or you open up Telephoneapp and you choose Contacts. Tap a contact, choose Change and then tap the arrow button ringtone. Select your ringtone and tap the button Ready. Your ringtone is now associated with this contact.
