Since the launch of iCloud in 2011, and MobileMe before it, Apple has offered its users an online storage solution to save their photos and synchronize them across their different devices. We explain the different options offered by the manufacturer.
If Google offers 15 GB of free cloud storage for each account created, Apple is not as generous with only 5 GB of iCloud Drive online storage space offered upon registration, but also with automatic synchronization of all your data as well as images and videos on all of your Apple devices, as well as on Windows after installing iCloud on your PC and via a web browser.
However, it is possible to subscribe to a subscription plan with Apple, which allows you to benefit from 50 GB, 200 GB or 2 TB of storage space in the cloud in order to deposit all of your files there without any restriction.
Synchronizing your photos via iCloud on iPhone, iPad or iPod Touch is a very simple operation to set up, you still need to know the few steps to carry out on your iPhone, iPad or Mac to no longer worry saving your images and videos over time.
How to set up your photos to sync to iCloud on iOS?
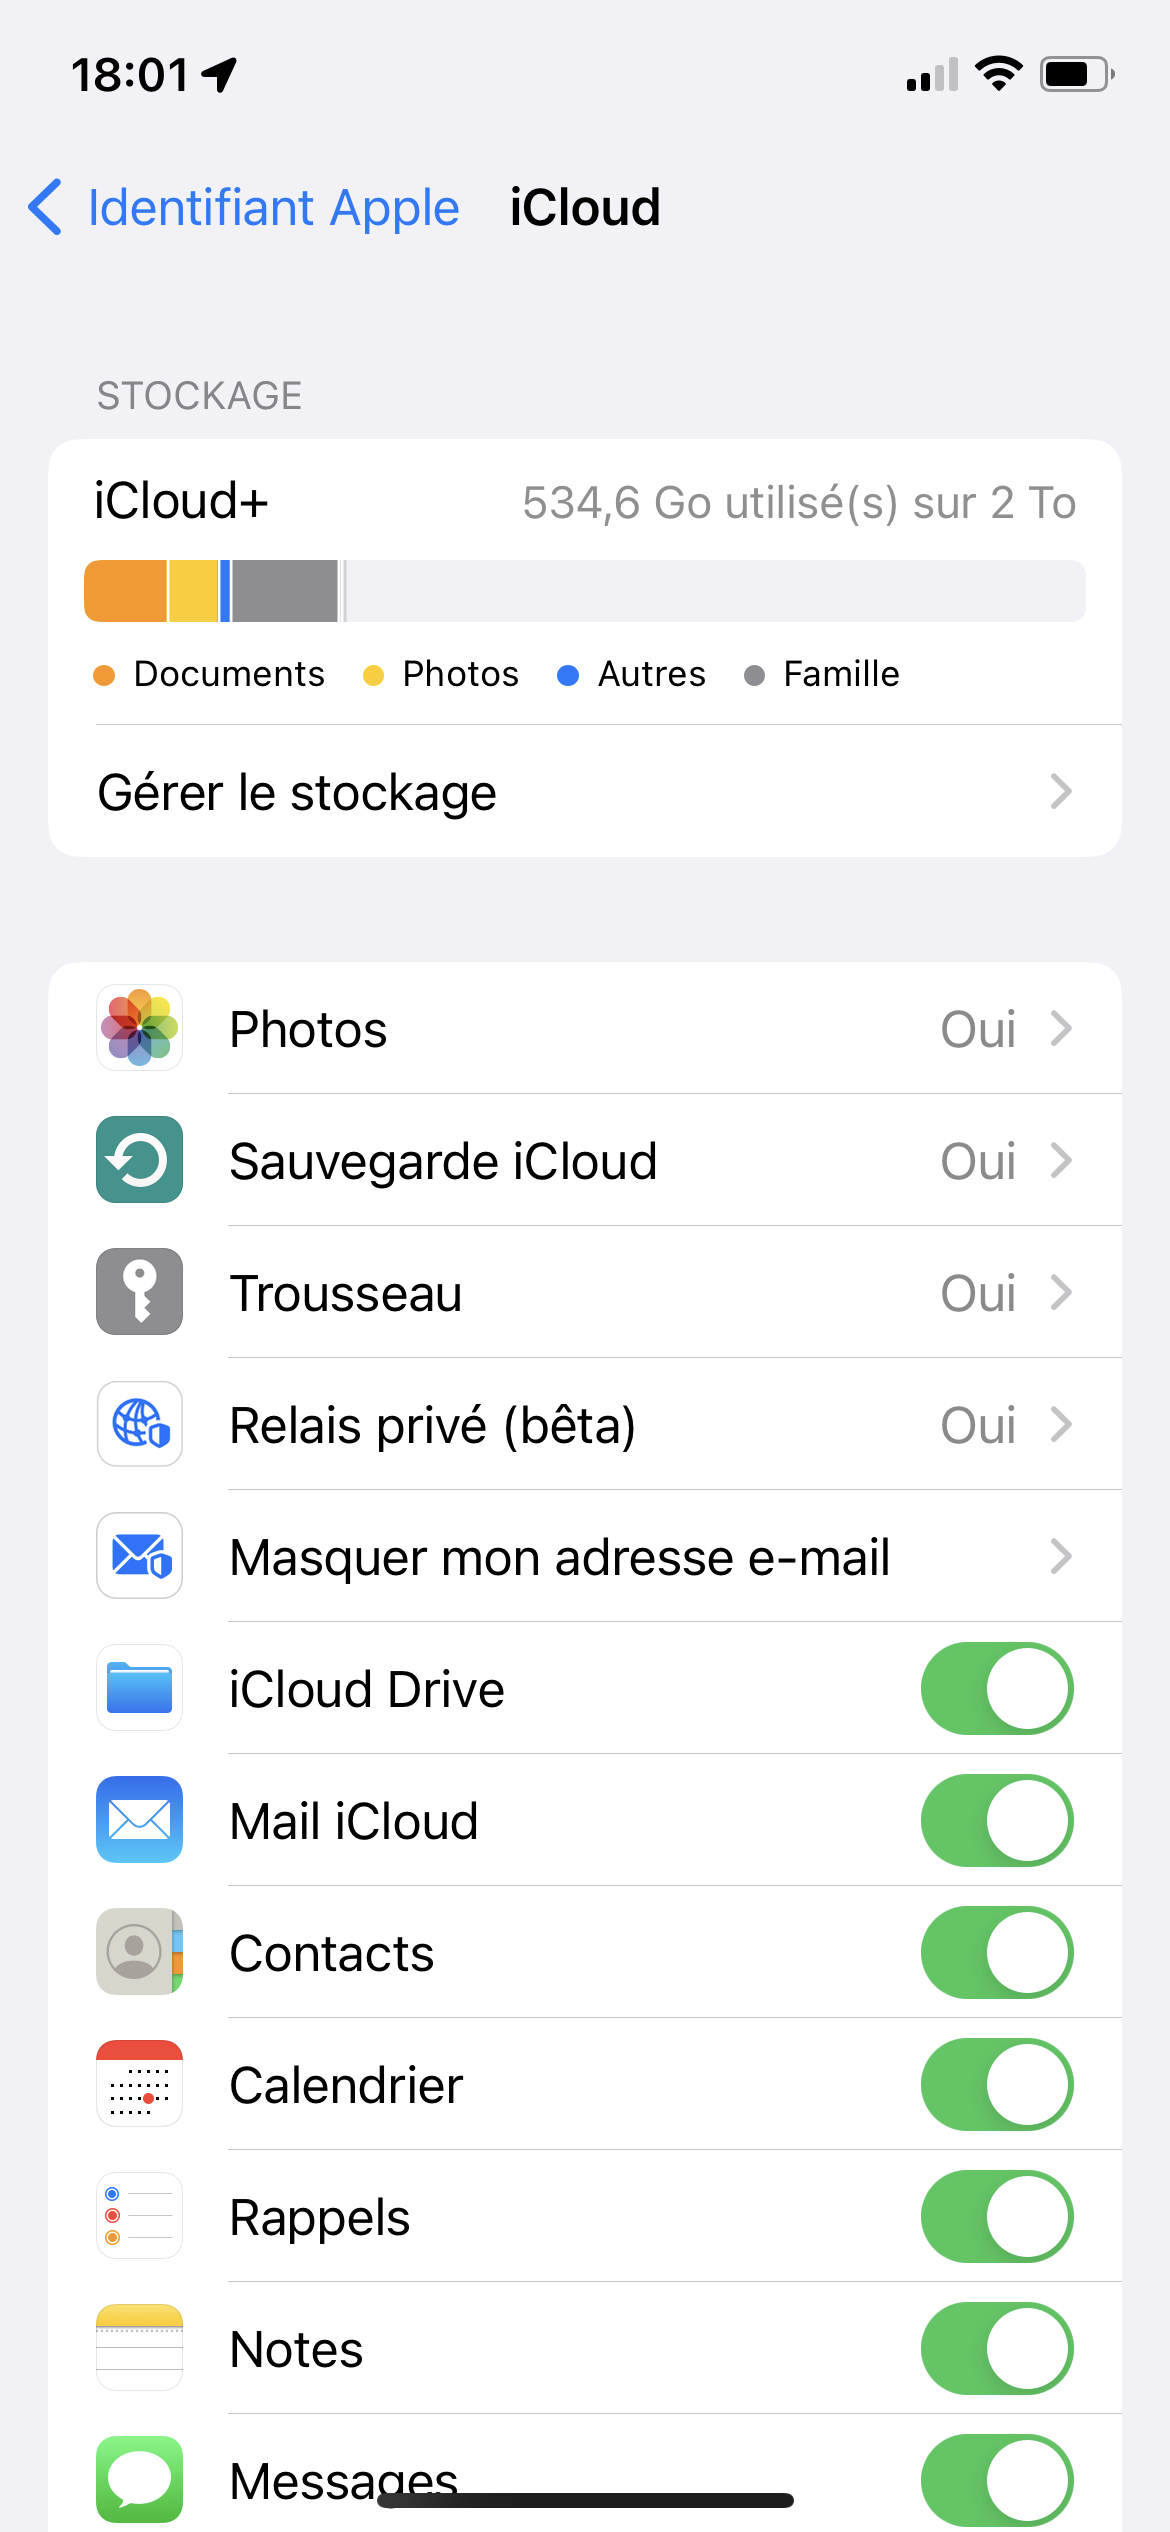
If you want to activate the synchronization of your iCloud photos on your iPhone or iPad under iOS, you will first need to open the “Settings” application on your mobile device then press the first option at the top of the page where is displayed your name. Then tap on “iCloud” then click on “Photos”. You will then just need to check the “iCloud Photos” option to activate the option and start the synchronization of your photo library, to be found in the “Photos” application.
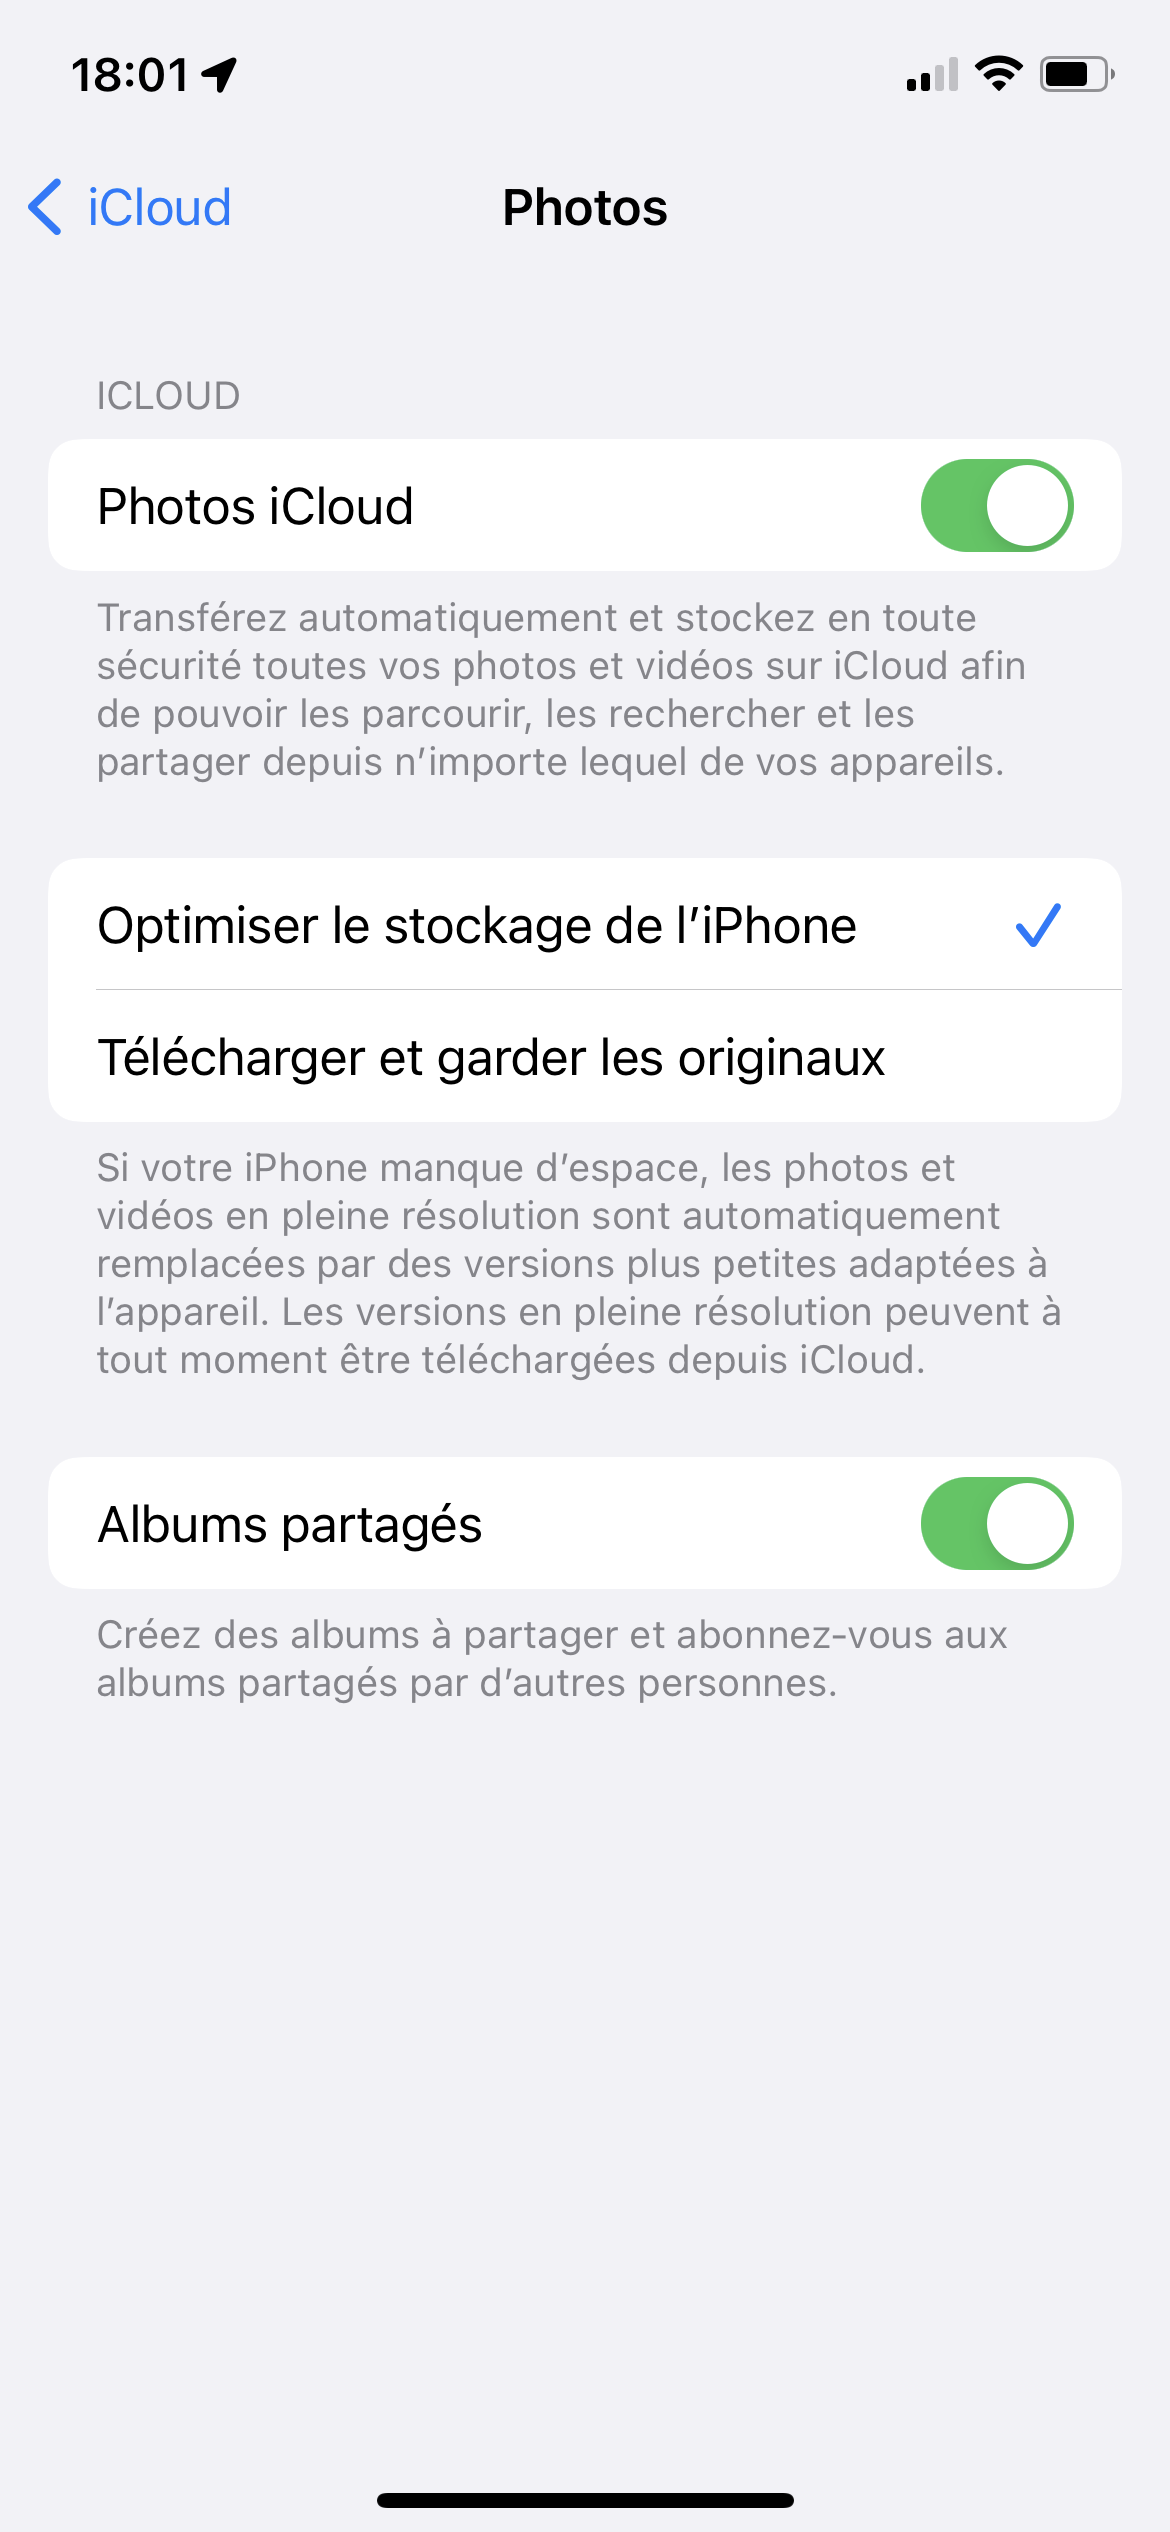
Below this option you can choose how to store your iCloud photos on your iPhone or iPad. If you click “Optimize iPhone Storage”, only a small part of the images and videos will be downloaded to your device. The rest will be downloaded as needed. If you click “Download and keep originals”, all the photos in your library will be downloaded to your device, if you have enough space for it.
The last option, “Shared albums”, allows you to create albums to share with your contacts but also to access their albums and add your own images and videos in order to obtain the maximum possible photos from a event.
How to set up your photos to sync to iCloud on Mac?
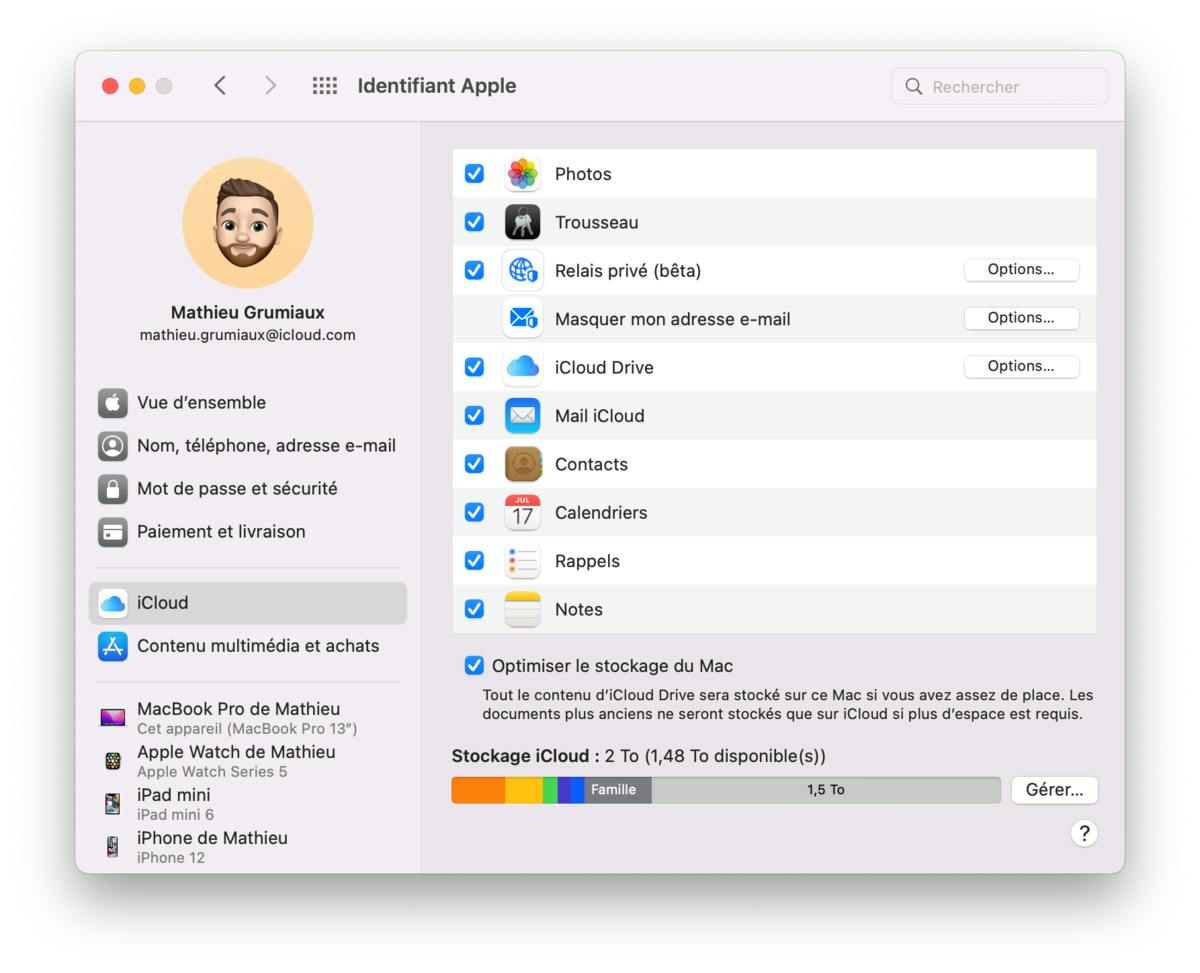
On Mac, to start synchronizing your photos with iCloud, simply go to the “System Preferences” applications, then click on the “Apple ID” icon. Then press iCloud in the left menu then check the “Photos” box on the right. Synchronization starts again immediately in your “Photos” application for macOS.
You can also configure how your photos are retrieved and downloaded to your Mac. To do this, go to the “Photos” application then click on “Photos” in the menu bar at the very top of the screen. Then click on “Preferences”. Then press the “iCloud” button.
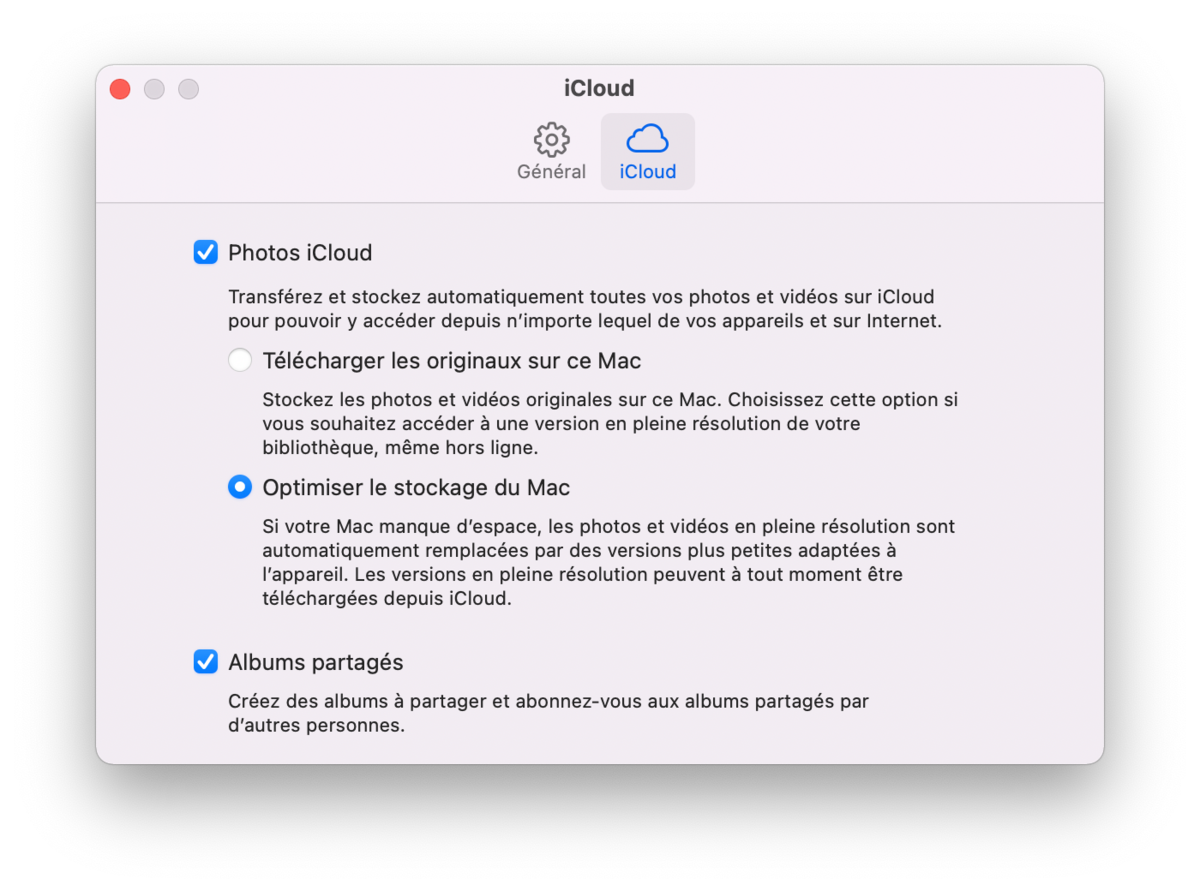
Here again you can choose to “Download the originals to this Mac” to recover all of your images and videos in their original quality (be careful with the storage which risks melting like snow in the sun) or to Optimize the Mac Storage” to only download the latest photos saved to iCloud and leave the rest of your collection in the cloud.
How to set up synchronization of your photos to iCloud on Windows?
If you use a Windows computer, Apple also allows you to enjoy your photos directly on your computer, with the possibility of synchronizing in real time each of your images and all your videos as soon as they have been taken on your iPhone or your iPad.
To do this you will first need to install iCloud for Windows. The installation package for Windows 10 and Windows 11 systems is available from the Microsoft Store. For older versions, you will need to go through the Apple website, “Support” section to retrieve the file.
Once iCloud for Windows is installed, you will need to identify yourself in the application using your Apple ID and password then, if you have not already done so, check the iCloud Photos box in order to start synchronization of your photo albums and videos on your operating system.
To find your photos, simply open your file explorer. In the left menu, you will now find an iCloud Photos option. Click on it and you will immediately see all of your photos synced to your Windows PC.
You will also be able to access iCloud shared photo albums, and will be able to create one and distribute it to your contacts who also have one or more Apple devices.
iCloud: Use Photo Stream
If you don’t want to sign up for a paid plan to get more iCloud storage, there’s a solution called “Photo Stream” that lets you take advantage of syncing your most recent images and videos.
To do this, activate the “To my photo stream” option in your device settings, whether on your iPhone, iPad or Mac.
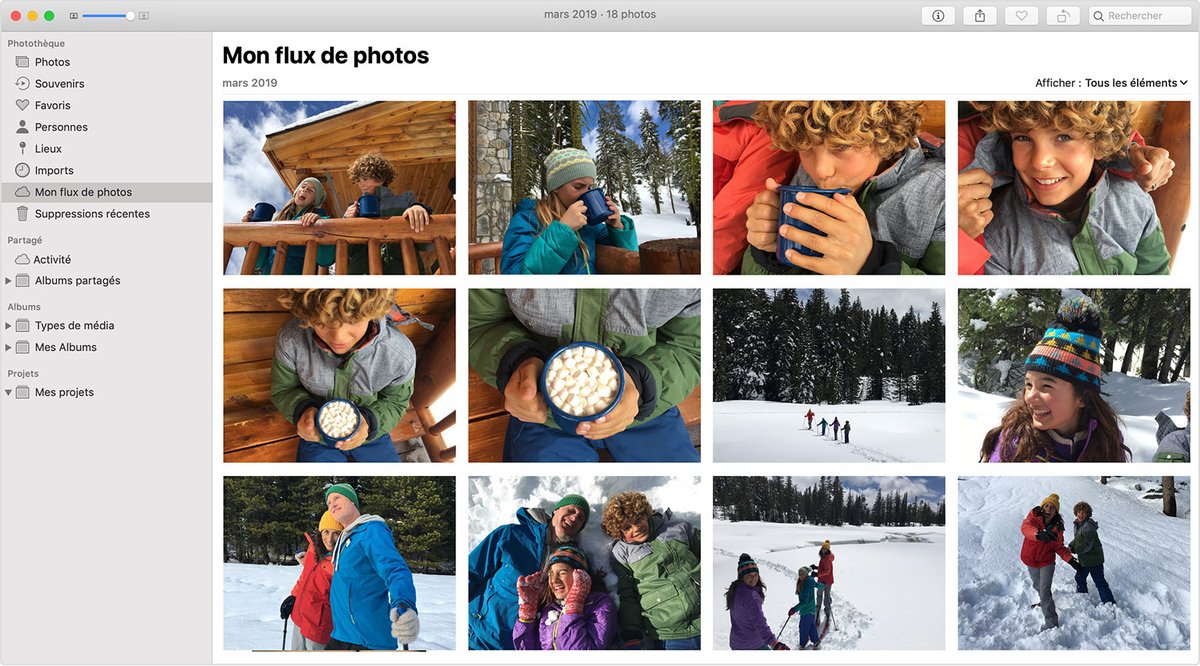
Photo Stream allows you to keep the last 1000 images or videos in your storage space, all for up to 30 days. These images are not counted against your iCloud storage, which can be handy if you only have 5 GB of cloud storage.
Please note, however, that this option may no longer be available if you recently created your Apple ID. This may also be the case if you have iCloud storage and have been using iCloud Photos for some time to store all of your photos and videos.
iCloud photo sharing: your photos with friends
iCloud Photo Sharing is initially designed to share images and videos that may be of interest to friends, such as a birthday or wedding. You probably know how complicated it can be to recover all the photos taken during a birthday, a wedding or an important event. Until now, you may have had to contact your contacts one by one to ask them to send you their photos by email or via instant messaging.
With iCloud Photos, you no longer need to spend many minutes recovering all those photos. With iCloud photo sharing, Apple offers you a simple way to bring together all of your loved ones’ photos in a single album.
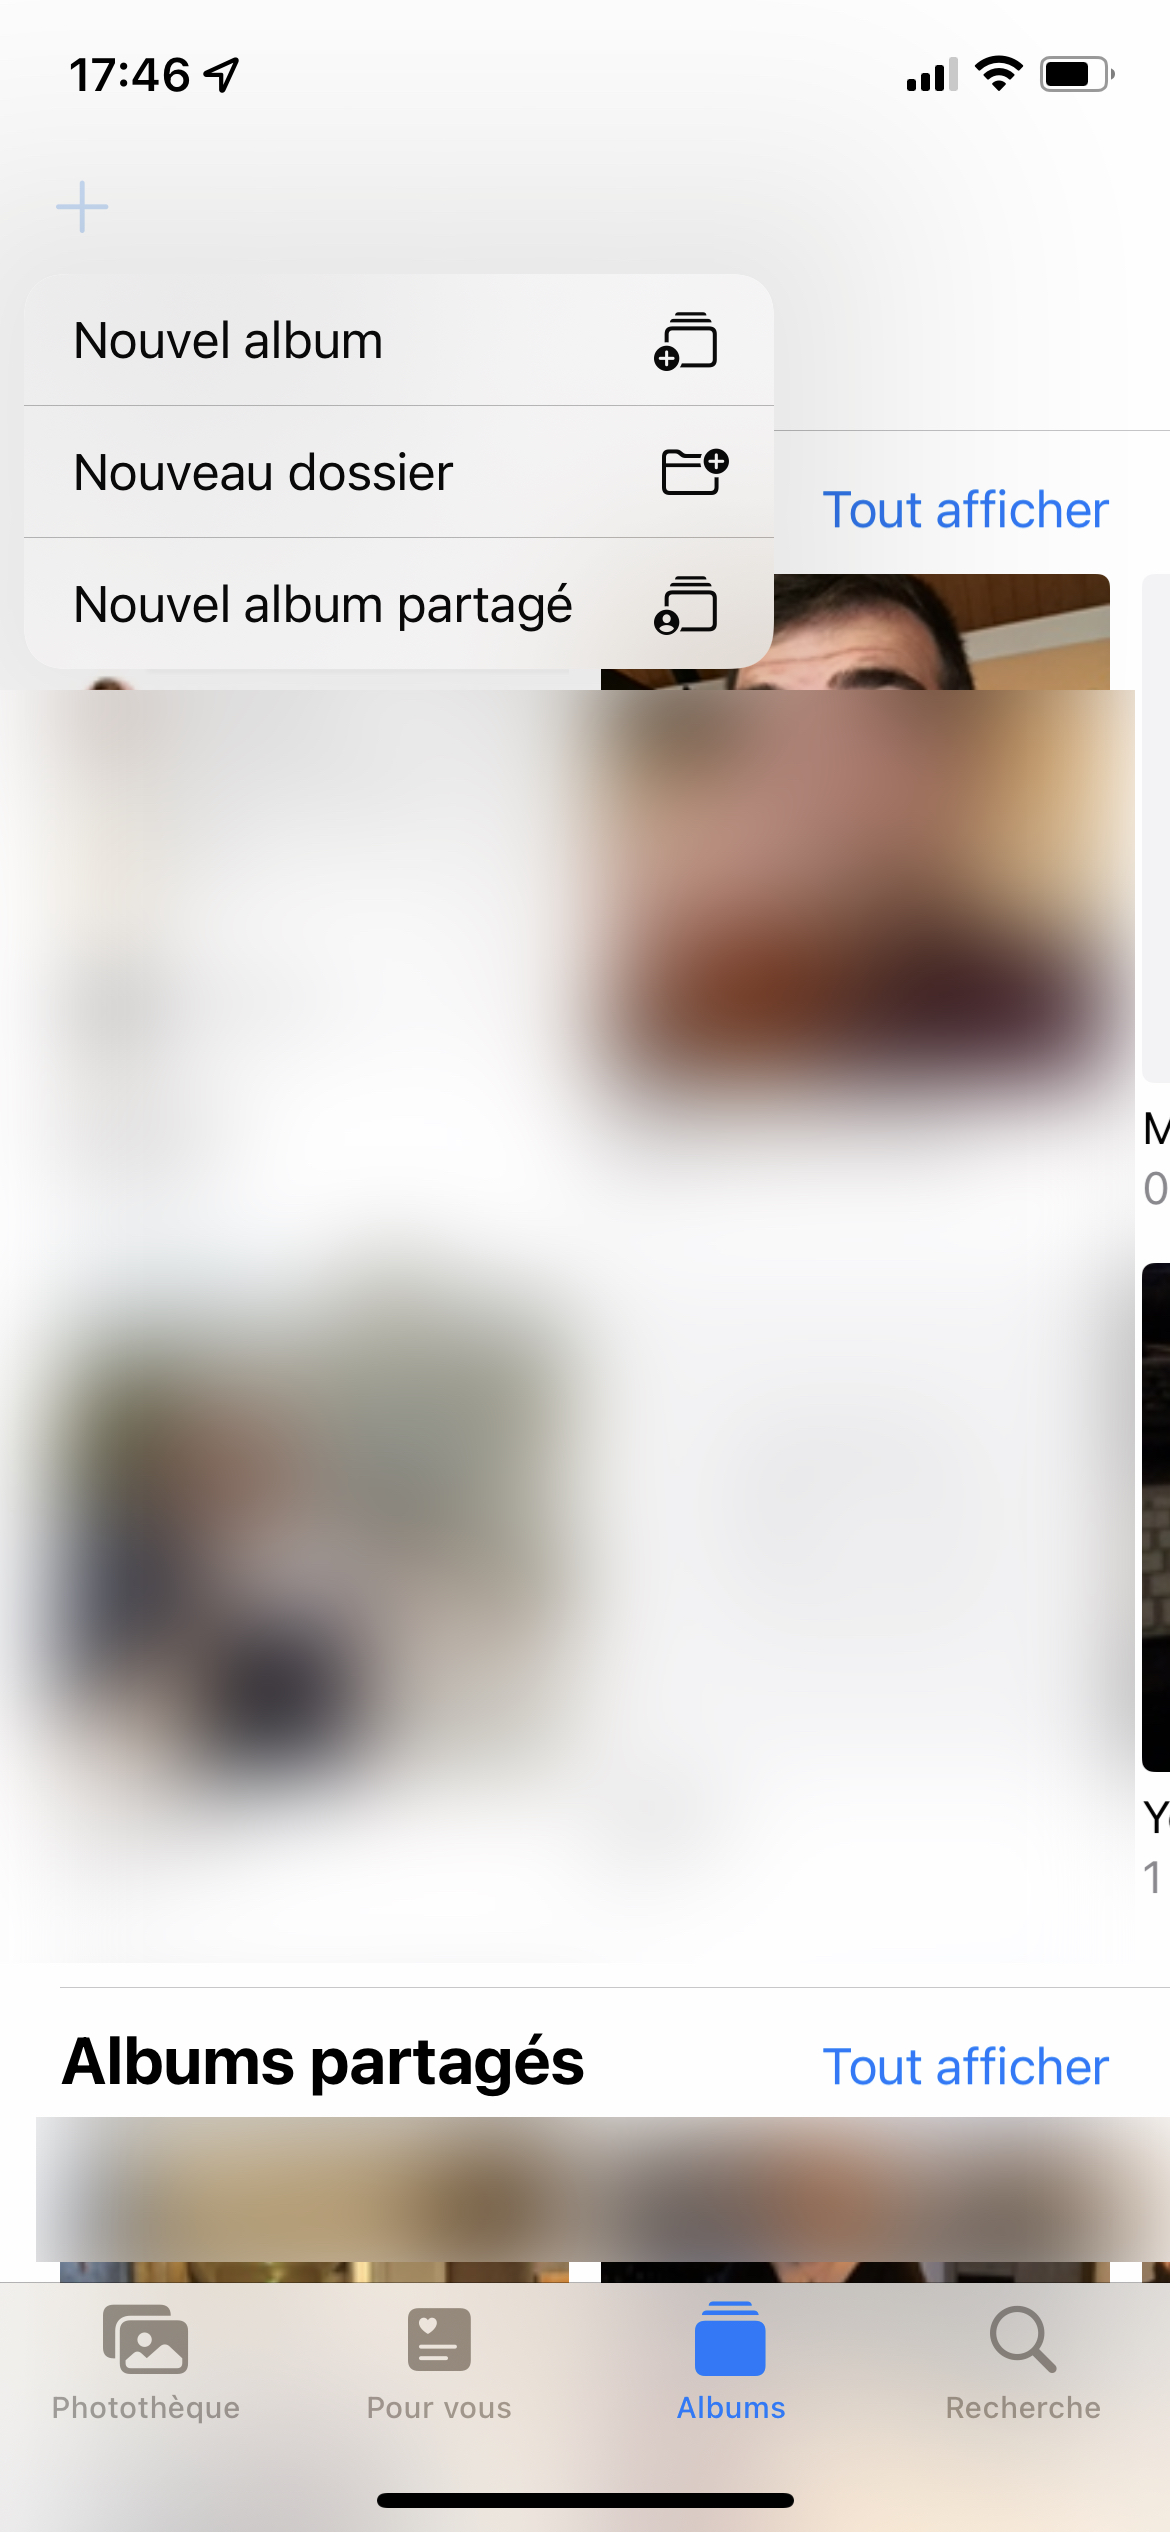
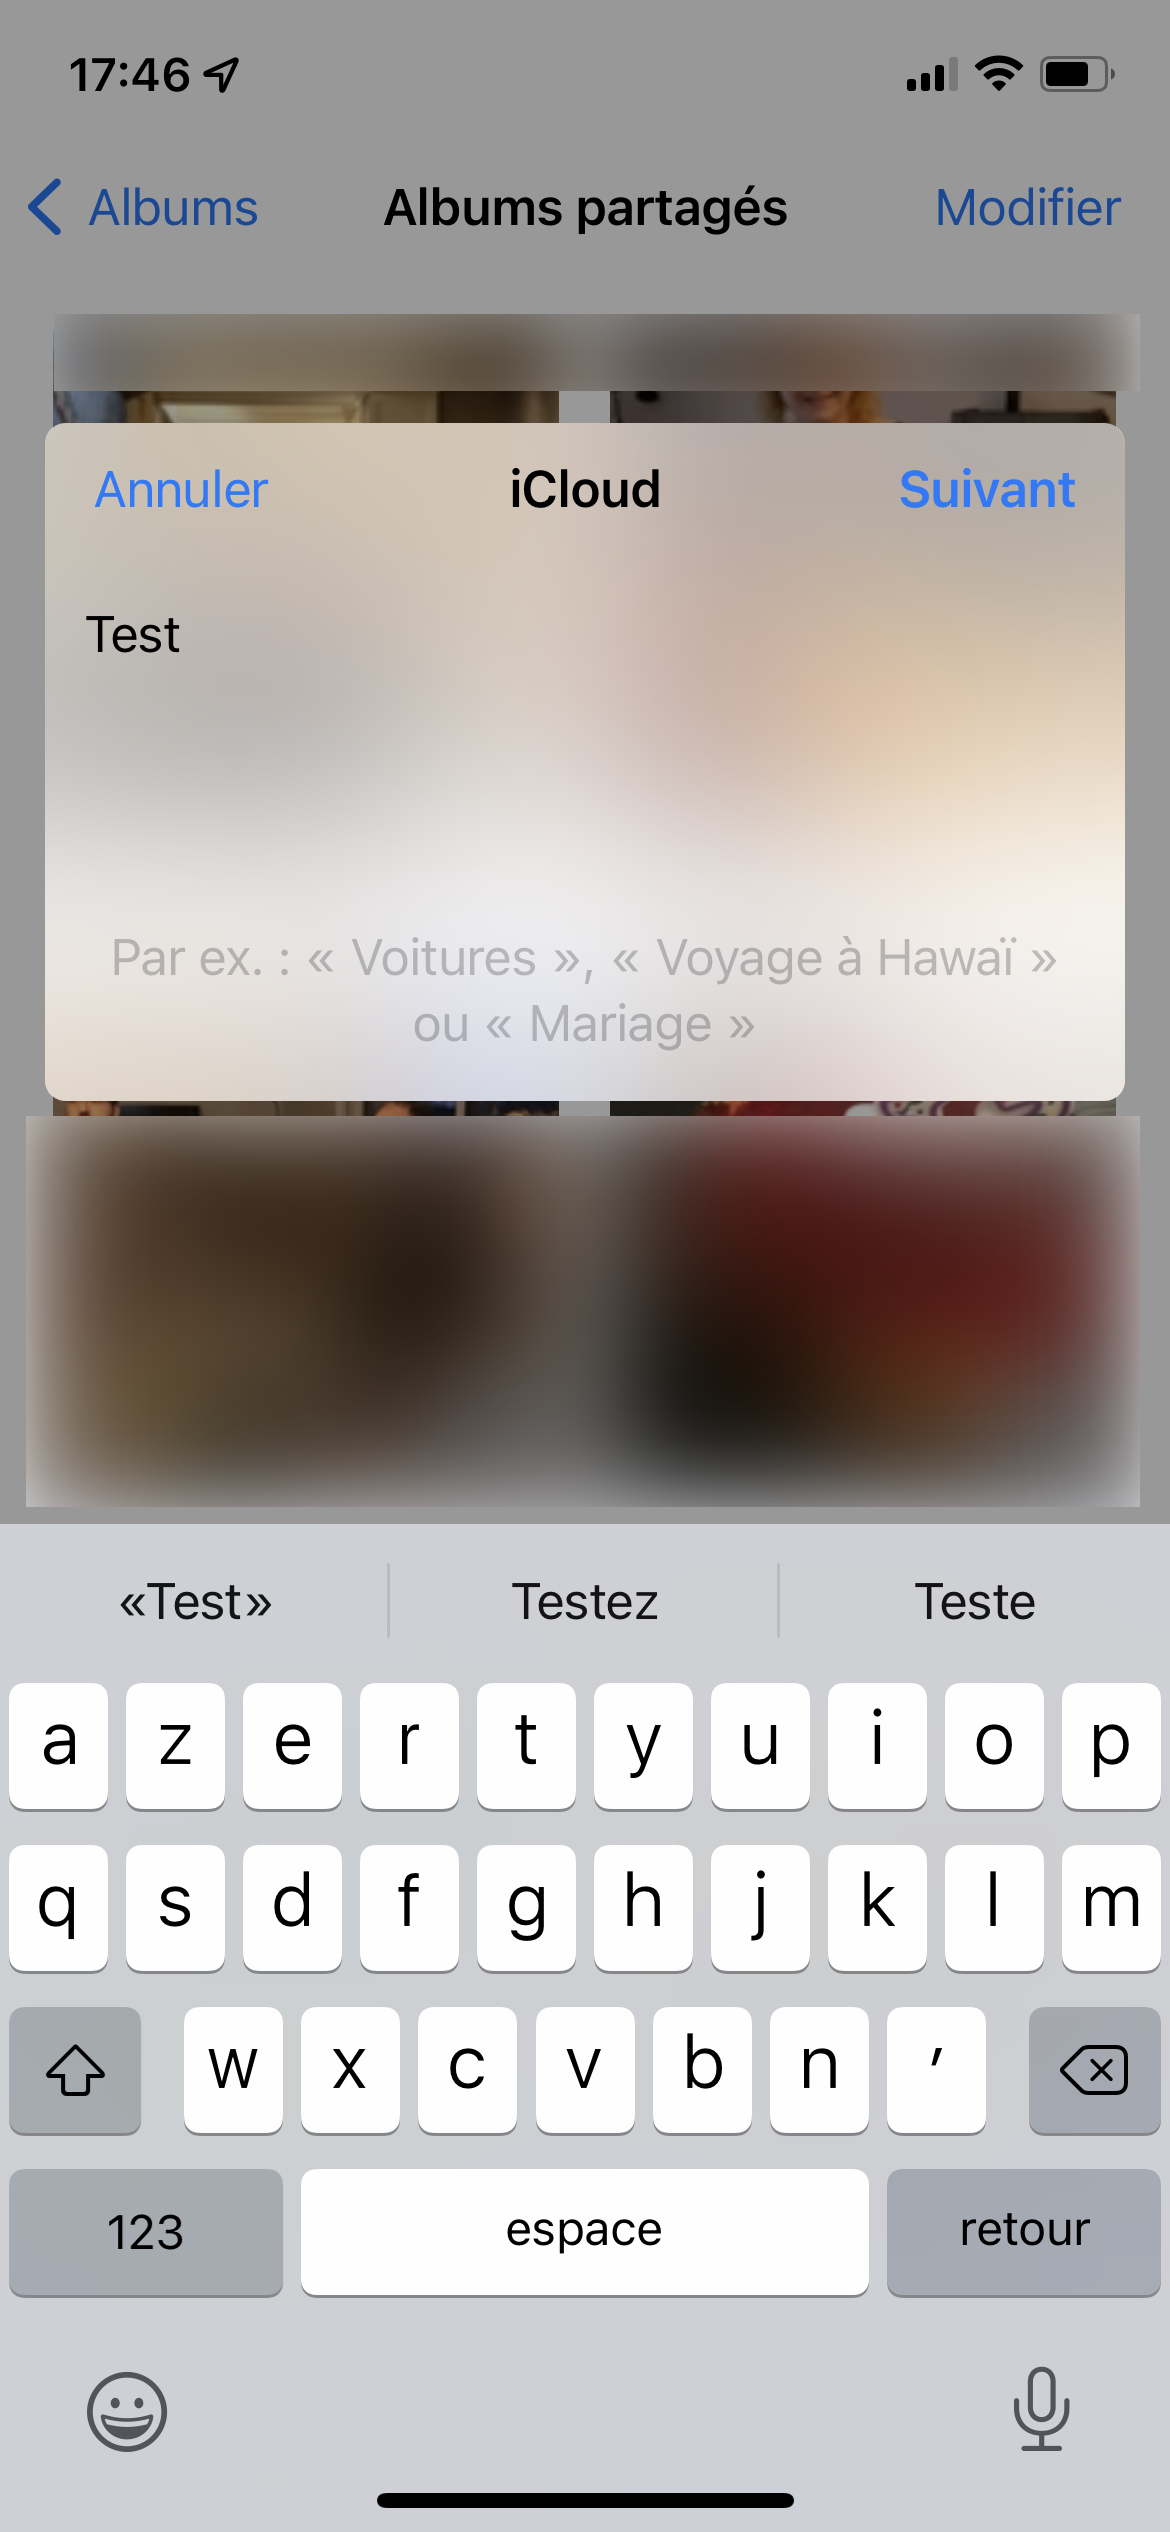
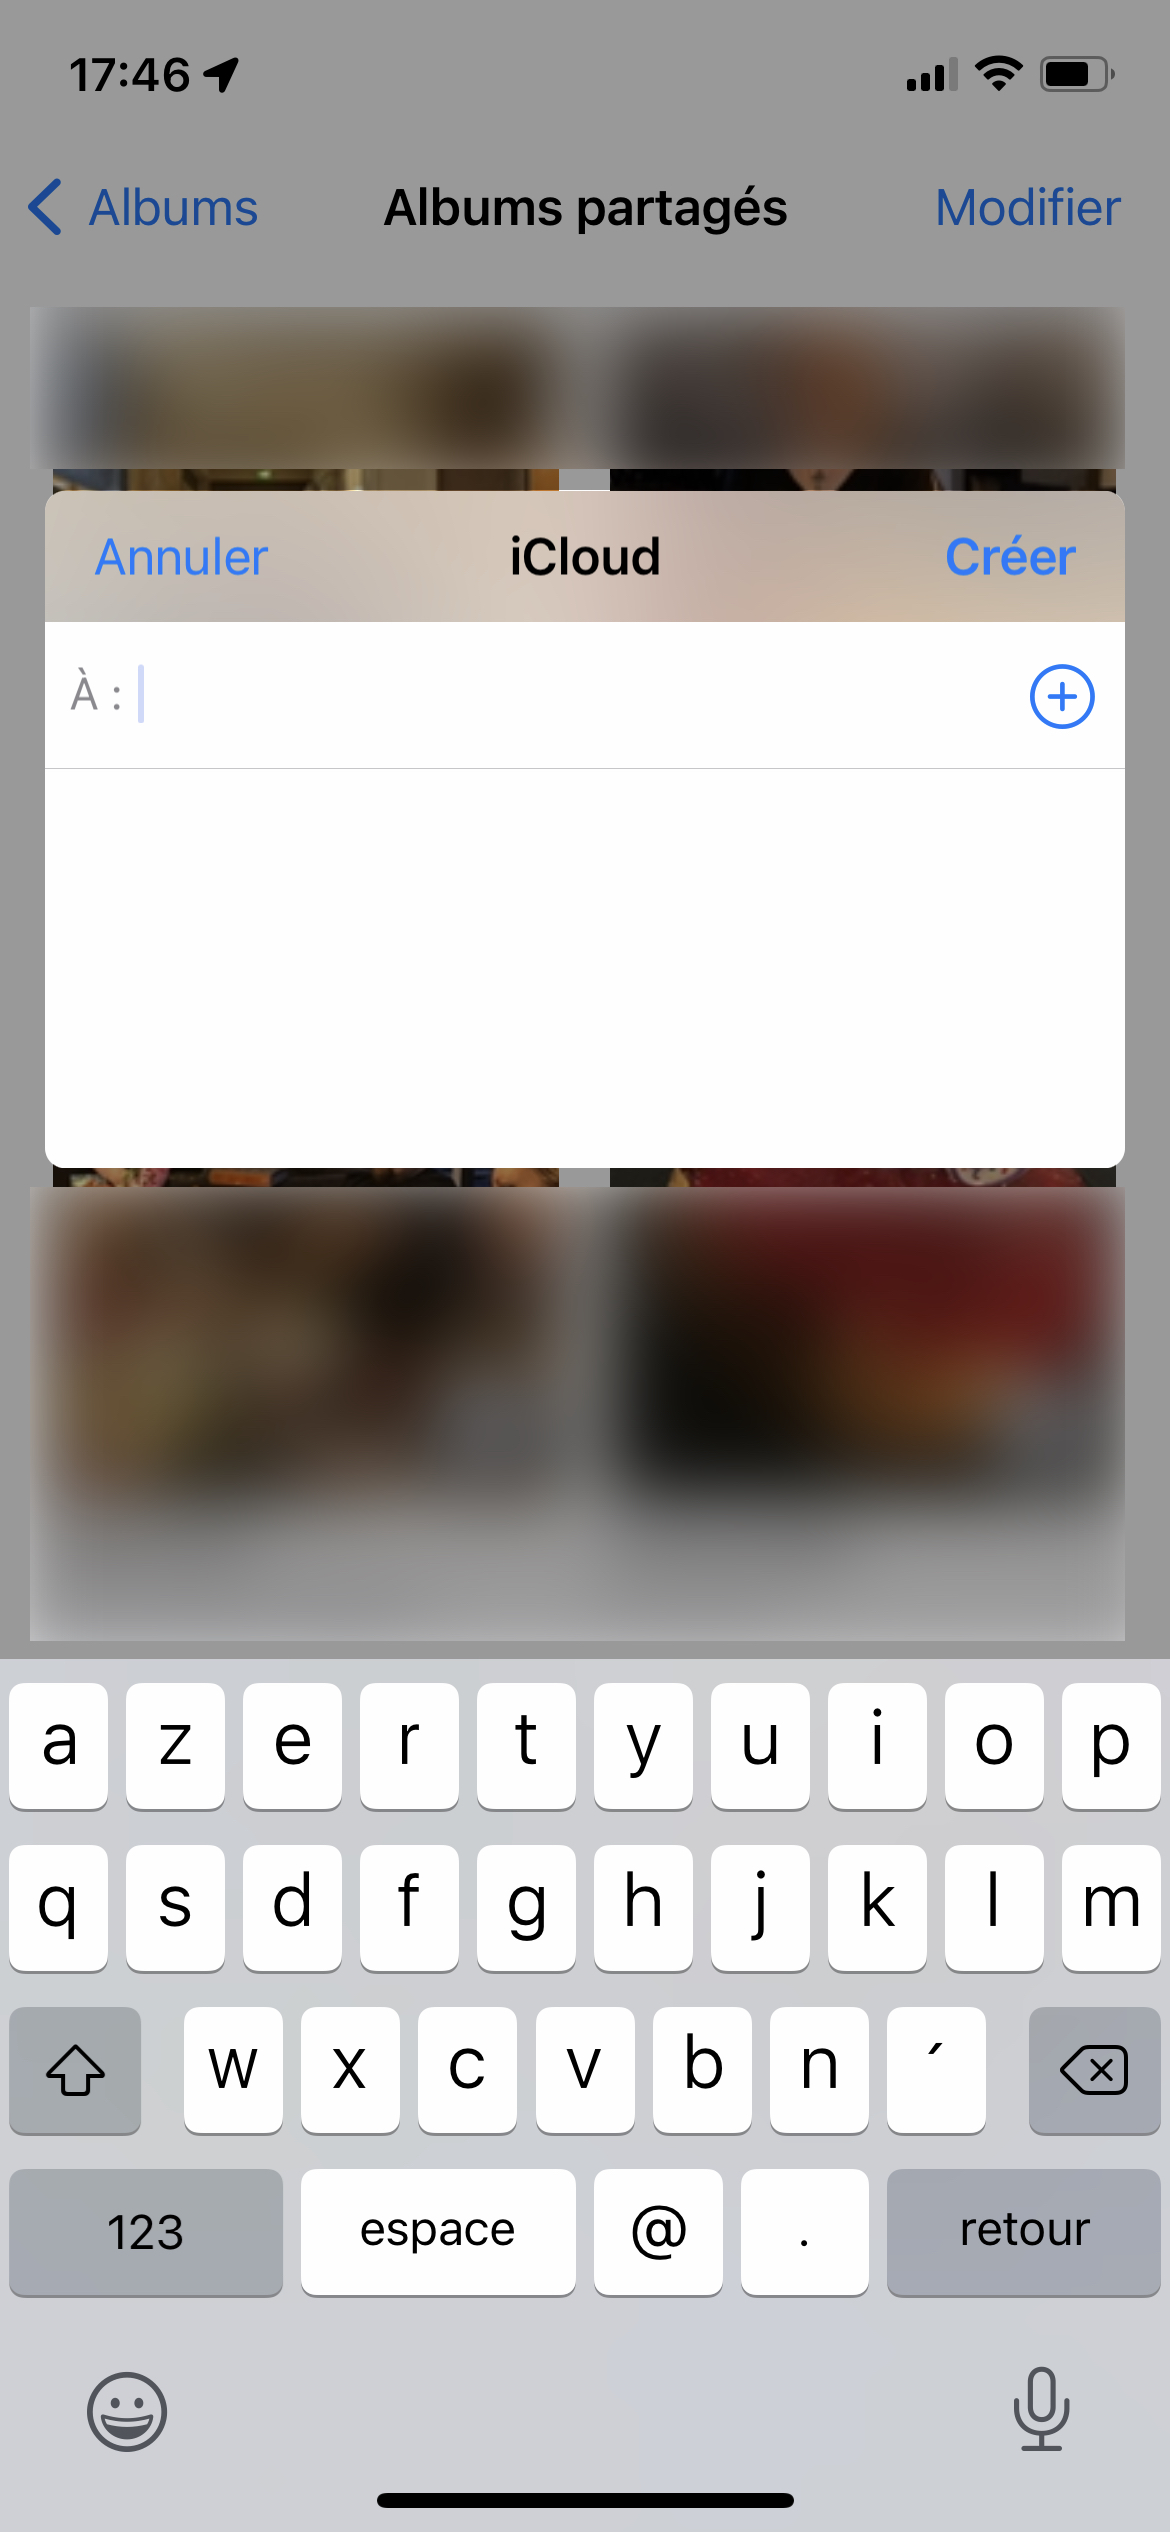
To create an album, simply from your iOS application go to the Photos application, then click on the “Albums” tab then finally click on the “+” symbol at the top left then finally on “New album sharing”. Then enter the name of your album, then click “Next”. Then add your contact(s) and press “Create”. Finally, just select all the photos you want to add to the iCloud album and finish.
On Mac, go to the Photos app. In the left menu, find the “Shared Albums” option and click the “+” symbol. A window opens allowing you to enter the name of the album and the contacts with whom it will be shared as well as a comment. Once created, all you have to do is go to this new iCloud shared album and add the photos and videos that you want to share with your friends.
Photo sharing: a solution to no longer worry about storage
It is also possible to use it to keep all of your photos and bypass the 5 GB limit offered by Apple when creating an iCloud account.
To do this, you will first need to create a second Apple ID with an address different from the one used on your main iCloud account. If you’re on a Mac, create a second user session and sign in with your secondary Apple ID.
From your main account, create a shared album and upload your photos. The limit imposed by Apple is 5,000 images and videos per album and the transfer of 10,000 photos per day. When you need to enter the contact to share the album with, enter the address of your secondary account.
Now switch to your other Mac session and you will find all of your photos, without having touched your iCloud storage space. This solution requires a little time and some organization but can save you a few dozen euros per year in total and allow you to keep more data without spending a single cent.
All our other content on iCloud:
- How to reset a forgotten iCloud password?
- How to use iCloud on Windows?
- iCloud: how to use Find My, Apple’s tool to locate your devices?
- How to delete an iCloud account?
- How to create an iCloud account?
- How to find iCloud photos on a Windows PC?