
The most striking innovations have already been described in PC-Active 326. That’s why we now focus on useful features that are easy to overlook. You can also apply all tips to an iPad with iPadOS 16.
Bert van Dyke
Tip 1. No screenshots between your photos
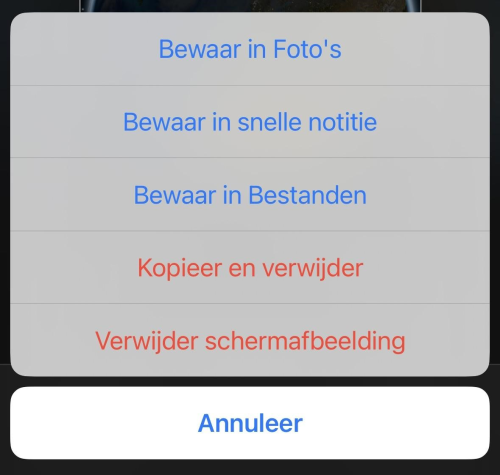 |
| Choose screenshots Save to Files or Copy and Delete |
If you regularly take screenshots, this is a very useful feature. After taking a screenshot, you first see a mini-view. If you click on that and then choose top left Readyyou can paste this image directly somewhere, before Copy and delete. For example, those screenshots no longer pollute your photo collection and you can use them directly in an email or presentation, for example. If you don’t need the image immediately, choose Save to Files. This allows you to keep all screenshots together in a screenshot folder so that you can find them more easily later.
Hint 2. Don’t share everything from a contact
When sharing a contact, you can now decide for yourself which fields you want to share. For example, at the bottom of each contact after the choice Share contact above the sharing options via Filter fields for example, unchecking the e-mail address and private address so that you only share the phone number and name.
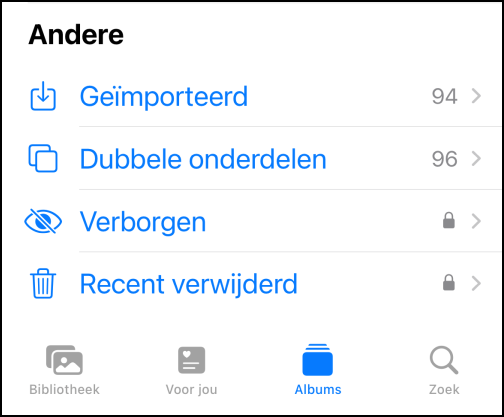 |
| You can delete duplicate photos here and photos with the lock are extra protected |
Tip 3. Lock on deleted and hidden photos
In the photo app you can find via the tab albums and some scrolling at the very bottom some hidden options. Behind Hidden and Recently deleted you will now find two locks. By default, those photos are now extra protected. You can only see those photos after recognizing your face or fingerprint. You can only disable that extra protection for these two albums by clicking at Settings>Photos turn off the switch behind Face ID or Touch ID. Photos with confidential content, such as your driver’s license or passport, can be viewed easily via the circle with the three dots via Hide keep it safe so that others cannot see that photo. You can still view photos that you have deleted for 30 days via the menu line Recently deleted. If you delete photos within that folder again, they will immediately no longer be visible there.
It has been possible for some time now to protect photos by placing them in a note and, via the circle with the three dots at the top, choosing Lock via the device passcode, a unique code or Face ID/Touch ID. After that action, you will of course have to delete that photo in the photos app. You can later also easily transfer multiple photos from such a note as separate photos to the photo app via the share icon and Save image.
Tip 4. Remove Duplicate Photos Quickly
You no longer need a separate app such as Gemini to recognize duplicate photos. In the photo app, first choose the tab at the bottom Album after scrolling down you start the function via the line Duplicate parts. After synchronizing all photos from iCloud, you will see all duplicate photos side by side, along with the size of each photo. With the combine button you can deduplicate per photo. It is even more convenient to immediately deduplicate all your photos. You do this through Select and Select all. The photo with the highest resolution is automatically saved and any texts with your photos are added together. A very nice, new feature in Apple’s Photos app.
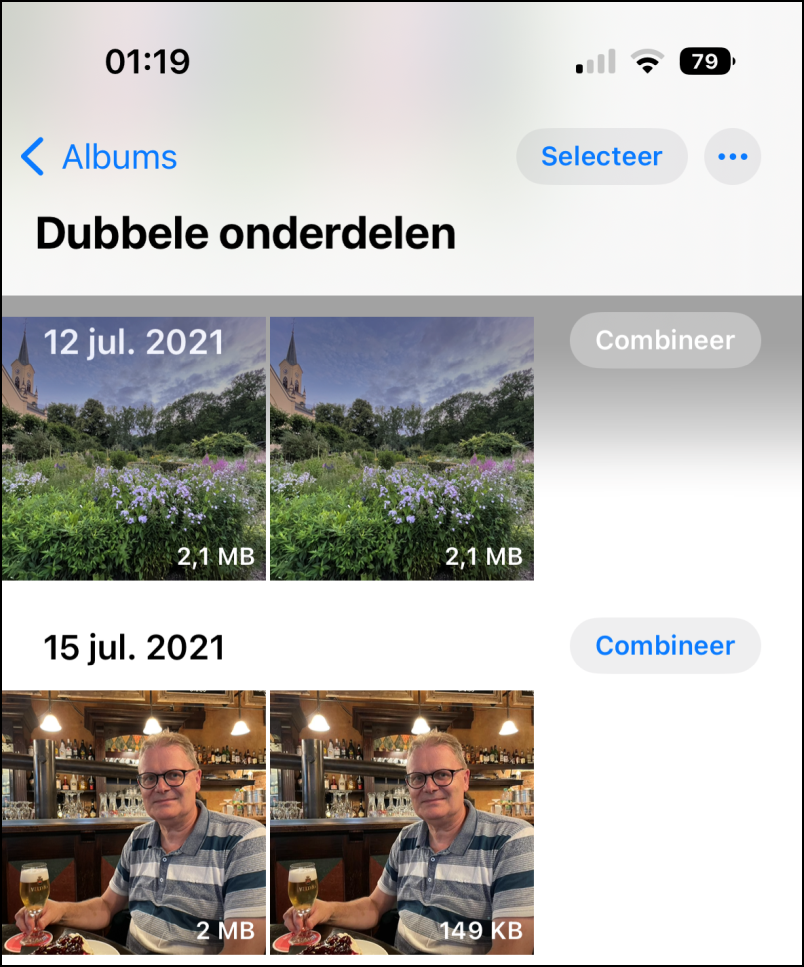 |
| You can delete all your duplicate photos via the select button and Select all |
Tip 5. Delete duplicate contacts
You also often have to deal with duplicate data in the contacts app. These can easily arise if you also use contacts from your Google Account in addition to iCloud. If you at Lists choose for All contacts see yes via View duplicate all contacts that appear multiple times in your Contacts app. At the touch of a button Merge everything you can quickly get rid of all your duplicate contacts. Here too, all information is combined so that you do not lose any data.
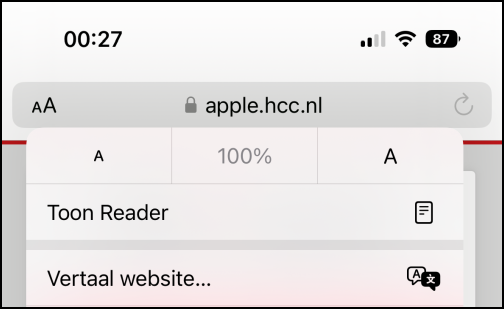 |
| Below the aA button in Safari’s address bar you will find a lot of useful functions |
Tip 6. Click on Aa in the address bar in Safari
Behind that inconspicuous button you will find a wonderfully quiet one readerview that makes reading a large number of websites much more pleasant. Within that reader you can easily adjust the font size and background color. New behind Translate website is that it is now also possible to translate websites into Dutch. Similarly, if you do not have a good command of a foreign language, you can, for example, read articles from foreign newspapers in Safari.
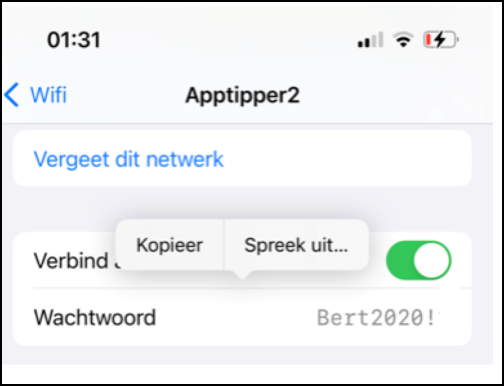 |
| By tapping the dots behind Password can you copy the Wifi password |
Tip 7. View WiFi password
When you need the WiFi password, you no longer have to look at the back of your router and type all those characters. On a Mac, you have been able to consult a WiFi password for some time in the passwords app. With iOS 16 you can now also easily look it up via the i-tje of a known network Settings>Wi-Fi. After clicking on the dots of the password and recognizing your face or fingerprint, the password appears and you can copy it via a small pop-up menu to share with someone via WhatsApp, for example.
Tip 8. Vibration when typing on the screen
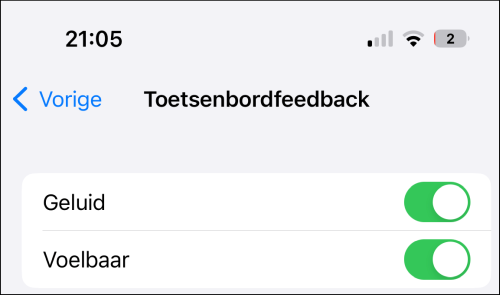 |
| With this setting, typing feels on your iPhone screen more comfortably |
You can enjoy typing on your iPhone even more if you feel a small vibration after each typed character. For example, typing on the screen feels a bit more like typing on a real keyboard. Many Android devices have had this option for some time.
You enable it via Settings > Hear & Feel > Keyboard Feedback > Tactile. You can also turn on a soft tapping sound. But in a quiet environment, if your iPhone is not on silent, that can be a bit disturbing. You also have to take into account that this costs a little more power. But if you don’t type too much, you won’t notice much of this. On an iPhone with iOS 15, the Quickpath swipe keyboard also gave you a vibration feedback on the first touch. You could also experience a similar effect on your iPhone with Google’s Gboard keyboard app.
Tip 9. Reports of severe weather and precipitation in the coming hour
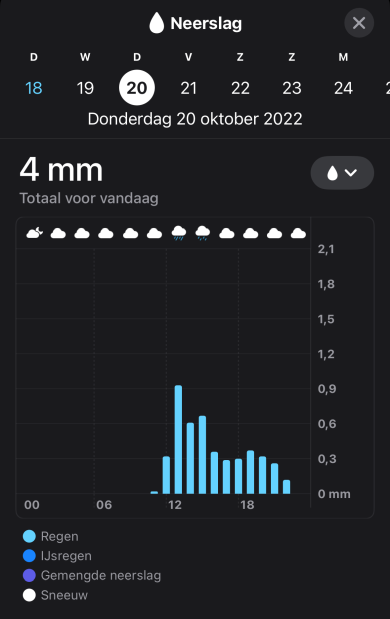
 Apple’s weather app hasn’t changed all that much on the iPhone. But there is more information in it than many people realize. Just click on the temperature or a panel and then swipe sideways to the following days. Via the rain panel you can see a nice graph per day for the next ten days with clear information about how much rain is expected in which hour.
 |
 |
| Clear precipitation charts for the next 10 days in Apple’s weather app |
With iPadOS 16, that weather app is finally also available on the iPad. In the dashes menu you can use the choice Turn on notifications the switches behind Severe weather and Precipitation next hour set to green to receive notifications. Below that you can also turn on the same notifications for any other locations in your weather app. A side note is that with IOS 16 in the Netherlands only Severe weather has become available. At the More informationlink, Apple states that the precipitation reports for the next hour are only available for Ireland, the UK and the United States. Hopefully the Netherlands will also be added to that list soon.
Tip 10. Actions on more files
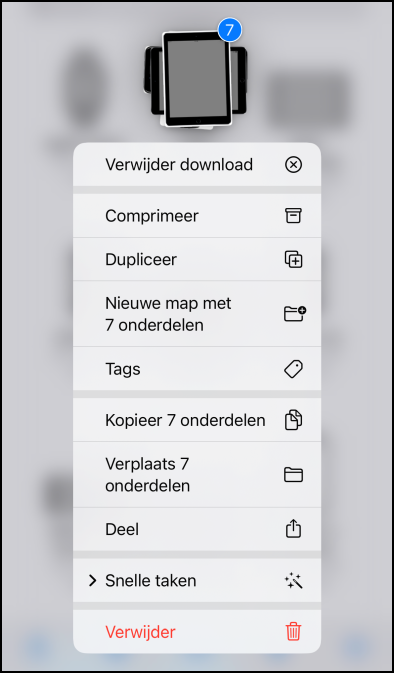
This trick is not entirely new, but sometimes just very useful. That is why we close here with this tip. After the choice Selecting you can tap multiple files in various apps. If you hold that selection a little longer, a menu will appear that allows you to do something with all those files in one fell swoop.
This way you can easily put multiple photos or files in an album or folder. With the choice Compress create one zip file that takes up less space. This trick works in the Files app, Photos app, Mail app, Notes app, and Assignments app.