
Canva is a free design program for images, presentations and posters and can be used via any web browser. In this workshop we will explain step-by-step how to make a collage using Canva.
 Megan van der Wagt
Canva is widely used for designing projects. This makes it possible to design PowerPoint presentations, put together a CV, design a logo or, for example, a Valentine’s Day card, as you have read in PC-Active 334. By adding smarter functions, Canva continues to expand and the possibilities with Canva increase. Today we are going to make a collage in Canva. The photos we use in this workshop are all AI-generated by the AI program in Canva. You can also read how to take such photos in this workshop.
Step 1 Account and format
Would you like to read how to create a Canva account and how you can adjust the size of your document yourself? Then you can read this in the Canva article in PC-Active 334 on page 20.
Step 2 Choose template
Canva has hundreds of templates for all kinds of different purposes. You just have to look it up and a whole list of options will appear in front of you. There are tons of free templates, but some of them require a Canva Pro account to use. Don’t worry, there are plenty of free options to suit your needs.
USE TEMPLATE
Step 3 Look for the perfect template
If you choose to use a template from Canva, it is very simple to make it your own.
 |
|
|
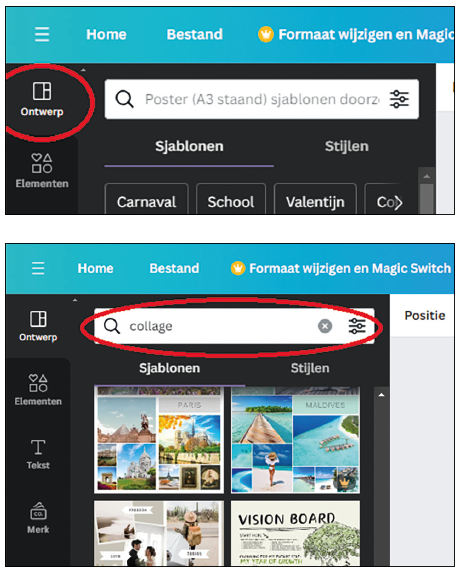
Click on design and search for a collage |
But it’s important to find the template you want first. After choosing the size, you should have a blank canvas in front of you and a large tab open on the left side of your screen called Design. This will automatically appear on your screen. On this tab you can search for the desired design, in this case a collage. Once you’ve found a template you want to use, click on it. The template automatically ends up on your blank canvas.
Step 4 Upload all the images you want
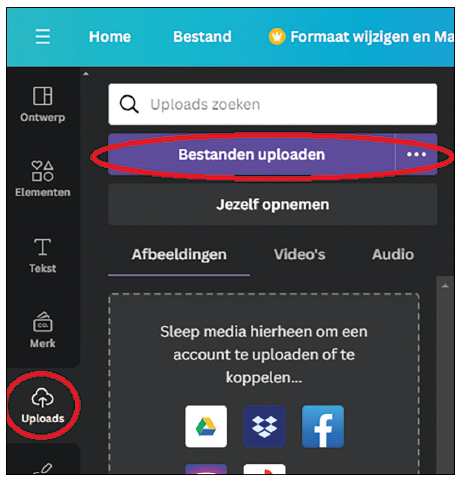
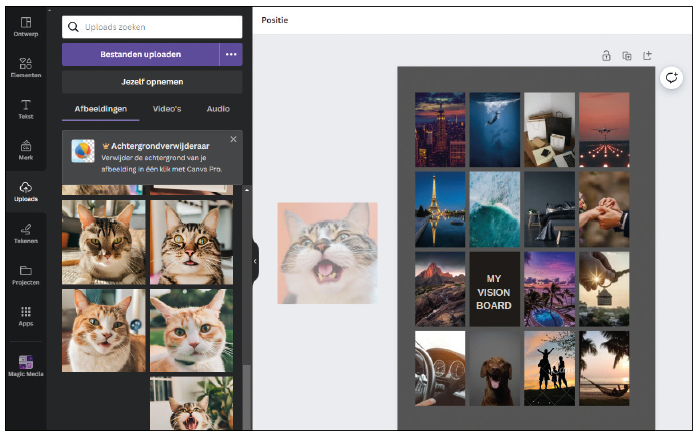
The template most likely contains photos or elements that you don’t want to use: you naturally want to make it your own. You can do this by first uploading your own photos. You do this under the tab Uploads. There you will find the purple button Upload files. Upload all the photos you want to see in the file here. As an example in this workshop we choose a collage of our AI-generated cats.
 |
 |
|
Click upload and upload all your files Canva’s AI function can be found under elements |
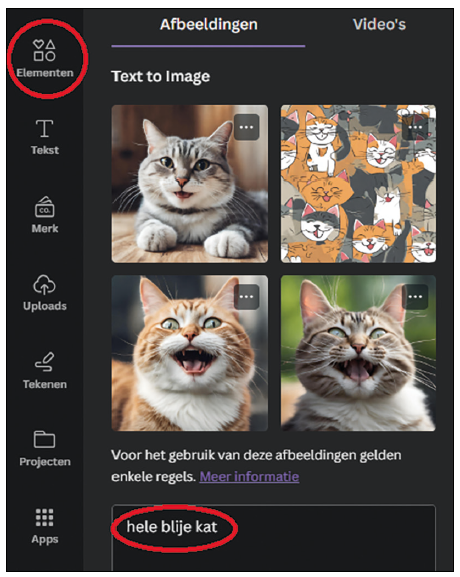
It is possible to create AI images via Canva. The major advantages of this are that you will in any case not have any problems with image rights (copyright) and that you create a unique design yourself. You do this under the heading Elements where the cup AI image generator can be found. Click on the square with the plus sign, which will reveal a square text box and the option to choose an image style. Write down your wishes in as much detail as possible in the text box. Through on the purple Generate-button, four examples will appear. Displeased? Then click Regenerate.
 |
|
Drag the files onto your canvas |
Once everything is uploaded, you can drag the photos to where you want them. Canva often ensures that the photo is automatically adjusted to the size. So all you have to do is drag.
Step 5 Background color or new elements
 |
|
|
Top left is the square for the background color |
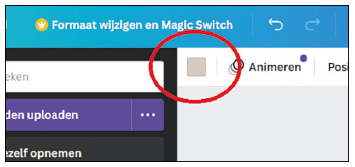
After the photos have been added, you may also want to change the background color. You do this by clicking on the square at the top of the screen, which is now gray in the example. Then choose the color of the background. After you have found the right background color(s), you can add certain elements to your design. You can do this under the heading Elements where you can look for small images that you want to add to your design.
Step 6 Save the collage
Is everything in this collage to your liking? Then you can save the file via the button To share. Here you will have the option to download your file, share it on social media or have it printed by Canva. Once you have the collage in the right place, you can enjoy your end result.
DESIGN YOUR OWN
If you want to take matters into your own hands, you can of course also design the collage yourself. Although it can sometimes be easier with a template, this method can often be a lot more fun and creative. We therefore continue with Step 3 here.
Step 3 Kiis a background color
You determine the entire atmosphere of your collage with the color of the background. As can be found in a few steps, you can adjust the color by clicking on your (currently) empty canvas and looking for the white square at the top. Click on this and change the color of your background.
Step 4 Coming up with a layout
A collage can come in different forms: it can be a busy and overlapping collage, but also calm and organized. It’s important to think about what you want to do with your collage before you start.
Step 5 Search for elements
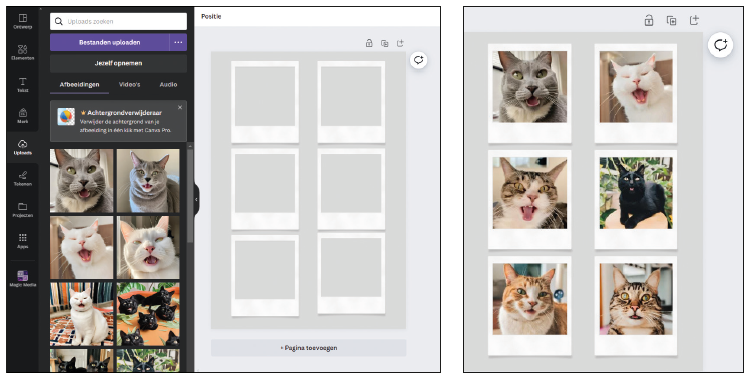
Even though you design yourself, you can still use the elements of Canva. In this case, for example, this could be a polaroid frame perhaps a photo frame or other elements that may be related to this. So if you want to use an element in advance, it is important to add it now. We choose to add polaroid frames.
 |
|
Canvas with blank polaroid elements and the AI photos inside |
Step 6 Upload all the images you want
Then it’s time to upload all your photos. You do this under the tab Uploads. There you will find a purple button Upload files. Upload all the photos you want to see in the file here.
Step 7 To work
 |
|
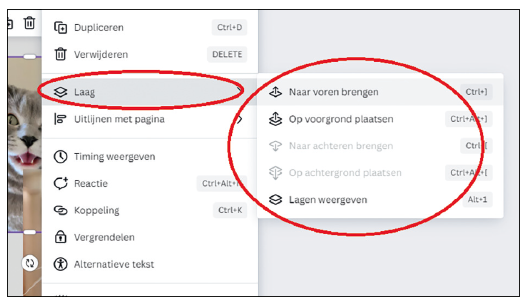
| Click on the photo, then on Layer and choose what to do with the photo |
From this step onwards, your own creativity is mainly involved. Do you use elements? Make sure you place them in the right place and that the photos fit well into the element. Are you going to work on a busier collage and do you want to overlap the photos? Then you can start dragging the photos to the right place.
If you want to put a photo more in the foreground or in the background, this is very easy to adjust. First you click on the photo, then on the three dots and then you start looking for Low. There are several options you can choose from to adjust the layer of the photo.
Step 8 Save the collage
Is everything in this collage to your liking? Then you can save the file via the button To share. Here you will have the option to download your file, share it on social media or have it printed by Canva. Once you have the collage in the right place, you can enjoy your end result.
 |
|
Save and enjoy your end result |
.