
You have made a series of video recordings and you would like to forge them together into a beautiful film. You are not really sad about the passing of Windows Movie Maker, because that was just a lightweight. HitFilm Express has a much more powerful alternative, with numerous possibilities and effects. The learning curve is a bit steeper and that is why we are helping you on your way.
Tip 01: Modules
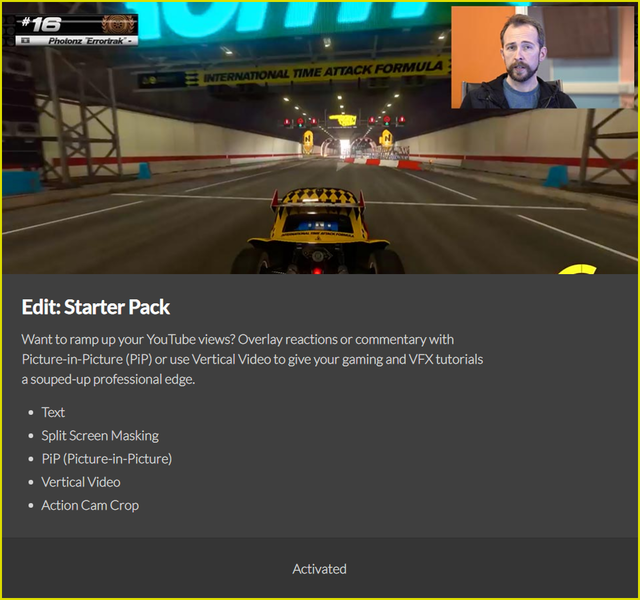
HitFilm Express (HFE) is not yet well known by the general public and that is quite a shame given the many possibilities of this video editor. The program is available for both Windows 8 (64 bit) and macOS 10.11, or higher versions. In the free version, although some effects and options are not available as standard – unless you do not care about a watermark in your video images. But fortunately you do not immediately have to pay the full £ 299 for the complete professional edition. You can also opt for a free basic version, to supplement that optionally with specific paid add-ons. They are not really expensive. The Edit Starter Pack, for example, barely costs you ten euros, which gives you access to image-in-image, split-screen masks, vertical video and all kinds of text animations.
In this article we will get started with the free version. Keep in mind that HFE requires quite a bit from your machine: preferably 8 GB of ram, a graphics card with at least 1 GB of video memory (or 2 GB for 4K UHD video) and at least one Intel Core i3 or equivalent processor (preferably core 5).
Tip 02: Activation
You download HFE here. After installation you still have to activate the tool via Activate and unlock and you need a login ID for that. You make that here On.
After the activation and a restart of the tool you can then get started. Through File / Options / Activation you can see again which extra features (add-ons) you have already purchased. For example, the add-on Edit: Starter to purchase, click here HitFilm Store, select the relevant add-on and follow the further purchase instructions. You will also find the button in this window Deactivate Program on: useful if you ever want to install the tool with the same account – and the already purchased add-ons – on a different PC.
When starting up, you end up on the tab by default Home, with links to various instructional videos and an online user guide – which is also available as a pdf of over 500 pages. Good that you have it within reach, because you understand that we can never discuss all the possibilities within the scope of this workshop. If you do not get to see the Home panel, you can still do it via the Viewmenu or with the shortcut Ctrl + 1.

Thanks to the modular design, you only purchase the modules that you want
Tip 03: Project
Time now to start our first project. You do that via File / New or with Ctrl + N. You now have the opportunity to set some parameters for your project. In the drop-down menu at Template you will immediately find around 50 project templates, but via the option Custom, at the very bottom, you can also compile and save your own profiles. It is also possible to adjust parameters during your project. HFE will give you a signal if the video material used deviates from the set options. Confirm with OK as soon as you have configured everything as desired, so that the actual editing module becomes visible – also available via View / Edit or with Ctrl + 2.
From the Viewmenu you can personalize this interface in all sorts of ways. With the option Panels decide for yourself which panels you want to see, or select via Workspaces a ready-made workspace with the corresponding panels. We prefer the workspace here Editing, but you are free to adjust it and record your own workspace with Save Workspace – it will then automatically become available in the list with Workspaces.
Be sure to also check the options at File / Options. However, we stick to the default values here.

Tip 04: Retrieve media
Without media files you can of course do little with HFE, so it is best to first retrieve all the video clips, images and audio files that you want to use for your project. You do that in the Mediapanel, top left as standard, on Import clicking and retrieving all desired files. A handy alternative is that you simply go to it Mediapanel dragged.
At the bottom right you notice the actual Editorpanel, including the obligatory timeline. You will find the tracks on it Video 1 and Audio 1 On. The intention is that the intended media get a place here. To begin, drag a video clip from it Mediapanel to the video track. Give your other video clips a place in this video track.
It is also possible to drag a clip to the empty track at the top. HFE then automatically creates an extra video track (2nd, 3rd and so on) for these clips. You will notice that the accompanying audio ends up neatly on a separate audio track.
Good to know: you will find it at the bottom left Historypanel on. Adjustments that you are not satisfied with can be quickly undone from here.

Tip 05: Trim operations
You have now imported your clips, but we can imagine that you only want to use one piece of certain video or audio clips. Such a trim operation is possible from within Trimmer-panel. Select the clip in it Mediapanel or double click on the clip in the timeline. In the Trimmerpanel double click on the time display and adjust the start time. Or you can drag the white ball to the desired time. Then click on the button Set In Point. Repeat this procedure before the end of the clip (Set Out Point).
Of course you want to transfer that fragment to the timeline now. There are two buttons for that: Insert Clip and Overlay Clip. Both ensure that the clip ends up at the location of the play button. The difference is that with the first button any video clips move to the right to make way, while with the second option the video images are replaced by the clip.
You can also trim clips on the timeline itself. We will show you how to remove a video clip in which you do retain the associated audio, after which you can replace that video clip. That means that you first have to break the link between the original video and the audio. To do this, right click on the clip and choose Unlink (the switch icon on the clip disappears). Next, move the mouse pointer to the right edge of the video clip so that it changes into a brace. You then drag it inwards: a so-called L-cut.

Tip 06: Extra traces
In tip 4 we have already indicated that you can create multiple video and / or audio tracks on the timeline. At first glance, that doesn’t make much sense: after all, only the top clip appears in the resulting video, and combined audio may result in a cacophony. You can easily adjust the latter. Suppose you have an audio track for commentary and one for background music. You can then quickly lower the volume of the latter by dragging the white horizontal line on the audio track with the mouse pointer. You may increase the other volume a little.
Something similar is also possible with video images. Here, the white horizontal line indicates the opacity value: the lower the line, the more transparent the video. In this way you can make the underlying video visible.
By the way, there is still a way in which two video tracks “connect” to each other: the so-called mix or blend mode. For example, just right-click on the top video clip and choose Blend: you can now experiment with 20 mix modes.

Tip 07: Keyframes
We have already played with some effects and these are applied as standard to the entire video clip. However, it may happen that you want to apply an effect to only a small part of such a clip. This is possible with the help of so-called keyframes.
Suppose you want an audio clip to sound quieter only within a specific fragment. Then, with the Ctrl key pressed, click on the white horizontal line of the audio volume at the start and end points of this fragment. A blue diamond is now visible at each of the two points: the so-called keyframe. You can also create extra keyframes and you can quickly jump from one keyframe to another via the arrow buttons at the top left of the timeline.
To lower the volume between two keyframes, double-click the first keyframe and then open it Controlspanel (top left, the tab next to Media). Here you set it Volume Level as desired: only the fragment up to the next keyframe will now play less loudly.
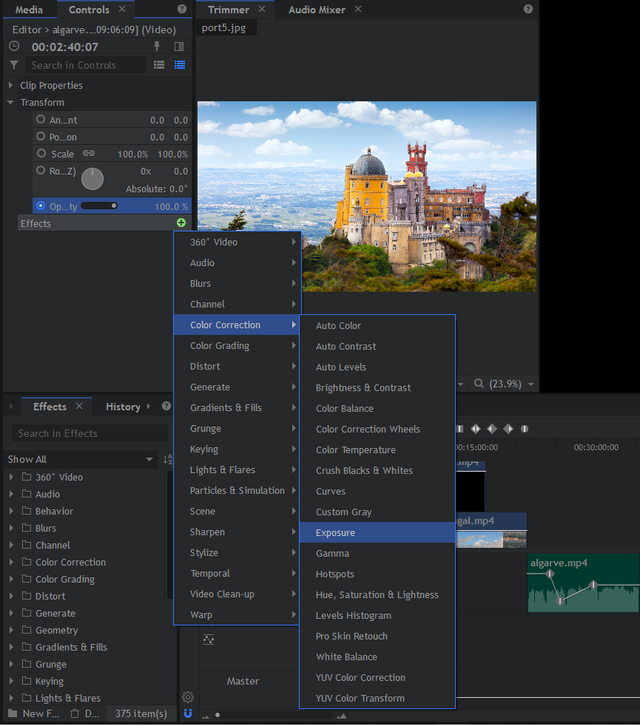
This technique can also be perfectly applied to video clips: in the Controls-panel gives you access to numerous effects via the green plus button.
With keyframes you only apply effects where you find that necessary
Tip 08: Picture-in-picture
We already indicated that you can also use nice image-in-image effects (picture-in-picture, or PiP) with the Edit Starter Pack, but if it is allowed to be a little less advanced, it can also be done for nothing. Logically, we need two video tracks for this effect (see also tip 6): we want to show one image simultaneously with the other, albeit in miniature format.
Select the first track to start. In the Viewerpanel, top right, you notice four handles on the respective viewing angles and you can now drag them inwards. Hold down the Shift key to save the aspect ratios. You can then move and rotate this miniature image using the blue square.

Tip 09: Composite shot
If you are interested in gimmicks, then you should definitely not ignore the so-called composite mode of HFE. This is because it is intended to be able to apply all kinds of effects as well as possible. Wait, for example, you thought of a spotlight on your video images: everything is monotonous in color except the image under the spotlight. This gimmick requires some preparation, but in this way you also quickly get acquainted with a number of useful options.
Right click on the clip either in it Mediapanel, either on the timeline, and choose Make Composite Shot. Provide a suitable name for this shot and confirm with OK. An extra tab with corresponding timeline (next to that of the standard) opens Editor). Switching is a matter of clicking on the desired tab.

Tip 10: Mask: effects
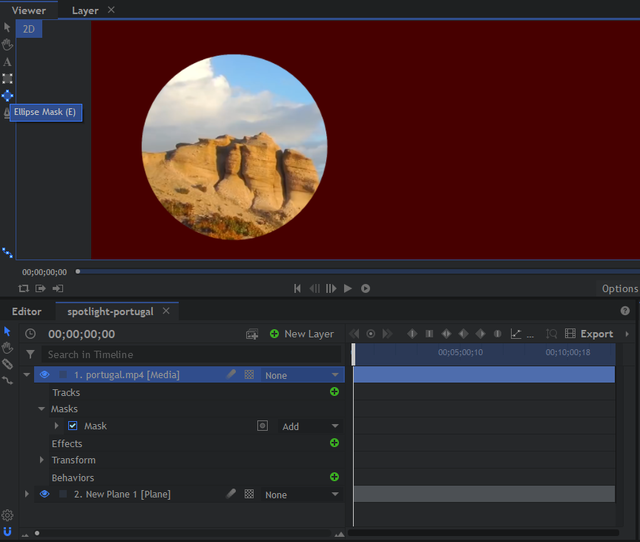
The shot currently only consists of one layer. You add an extra layer to that via New Layer / Plane (Ctrl + Alt + A). Suppose Color Select the desired color for your coating and confirm with OK. You can now drag that layer under your original layer so that it no longer covers your video image. Then select the layer with your video images and press the button Ellipse mask, to the left of the Viewer panel. With the Shift key pressed, you draw a circle shape on the preview image.
When you then click on the small arrow next to the layer (on the tab of your composite shot) a menu with items such as Masks, Effects, Transform, and so on. click on Effects and press the corresponding plus button, after which you can add all kinds of effects to the circular mask. Each effect can in turn unfold for additional options.
By the way, there are a lot more effects available: you just have to take them from it Effectspanel (bottom left) to your layer. Here you will find the sections, for example Transitions (transitions) to and in the section Generate do you think Texteffects back. To adjust an effect, click it in the layer and open it Controls-panel.
The securities arsenal is almost inexhaustible
Tip 11: Mask: animation
To make the spotlight move over your images, open the item in the layer Masks and select you Transform. Click on the circle Position so that it turns blue: you have created a keyframe with this.
Now move the drag button at the top of this panel a little to the right where you create a second keyframe in the same way: you do that by pressing the circle button with the white dot (Toggle Keyframe (s)) to click. You set a different position for this second keyframe, either by pressing 0.0.0.0 Bee Position clicking and entering the x, y coordinates, either by the button Selection Tool next to it Viewerwindow and move the mask with the mouse. In this way you can create additional keyframes, each with a modified position. The result indeed appears to be a moving spotlight.

Tip 12: Export
If you are satisfied with your video edits, it is time to cast them into a definitive form. Open the menu View and choose Export (shortcut Ctrl + 3). In the Projectpanel get the different timelines and composite shot layers popping up, accompanied by one Export-button. Via these buttons you either export the entire content (Contents) or the fragment between the In and Out points – these points can also be quickly adjusted here by clicking on the time indicators. The selected clips now end up in the Queue-panel.
From the Presetspanel you define the standard format for your video file, but you can also adjust this profile per item from the Queue-panel. You can add your own profiles simply with the button New Preset (bottom right).
Is everything neatly in the queue, then you put the button Start Exporting, at the very bottom, the labor-intensive export process in progress. You follow the progress in the Preview-panel. Good luck!
