
© Pixabay – Gray Rhee
Permanently delete all data stored on your storage devices in a secure way to prevent any data recovery attempts.
Are you planning to sell a PC or part with an external storage medium? Before getting rid of them, it is recommended to carry out a cleaning in order to ensure that all the potentially sensitive data they could contain have been definitively erased.
To be certain, it is generally advisable to carry out a secure formatting which will take care of overwriting the residual data which is on the disk by writing random data over it several times. Thanks to this technique, the next owner of the PC or storage medium you want to part with will not be able to recover your data, even using dedicated data recovery software.
We will see in the following lines two cases. The first concerns the formatting of the internal storage media of a Windows PC. The Microsoft operating system incorporates a reset system through which you can return your computer to its factory configuration. Be careful however, for the data of a PC to be deleted, you must tell the Windows utility to carry out an erasing in several passes, longer, but which ensures an irreversible eradication of the data stored on the device. The second concerns the case of external storage media. Again, Windows includes in its disk management module a tool for performing a secure format. Here’s everything you need to know to securely erase your hard drive before you part with it.
How to format a PC securely?
If you are about to give away your computer, it is best to reset it, making sure to perform a complete data deletion. The manipulation is not insurmountable and can be done very easily by everyone thanks to the wizard integrated in Windows 11. Here is how to use it.
1. Go to Settings
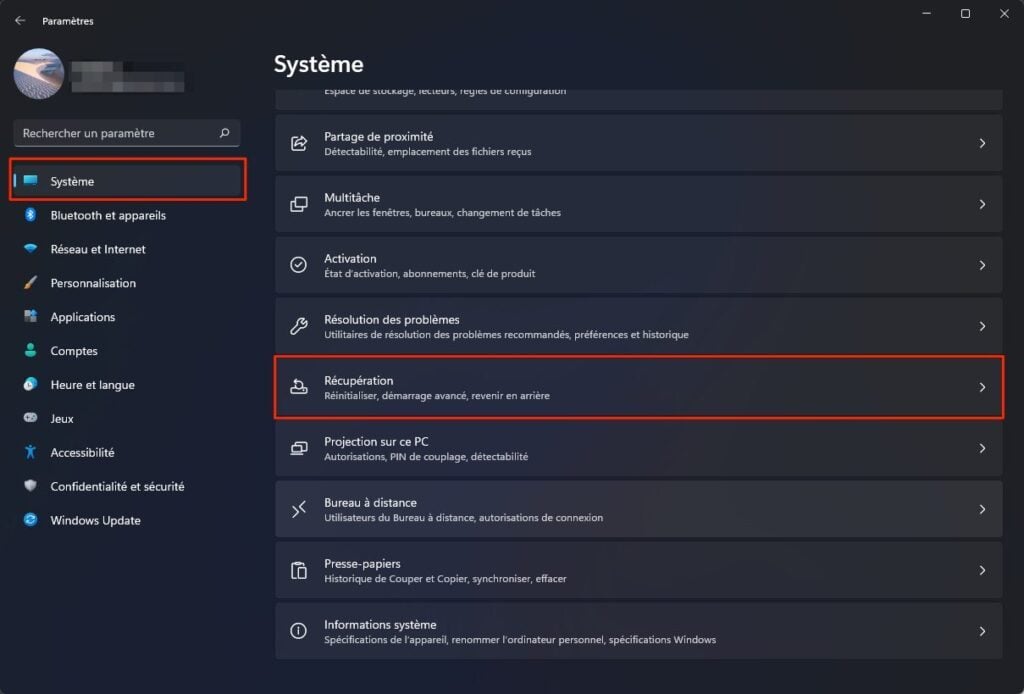
Start by opening Windows Settings using the keyboard shortcut Windows + i. Select System from the left column and then enter the Recovery menu.
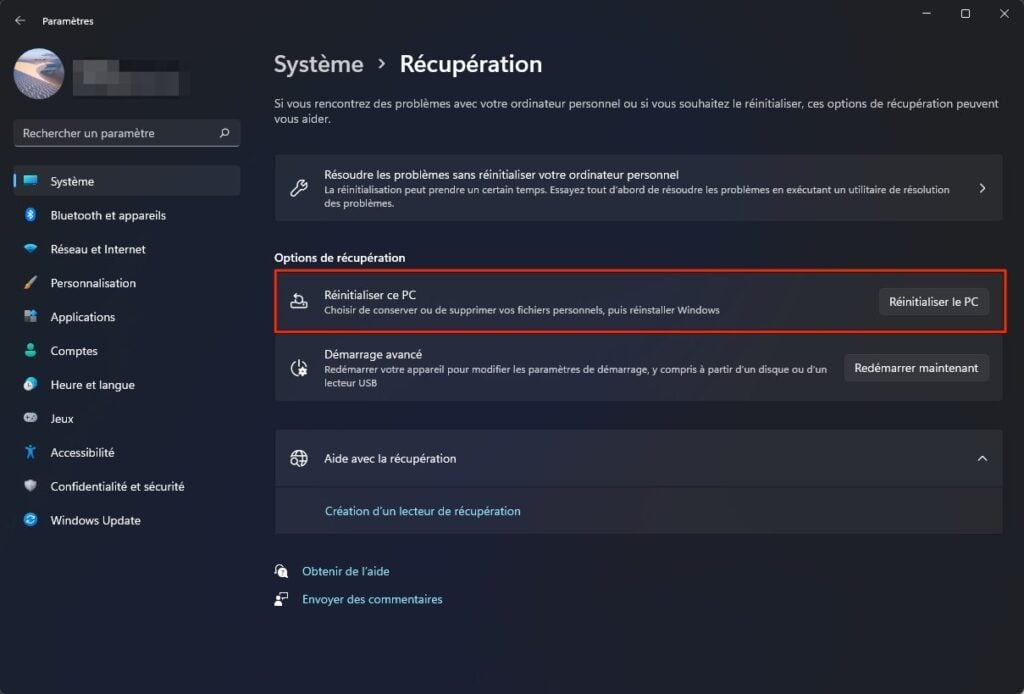
In the next window, click the Reset this PC button.
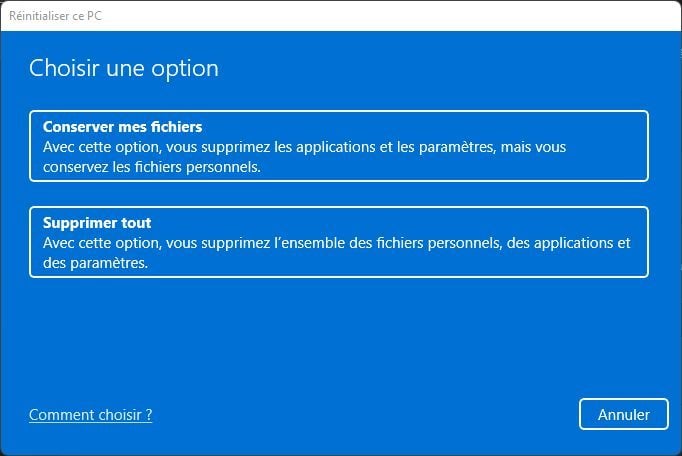
2. Choose your reset options
A new window for setting your reset preferences should open. Click Delete All.
The Windows Reset Wizard then offers two options for reinstalling the operating system: Cloud Download, and Local Reinstallation.
If your Internet connection allows it, prefer the Cloud Download option, which is a little longer (it requires downloading 4 GB of data) but will reinstall the most recent stable version of Windows.
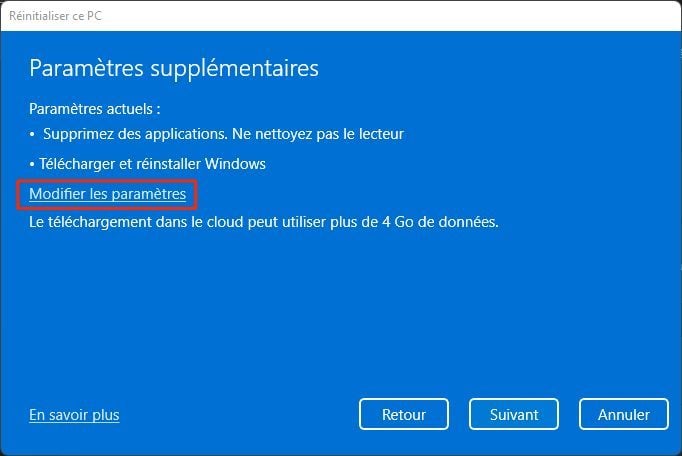
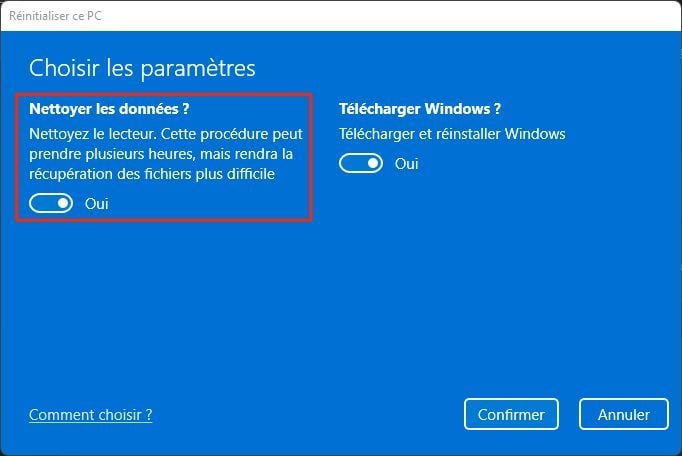
The Reset this PC wizard then displays a summary of the settings you just selected. Click Change settings to customize additional reset settings.
Under Wipe data? option, toggle the switch to Yes and click Confirm button. By activating the Data cleaning option, Windows will perform a secure deletion of data that has been stored on the machine. The reset process will be longer (it may take several hours), but will make possible data recovery attempts by the future owner impossible.
In the Additional Settings window that appears with your changes, click Next and wait a few moments. Finally, click on the Reset button to start resetting your PC and securely deleting the data it contains.
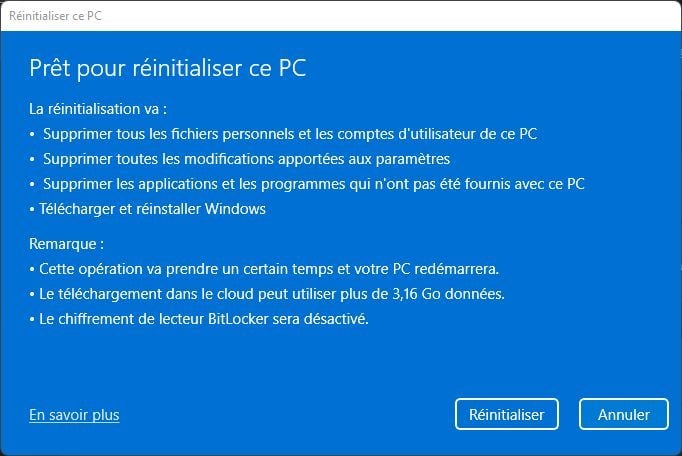
Now be patient while Windows resets your machine and completely deletes your data. During this process, which can take several hours, your computer will restart several times.
How to format a hard drive securely?
To securely erase the contents of an external storage medium, a few command lines in the Windows command prompt or in Powershell are enough.
1. Open Terminal
Right-click on the Start menu and click Windows Terminal (Administrator) to open PowerShell in administrator mode on your machine.

2. Launch Diskpart
To delete data from external storage media, you can use Diskpart, a command-line tool built into Windows. To do this, simply type the diskpart command and validate by pressing the Enter key on the keyboard.
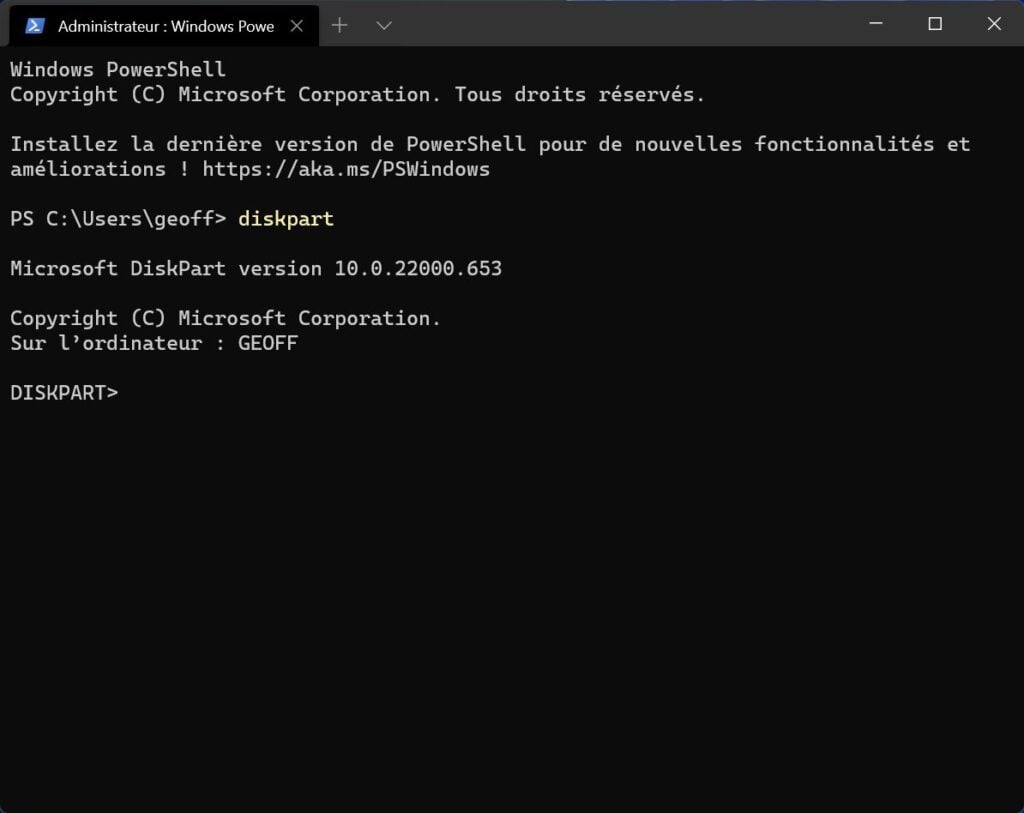
The terminal should then display at the beginning of the line DISKPART> sign that the tool is correctly launched in the Terminal.
3. List your drives
You should now list the disks connected to your PC. To do this, type list disk and validate by pressing the Enter key.
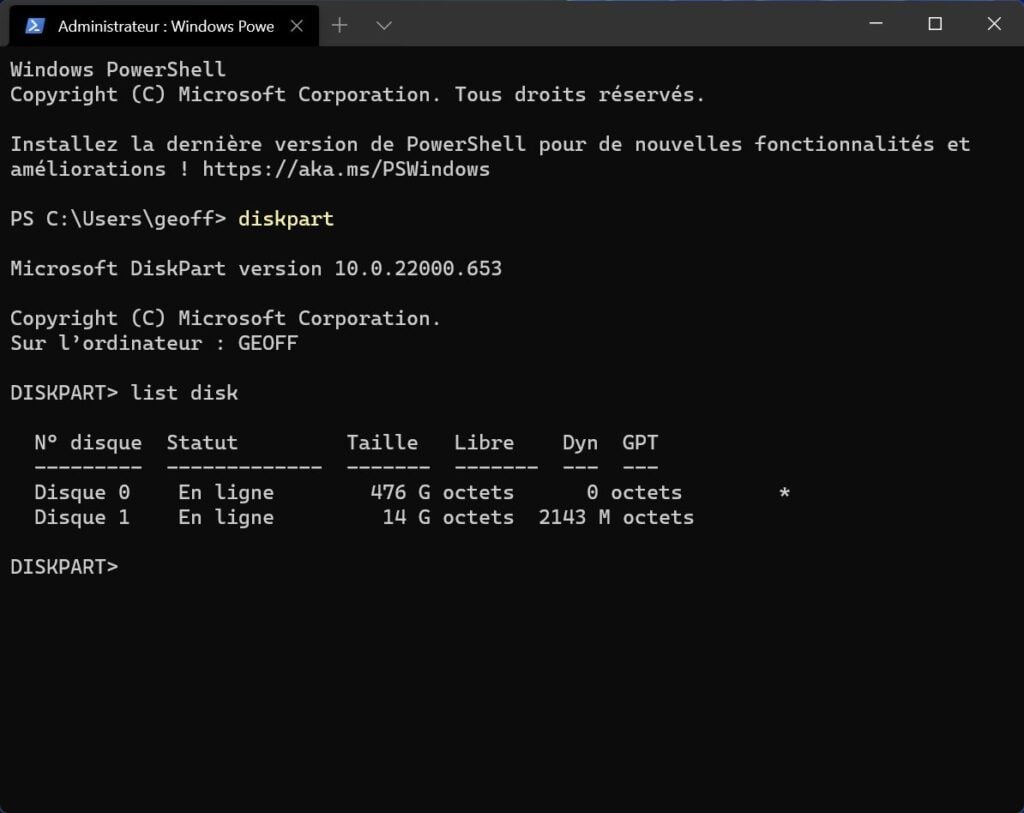
All storage devices connected to your PC should then be displayed. Locate the Disk number corresponding to the storage device whose data you wish to securely delete.
4. Select your device
To format your storage medium, you must first select it in diskpart. To do this, type the command select disk x where x represents the number of the disk corresponding to your storage device.
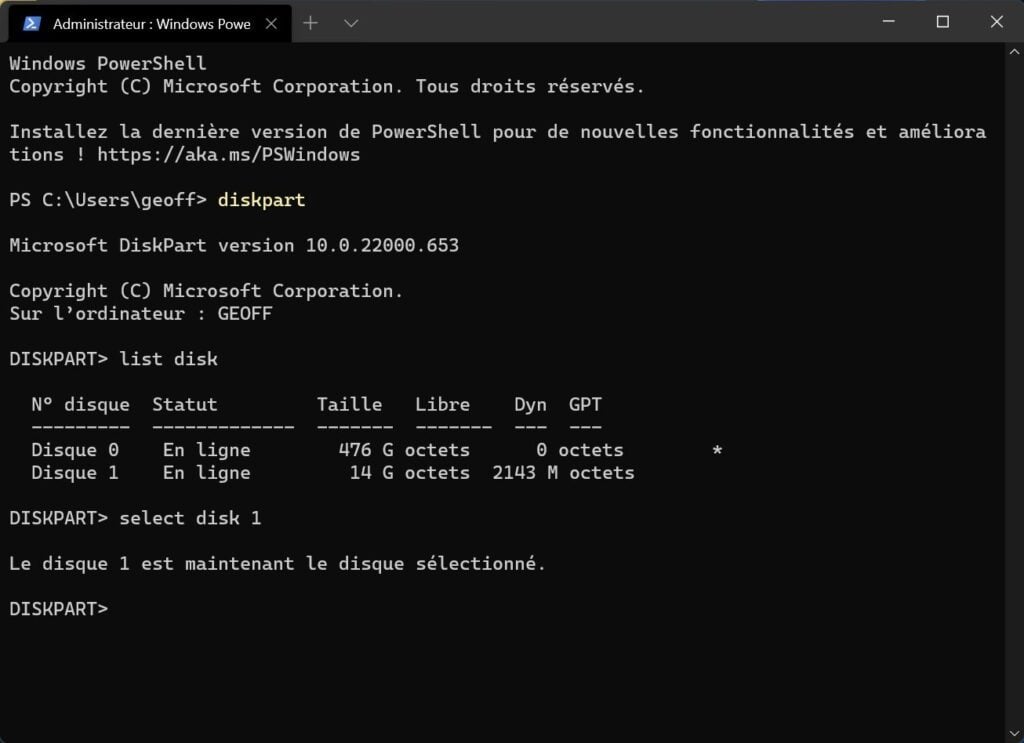
Once it is selected, Diskpart should show Disk x is now the selected disk.
5. Clear your storage device
To securely delete the contents of your storage medium, type clean all and validate by pressing the Enter key on the keyboard.

Depending on the size of your storage media, the data deletion process may take longer or shorter. On our 16 GB USB key, the utility ran for almost two hours to perform the secure deletion of data. If diskpart takes so long, it’s simply because it takes care of rewriting data on the entire storage device to make old data unreadable. When the data deletion is complete, Diskpart displays the message Diskpart succeeded in cleaning the disk.
6. Format the disk
Once your storage media has been erased, it cannot be used as is. You will have to format it, as a rule.
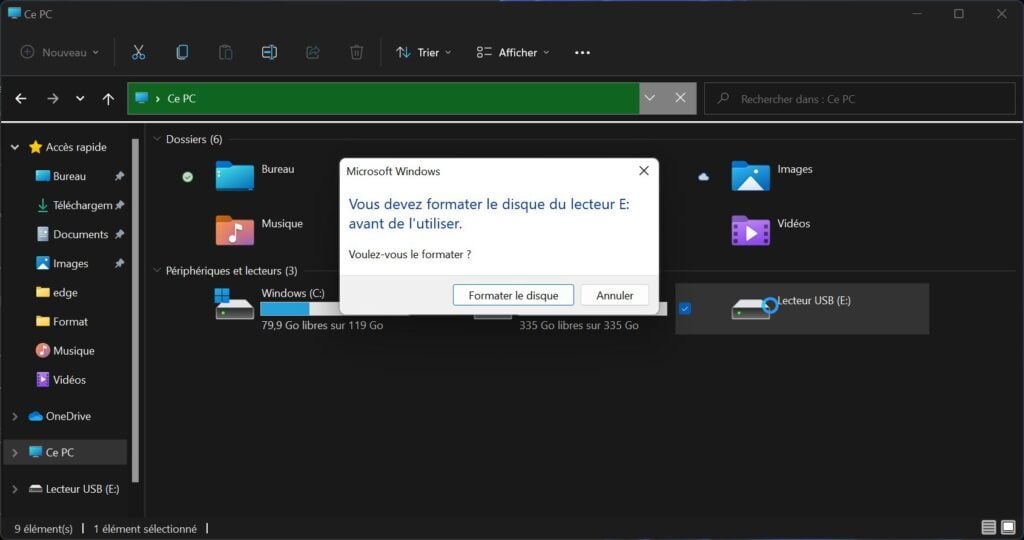
In principle, you will only have to connect your storage device to your machine for Windows to detect it and offer you to Format the disk. If necessary, you can also decide to partition your disk to organize your files there.