Whether you want to furnish or renovate a bathroom, a flat or a complete home, let Sweet Home 3D be your architect. With this free tool you can draw the rooms, place the furniture and walk around in 3D in your dream project.
Toon van Daele
There are several tools for virtually designing and furnishing spaces. A well-known tool is SketchUp (www.sketchup.com), available as a free web version for 3D modeling from your browser. Unfortunately, this app is quite complex. The online IKEA planners are much simpler (www.ikea.com/nl/nl/planners), but unfortunately only suitable for those who want to furnish spaces such as a bathroom or a kitchen with IKEA furniture. No, give us the free Sweet Home 3D: simple, flexible and with the option of a virtual 3D tour.
 |
| We choose the desktop application under Windows |
Download
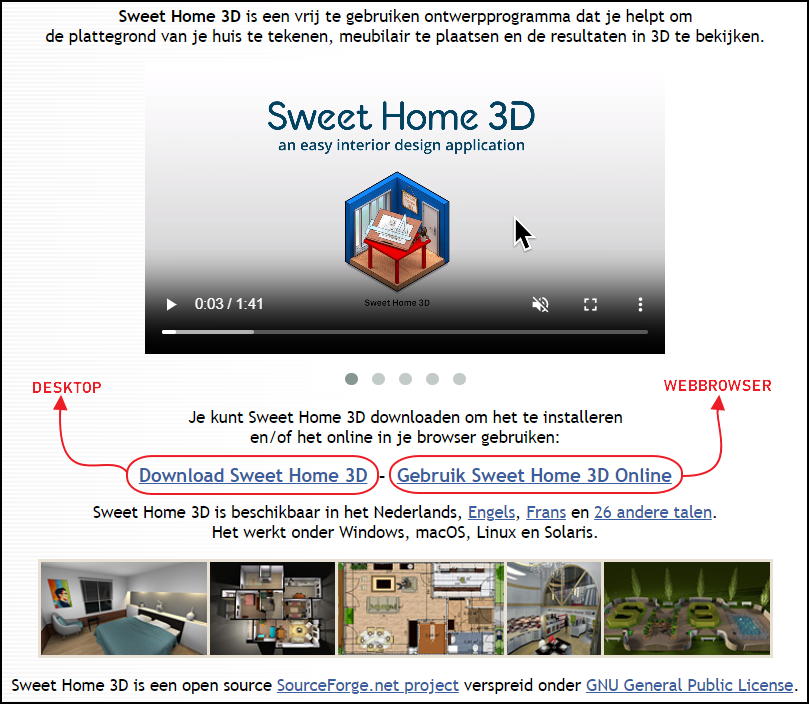
Sweet Home 3D is available at https://sweethome3d.com/en. You have the choice between downloading the software or using it online. Although online designing can be done directly from the browser, we prefer the desktop application. It works without a permanent internet connection, is a bit more stable and faster. To download, click on Download Sweet Home 3D. The app is compatible with macOS, Linux and Windows. For Windows, choose the option Windows installer.
 |
|
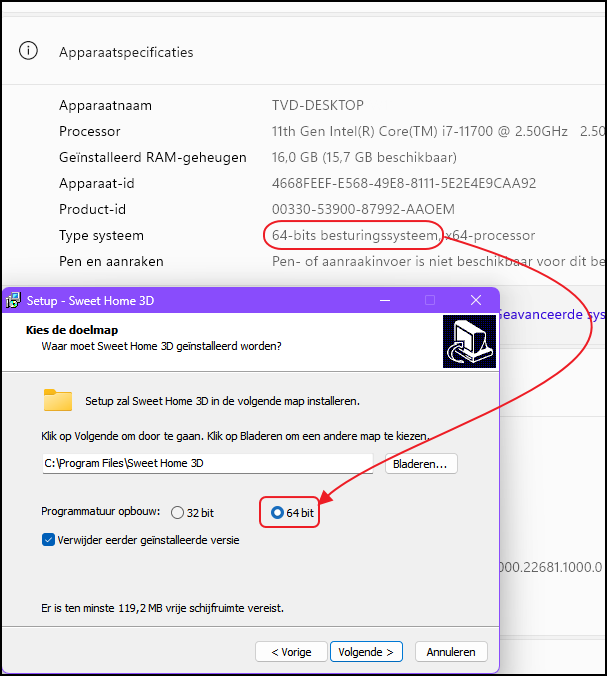
Select the ‘software architecture’ that matches your Windows operating system |
Installation
To install Sweet Home 3D, double-click the downloaded exe file. Choose Dutch as desired language and accept the license agreement. At some point you will be asked to choose between 32bit or 64bit for the Software Structure. For Windows 11 users, 64bit the right choice. If you are using an older version of Windows, right click on the Windows start buttonselect Institutions and go to System / Info. Below Device Specifications do you think System typefor example 64-bit operating system. Once you have selected the correct version, you can continue the installation and immediately launch Sweet Home 3D afterwards.
 |
|
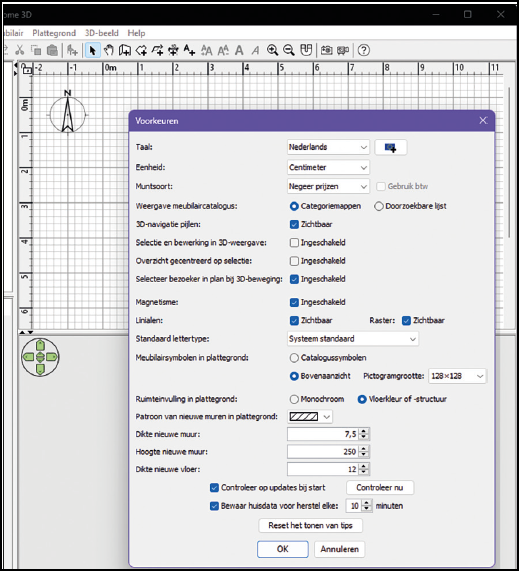
The default preferences are usually sufficient |
Boot up
When you start the app, you will see four panes: a catalog of elements such as furniture and lighting (top left), a list of actually used elements (bottom left), the design space (top right) and the 3D view of your 2D design (bottom right). The program should be in Dutch, but you can change this if necessary via File / Preferences bee Language. Feel free to explore the other options in this preferences window. For example, you can set the unit of measurement (default centimeter), rulers and grid. Confirm any changes with OK.
Before placing the walls, it is useful to first draw a floor plan and use it as a blueprint. This can be done in a drawing program or, if necessary, with pen and paper, after which you take a photo of it with your smartphone, for example.
 |
|
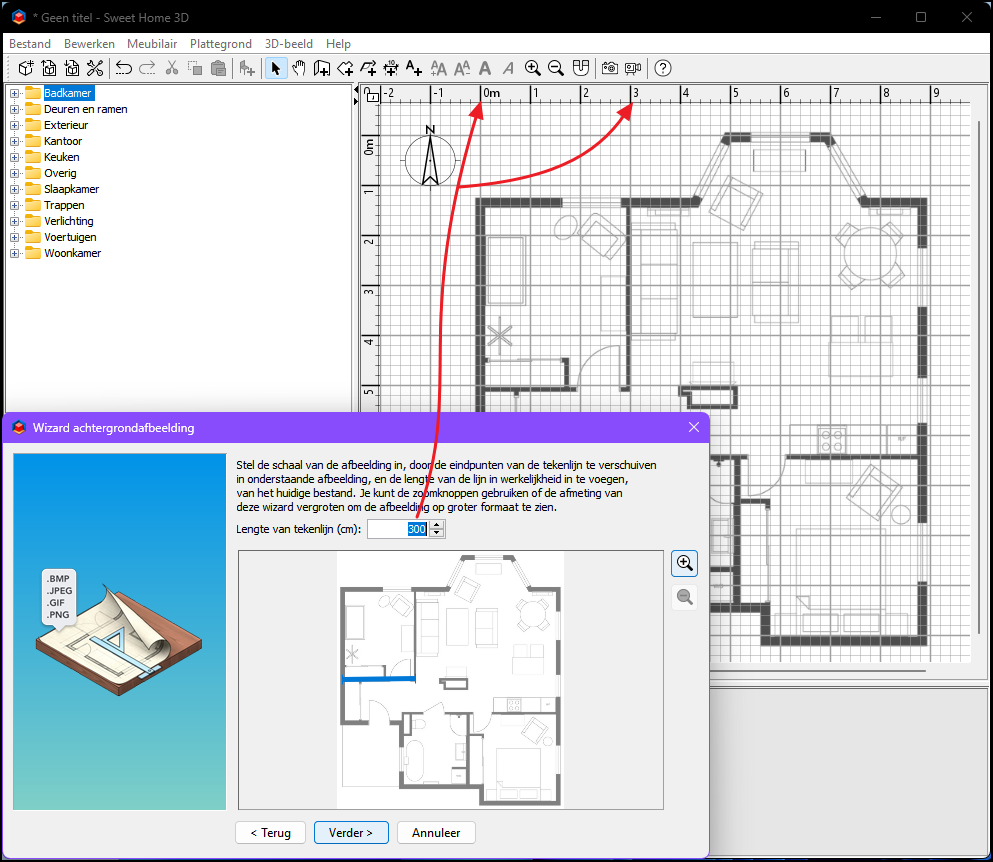
Make sure that any floor plan is entered into the design window at the correct scale |
Floor plan
If you don’t want to import a map, you can start building walls right away. If you find such a map useful, go to the menu Floor plan and select Import background image. Click on Choose image and navigate to your map file, a bmp, gif, jpg or png file.
Now comes an important step: setting the scale. Position on the image the two ends of the blue line between two points of which you know the exact distance. You can zoom in and out with the magnifying glass buttons. Enter this distance at Length of drawing line (cm). Click Next and place the blue dot on the spot you want as the ‘zero point’ (0,0 coordinates) of your 2D design, such as an outside corner. Round off with Completeafter which the scaled floor plan will appear in your design window.
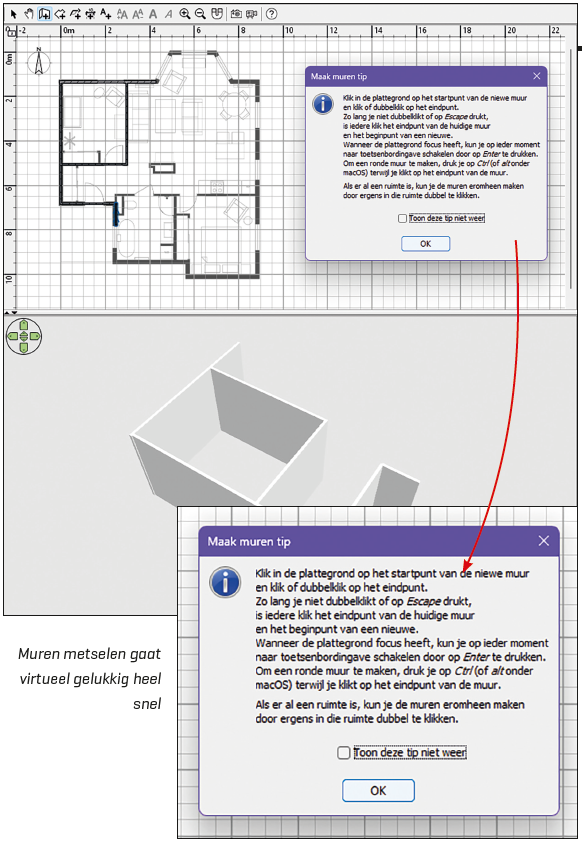
Walls (1)
You are now ready to place walls. For now, don’t worry about windows and doors, those will come later. First, check via File / Preferences whether the thickness and height of the walls are set correctly (default 7.5 and 250 cm). For example, you can set a different thickness for interior and exterior walls.
Zoom in enough with the magnifying glass buttons on the toolbar to draw your first wall. Now press the button Make walls – the names of the buttons appear when you hold the mouse pointer over them. Then click exactly on the starting point of the wall you want to draw. Double-click on the end point, or click once if you want this point to automatically be the starting point for the next wall. Press Ctrl for curved walls and on Alt for slanted walls (where you are not limited to 15 degree increments). To (temporarily) stop drawing walls, press Esc.
 |
| Dress your walls and draw a dimension line |
Walls (2)
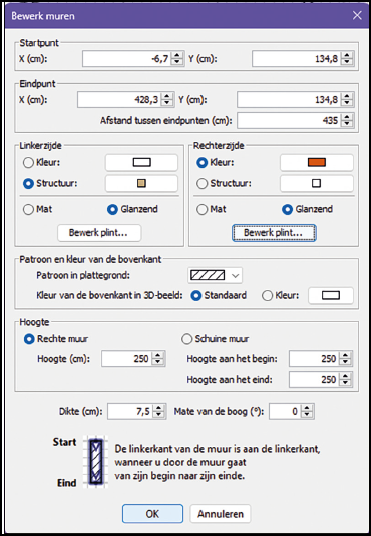
You can already view the walls you have drawn in 3D, but they still look a bit bare. That could be better. Use the arrow button Select objects in map to select walls. Hold the Shift key pressed while clicking the walls; the selected walls will turn blue. Right-click on a selected wall and choose Edit walls in the context menu. Here you can select colors or textures such as Little red stones or Marble apply to the left and/or right side of the walls. Via Import you can even choose your own structure. You can also add skirting boards. In this dialog you can also adjust the height and thickness of the selected wall. Confirm with OK and see the result.
The button Draw dimensions is also useful. First click on the starting point of the wall, then on the end point, and finally on the place where you want to place a dimension line for that wall.
 |
| You can precisely position and dress an element |
Doors and windows
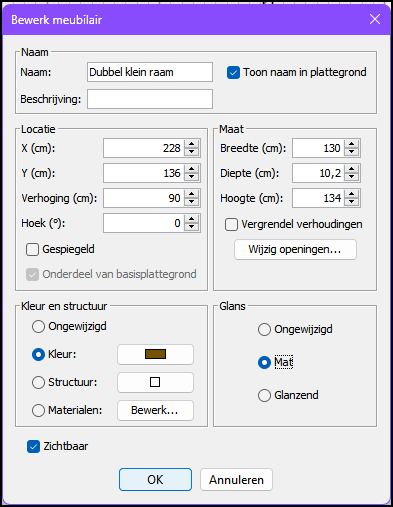
Of course you also want to be able to place windows and doors in your walls. For this, go to the section Doors and windows in the catalogue at the top left. Select a suitable model and drag it with the left mouse button pressed to the desired place in your design. By dragging the element to the outside or inside of the wall, you determine the direction of rotation. If the object does not immediately end up in the right place, you can adjust it with the blue handles in the corners. With these you set the size, height, degree of rotation and elevation (from the floor). You can also double-click on the element for the dialog box Edit furniture. Here you can name the object, change the color, and set the exact dimensions and location. Confirm again with OK.
 |
| Add furniture and place it exactly where it belongs |
Padding
Now that the walls, doors and windows are in place, comes the fun part: furnishing with furniture, lighting and other elements. You can find these in the catalogue at the top left, divided into categories such as Bathroom, Office, kitchen, Bedroom, Relief, Living room and more. Don’t forget the category Other to view for objects such as paintings, coat racks, radiators and much more.
Drag the desired element to the right place. By double clicking on an object you can adjust various properties, as we have already seen with walls.
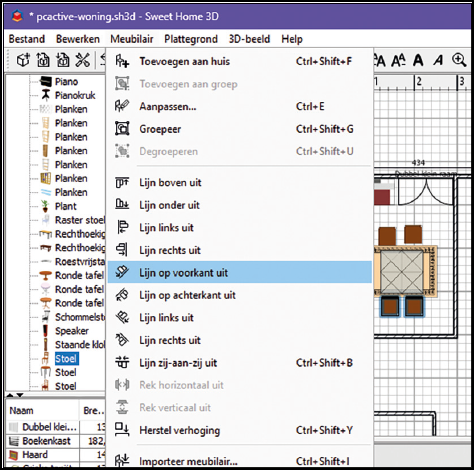
To align an element to another element, select the elements (while holding down shift-key), go to the menu Furniture and choose from the available alignment options. From this menu you can also (un)group several selected elements.
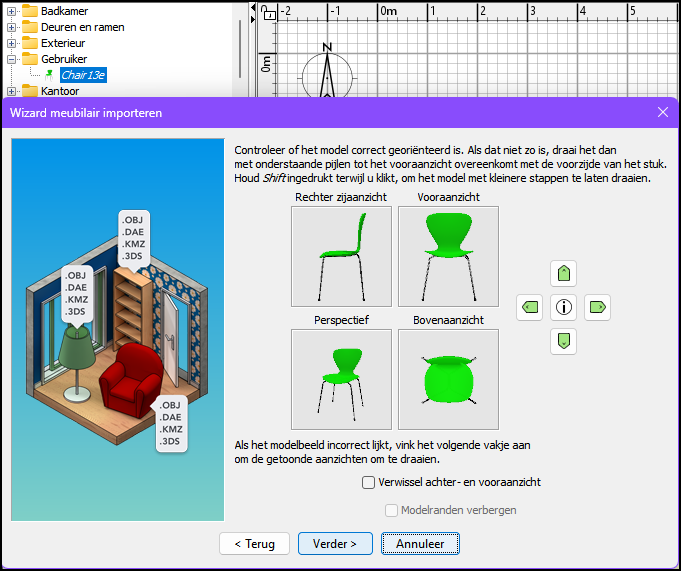
Additional 3D modelsAdmittedly, the standard Sweet Home 3D catalog is quite limited and somewhat dated, but fortunately you can expand it with various 3D models. Individual models can be found at www.sweethome3d.com/freeModels.jsp and via links at www.sweethome3d.com/nl/importModels.jsp You can import entire groups of models at once from www.sweethome3d.com/importModels.jsp Download each desired object or collection and unzip the zip file. To import a single object, go to Furniture / Import furniture. Click on Choose Model and navigate to the obj-file in the extracted zip archive. Click To open and then twice on Further. If necessary, adjust the name, color and dimensions and leave the category set to User. Then press Further and on CompleteThe object will now appear in the selected category of the catalog. To import an object group, go to Furniture / Import Furniture collection and navigate to the sh3f-file in the extracted zip archive. Select this file and press To open. If all goes well, you should now also find the newly added elements in the catalog. |
Spaces
Now that your home has walls, windows, doors, furniture, and lighting, it’s time for floors (and ceilings). First, you need to mark the boundaries of one room. It may be helpful to remove any floor plans first: go to Floor plan / Remove background image.
 |
|
Would you like a wooden floor in the living room or would you rather tile it? |
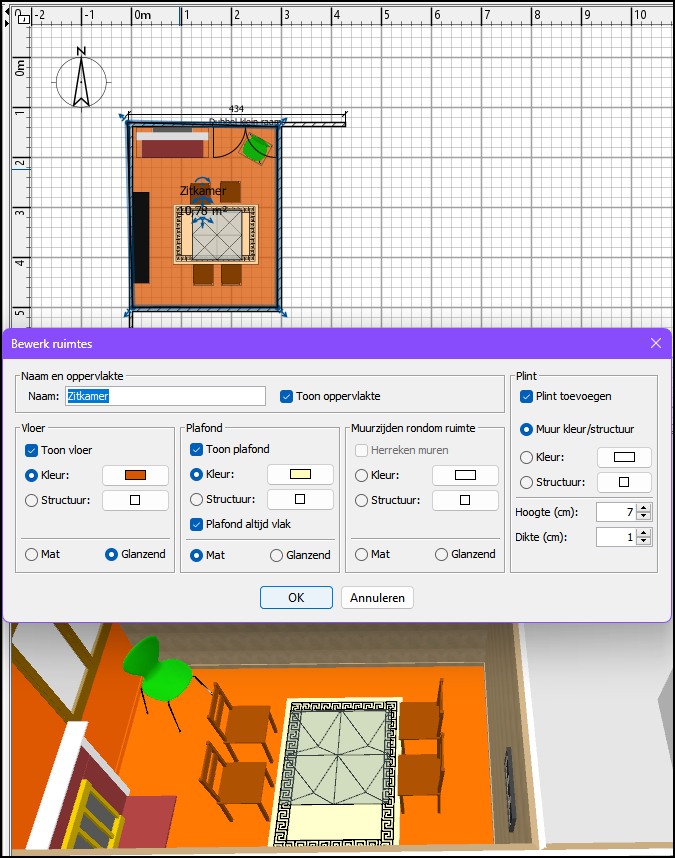
Then click on the button bar Create spaces. The quickest way to create a space is to double-click in a room that is bounded by four walls (with windows and doors if desired). You can also manually define a space by clicking on each corner of the room and double-clicking on the last corner.
To apply floors, click on Select objects in map and double-click anywhere in the desired space. The dialog box Edit spaces opens, where you can adjust various color and texture properties.
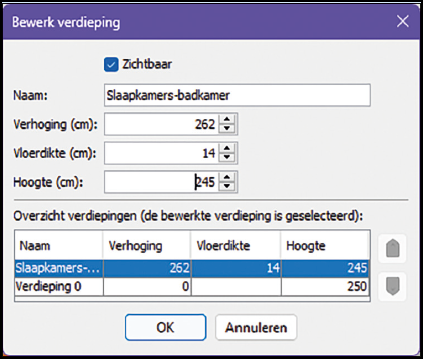
Higher onIn our design we limited ourselves to one floor, but Sweet Home 3D also offers possibilities for multiple floors. |
Virtual visit
 |
| Take a virtual walk through your design |
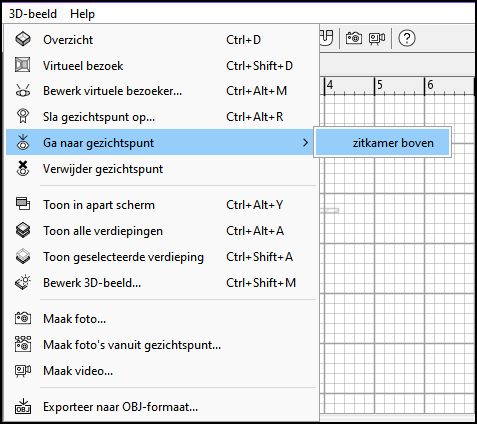
Now that your design is ready, you want to enjoy it and share it with others. You’ve already seen the standard 3D view, but there are more options. Open the menu 3D image and choose Save viewpoint. Here you can name and save the current view, with orientation, perspective and zoom factor. Use Go to viewpoint to quickly recall the same view.
The option Virtual visit is also fun. With this you place a movable figure in your design and adjust the eye level, body and head angle with handles. You see the result immediately in the 3D view.
Video
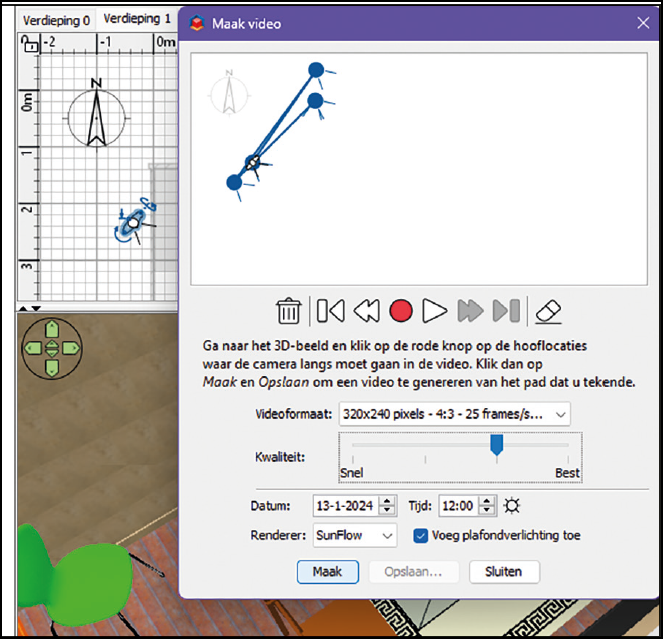
Take a picture or even a video of the 3D image via the 3D image menu. For a video, position the figure in a suitable place and press the red button in the window Make video. Move the figure and press the red button again. When you have captured all the desired viewpoints, choose the desired video format (for example 1920×1080 pixels), set the quality and any parameters, and click Create and then Save. The video is saved in mov format and can be viewed with the free VLC Media Player (www.videolan.org/vlc/index.nl.html). Have fun designing and viewing!
 |
|
You can also record the virtual visit in a real video |
