
In this workshop you will find two relatively easy tips for Windows 11. You can read how to adjust the size of the text, apps and your taskbar and how to change the size of your images.
Edited by Bram Veldt and Rob Coenraads
You can never stop learning on a computer, the possibilities are enormous. And that also applies if you use Windows, the most commonly used operating system for computers. In this workshop we show two fairly simple tips. First you’ll read how to adjust the size of text, apps and your taskbar, then we’ll show you how to resize images. The latter can be useful if you want to save space on your SSD, hard drive or in the cloudor if your photo (file) is too large to upload.
Resize text, apps and taskbar
In principle, Windows automatically recognizes the size and resolution of your screen. However, this does not mean that the scale of the user environment (also called the user interface) is immediately set perfectly. The scale will default to the recommended percentage, but if you find that a bit too small and, for example, you prefer not to wear glasses to read your computer screen, it can be very useful to simply set the scale a little larger. At the same time, you can also free up more screen space for apps on your taskbar or desktop, for example.
Step 1 Open Settings and System
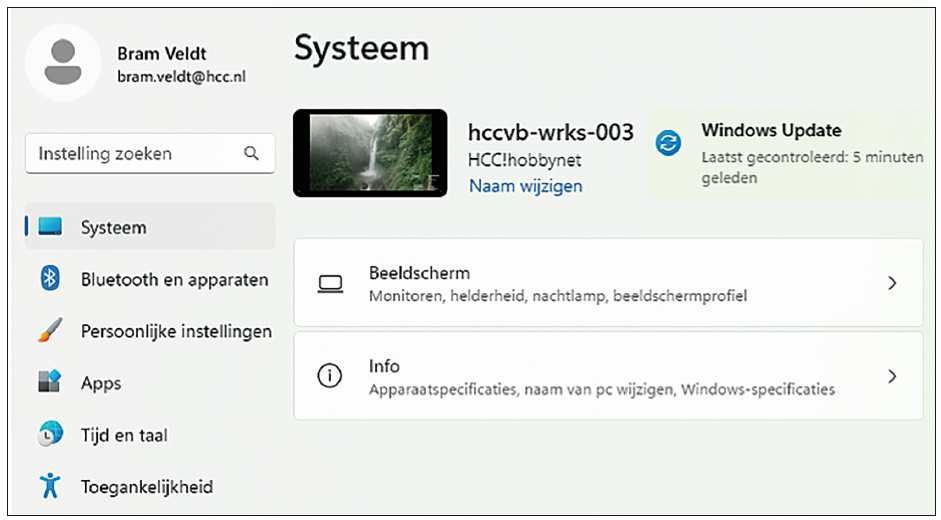
To adjust the scale of the user environment in Windows 11, first go to the settings. To do this, in Windows 11, type ‘Settings’ in the search screen with the magnifying glass at the bottom and then double-click on the gear. You choose this in the left column in the overview of all categories System.
 |
|
Go to System in Windows settings |
Step 2 Search for Scale and Layout
 |
|
|
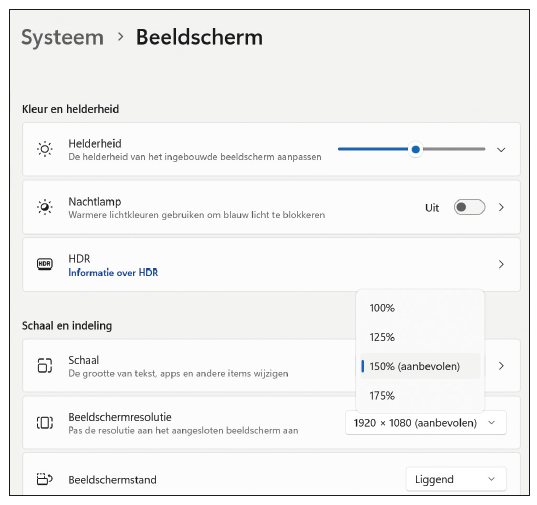
Under display you will find the options for Scale and layout |
Once you’re in System you will see if everything is correct at the top Display to stand. You will find settings for this here Monitors, Brightness, Night Light and display profile. So you have to click on that to make adjustments for your monitor. Under the heading Scale and layout you will then see options for Dish, Screen resolution, Screen mode and Multiple screens to stand.
Step 3 Percentage for scale
 |
|
|
Choose your desired scale from the list of options |
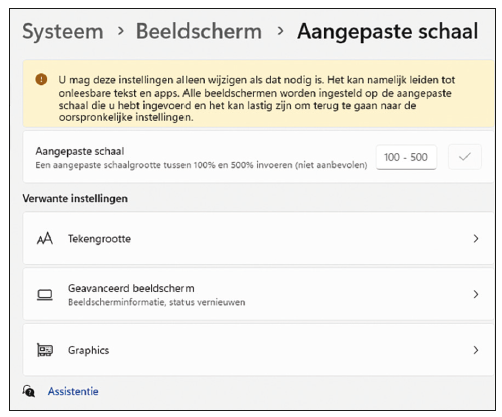
At the option Dish there is a drop-down menu with a percentage. That is the current percentage for the scale, but you can also select other percentages in this menu. Most people will be able to find a suitable percentage here. If that is not the case, you can also write somewhere on the cup Dish (next to the drop-down menu with the percentage) and then enter your own percentage on the next screen. You will then see a warning at the top that this custom scale is not recommended.
Word listUser environment Also called user interface, it is the way a program is presented to the user. In Windows these are, for example, the icons and the desktop and then it is also called a graphical interface or GUI. Pixel pixel that makes up the image of a screen. |
Step 4 Adjust the Font Size separately if necessary
In the custom scale menu you’ll also find a handy shortcut to the font size adjustment settings.
 |
|
Adjust your text size from here if necessary |
If you find all the icons and the user interface in general large enough, but the text is still a bit too small, you can also adjust the text size separately. Then you don’t have to make everything very big.
Reduce image size
However, there are several reasons why you might want to resize your images. For example, if you take photos with a good (smartphone) camera, the end result will sometimes be very high-resolution images that can take up a lot of storage space at a certain point. Do you want to free up more space? Then you can reduce the image. Plus, it’s also useful to quickly resize an image if you need to upload a photo somewhere online and your file is too large.
Step 1 Open image in Windows Photos
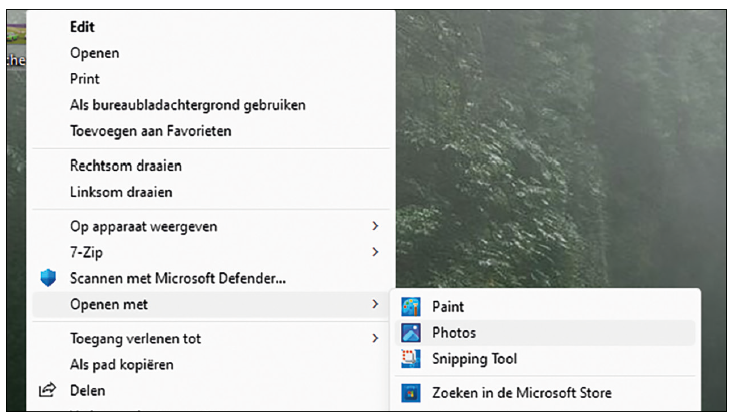
First, you will put your image in the photosapp in Windows. If this isn’t your default photo opening app, you can right-click on the photo and go to Open with go to manually open the app photos to select.
 |
|
Open a photo in the Photos app in Windows 11 |
Step 2 Resize image
When the image is open, you will see an icon with three dots at the top center of the window. Click on that and then select Resize image to get to the right menu where you can then resize and further adjust the image.
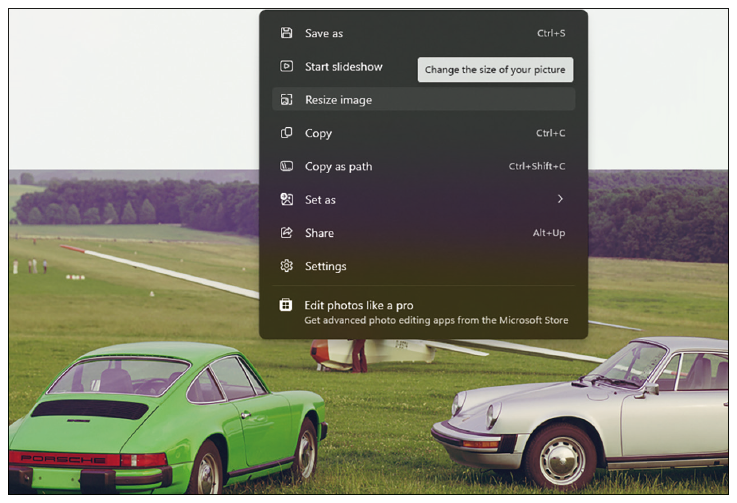 |
|
Go to Resize image |
|
Choose the new pixel width and height |
Step 3 Set pixels or percentage
You can now get a new one pixel width or –height (one also automatically changes the other, so the aspect ratio remains the same) to convert the image to a specific resolution. However, you can also choose percentage and reduce the width and height of the photo, for example, to 50% (or another desired percentage). At the bottom you can see what the new resolution and file size will be when you make adjustments here.
Step 4 Adjust quality and file type
However, you can do more than just resize the image here. You can also indicate with a percentage how much of the quality of the original photo should be retained, although quality will be lost when reducing the size. And you can also convert your photo files to JPG, PNG, TIF or BMP file types. When you are satisfied with your adjustments, click Save and you have a reduced image. If you want to test it first, first make a copy of your photo and make your changes there first to be able to view the end result.