
If you want to get your hands on an MSX computer for nostalgic reasons, you have to pay a lot of euros for it. But you can also bring such a machine to life with a cheap Raspberry Pi.
Wim Dewijngaert
MSX computers were and still are popular in the Netherlands. We noticed this, among other things, from the interest at the last HCC!knowledge day. Anyone who still wants to buy such a device on the second-hand market often has to dig deep into their pockets. We tell you how you can bring an MSX machine to life via a cheap Raspberry Pi: nostalgia in your pocket, for less than 40 euros.
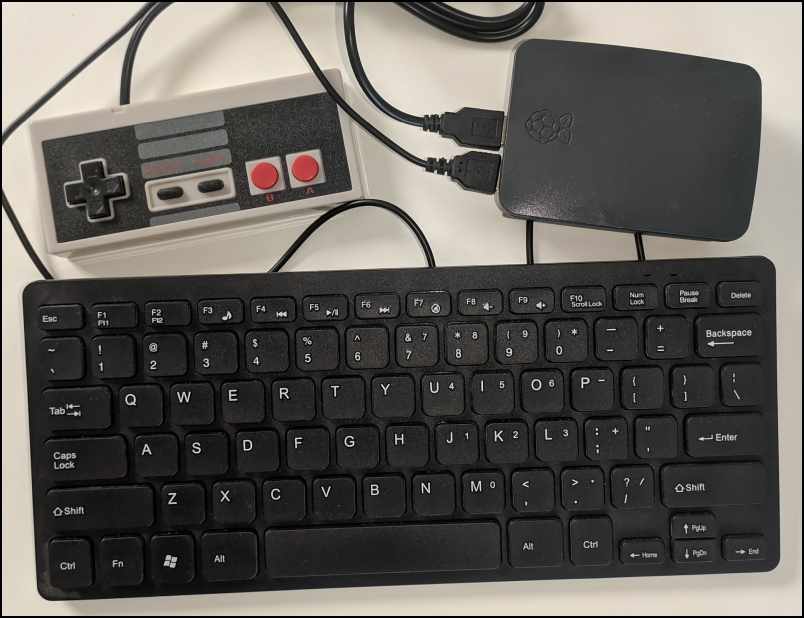 |
| Our own MSX computer, with a mini joystick and keyboard |
MSX: what is that?
It sounds unbelievable, but in the early 1980s, the PC had yet to be invented. Back then, if you wanted to play video games, you bought a machine that had a home computer was named. Unfortunately, each manufacturer released its own hardware, with unique (non-compatible) software. Microsoft and ASCII Corporation Japan wanted to do something about this and came up with a standard called MSX (short for MicroSoft eXtended). The specifications described a set of minimal software and hardware a machine had to have in order to be considered MSX compatible. The ColecoVision and the Sega SG-1000 video game system were used as inspiration.
The first MSX-compatible computer was officially released in 1983. Almost all well-known electronics manufacturers (including Sony, Philips, Yamaha, Pioneer and Sanyo) jumped on the bandwagon and released their own machines. The well-known software developer Konami also supported the initiative and released many classics on the platform.
Four generations
Four generations of computers were made: MSX, MSX2 (1985), MSX2+ (1988) and MSX TurboR (1990). Each version of the MSX standard was backward compatible with the previous one, but added a faster processor or better graphics capabilities. With the MSX cartridge system, modems, MIDI interfaces, touch tablets or sound cards could be connected. In total, approximately nine million MSX computers were sold in Japan alone.
New software for the now almost forty-year-old MSX computer is still being published, for example via the annual MSXDEV competition (https://www.msxdev.org) and on the forum of the website msx.org (https: http://www.msx.org).
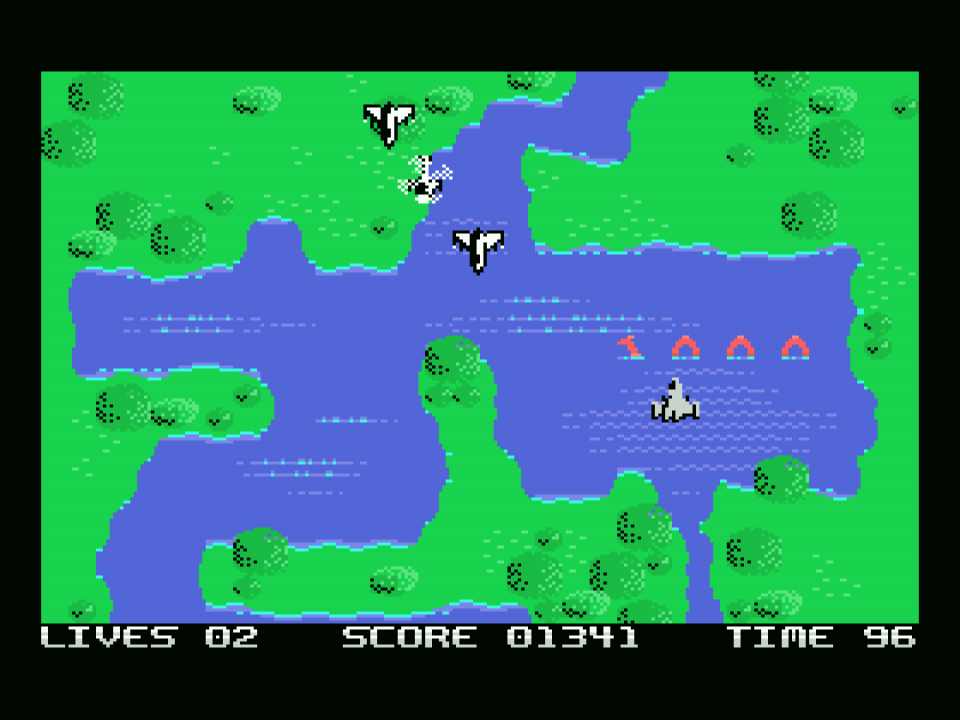 |
| The game Alien Attack was named the winner of the MSXDEV competition last year |
Grocery list
- Raspberry Pi3 B+ (may also be a faster version, but doesn’t have to be)
- Power supply and housing for Raspberry Pi
- HDMI cable
- Micro SD card of at least 4 GB
- USB keyboard and optional USB joystick
To work
We start by putting the Raspberry OS on an sd card. For Windows users, this is easiest with the Windows Raspberry Pi Imager (https://www.raspberrypi.com/software/). Insert an SD card into your Windows PC and launch the program. Choose at OS in front of Raspberry Pi (other) and then Raspberry OS Lite (32-bit). Bee Storage choose the drive letter of the sd card. Then click on the settings wheel. Select enable SSHchoose as username pi and any password. Finch Set local settings on and choose Europe/Amsterdam. If you want to use a Wi-Fi connection, select Configure wireless lan and enter the details of your WiFi network here. Finally you choose Save and Write. When the writing is done, insert the SD card into your Raspberry Pi.
Connect the keyboard and the HDMI cable to your Raspberry Pi and connect the Raspi to your television or monitor. If all goes well, you should now see the command prompt in picture.
We will first provide the OS with the necessary updates.
Type the following commands:sudo apt update
sudo apt upgrade
(choose Yes if there is a question or you want to update)
Next, we install OpenMSX with the command:sudo apt-get -y install openmsx
Then we upgrade to the latest version. For this we need to download and install a number of files:wget -N http://ftp.de.debian.org/debian/pool/
main/g/glew/libglew2.2_2.2.0-4_armhf.deb
wget -N http://archive.raspbian.org/raspbian/pool/
main/o/openmsx/openmsx_17.0-1+b1_armhf.deb
wget -N http://archive.raspbian.org/raspbian/pool/
main/o/openmsx/openmsx_17.0-1_all.debsudo dpkg -i libglew2.2_2.2.0-4_armhf.debsudo dpkg -i openmsx-data_17.0-1_all.debsudo dpkg -i openmsx_17.0-1+b1_armhf.debrm *.deb
Next we activate the graphics SDL driver:sudo apt-get -y install libsdl2-ttf-dev
Our MSX machine needs a system ROM to boot. These are stored on the website www.msxarchive.nl, and can be easily installed:
wget http://www.msxarchive.nl/pub/msx/emulator/openMSX/systemroms.zip
sudo unzip -o systemroms.zip -d /usr/share/openmsx
rm systemroms.zip
The same website also has an archive of some fun games, which we can add to our Raspberry with:wget -N http://www.msxarchive.nl/pub/msx/games/roms/msx1/GOODMSX1_0.999.2.ZIPwget -N http://www.msxarchive.nl/pub/msx/games/roms/msx2/GOODMSX2_0.999.2.ZIPsudo unzip -o GOODMSX1_0.999.2.ZIP -d /usr/share/openmsx/softwaresudo unzip -o GOODMSX2_0.999.2.ZIP -d /usr/share/openmsx/softwarerm GOODMSX1_0.999.2.ZIPrm GOODMSX2_0.999.2.ZIP
-
Next we will fine-tune our mini-MSX machine. First, we’ll get rid of the text prompt:
sudo systemctl disablegetty@tty1-
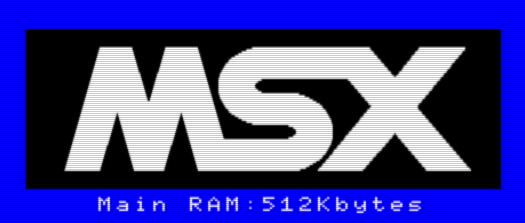
The classic MSX boot logo at startup Then we remove the boot logo:
sudo nano /boot/cmdline.txtAdd a space at the end of the line, followed by:
logo.nologo quietChange at the front of the line console=tty1 nasty console=tty3 and save the file again with Ctrl+X.
To make OpenMSX run fast enough on the Raspberry, a number of adjustments are needed. Of:
sudo nano /boot/config.txtsudo nano /boot/config.txtopen the configuration file. Here you remove the fence for everything related to overscan begins. Framebuffer_width give you the value 640 and framebuffer_height is becoming 480. The gate at the front can also be removed from both. Finally add at the bottom [all] add this line:
disable_splash=1Save the file with CTRL+X.
Then we optimize the settings of OpenMSX itself. Tap:
sudo nano /usr/share/openmsx/settings.xmland replace the text on the screen with:
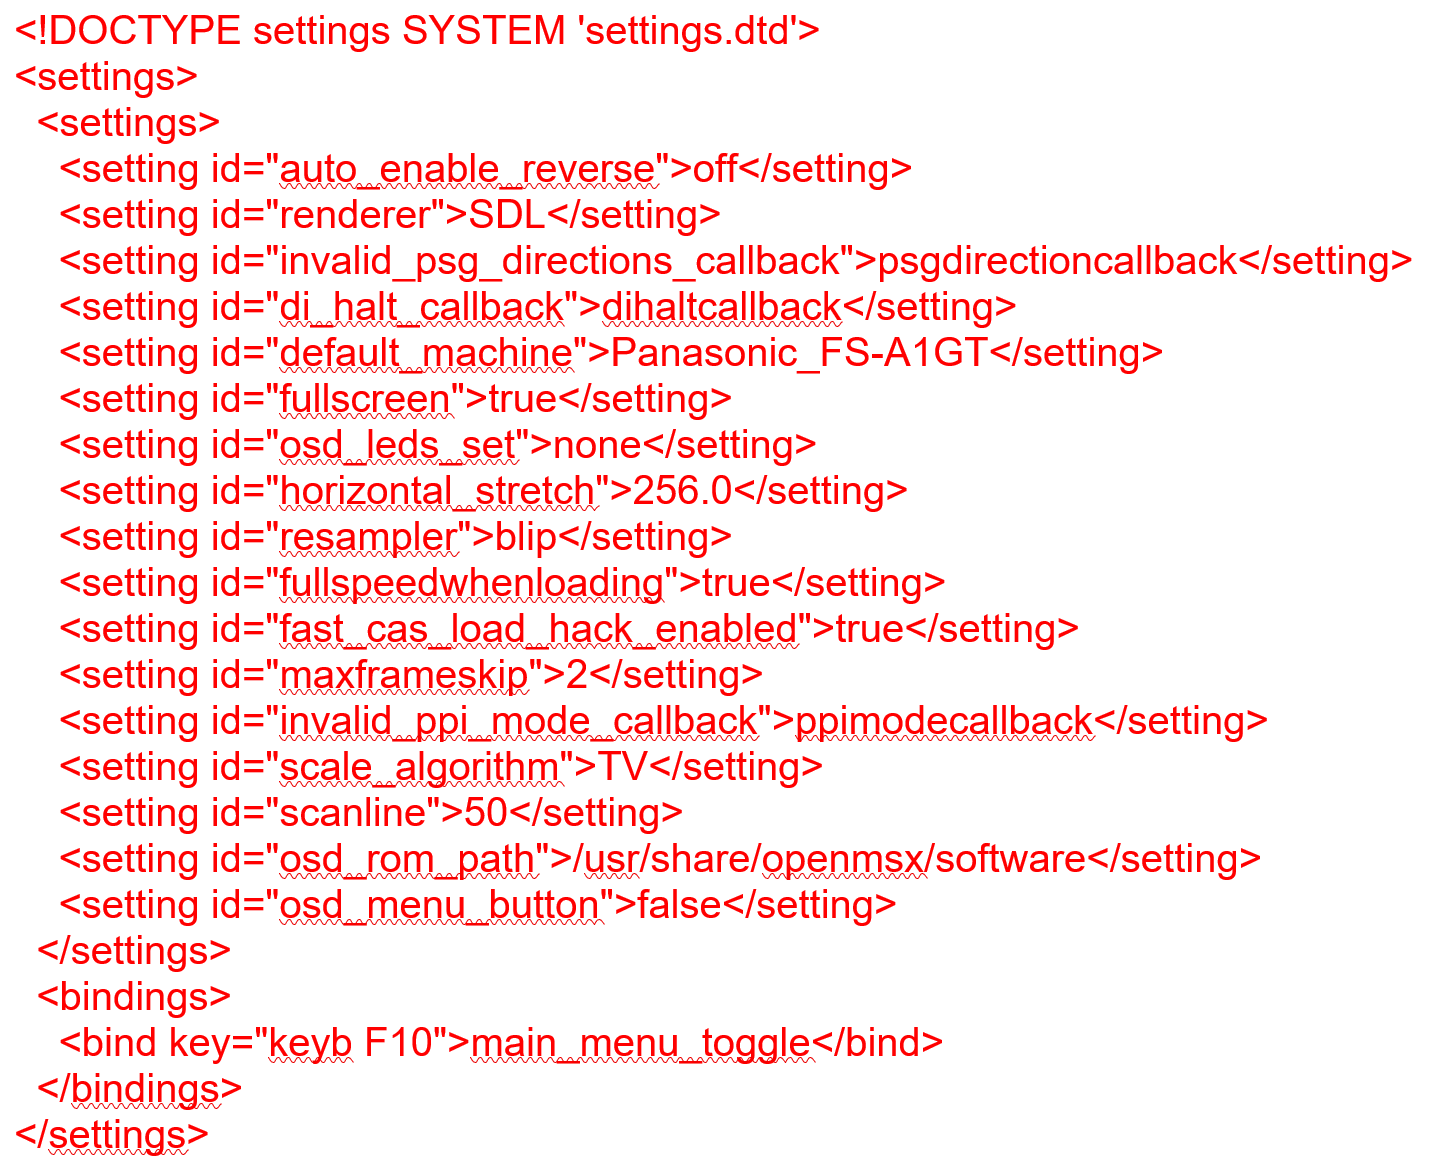
Save the file with CTRL-X.
To start OpenMSX automatically, use the command:
sudo nano /etc/systemd/system/openmsx.serviceHere you enter the following data:
[[
Unit]Description=Startup OpenMSXAfter=local-fs.target[Service]User=piType=idleExecStart=/usr/bin/openmsxSave the file with CTRL-X.
Finally, type:
sudo systemctl enable openmsxto activate automatic startup.
Finally, we restart the Raspberry with the command:
sudo reboot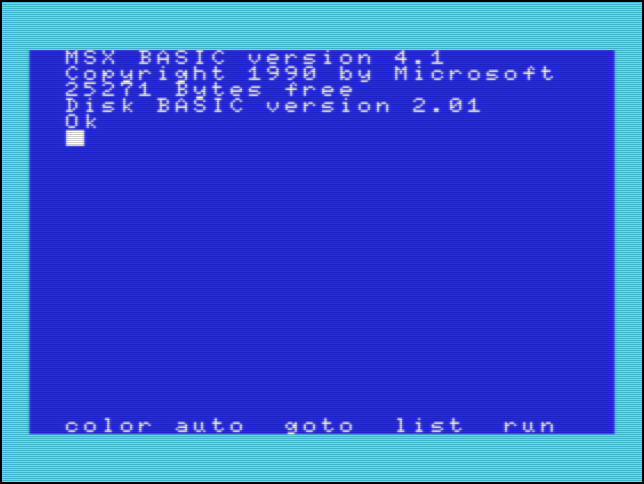
After booting, most MSX computers end up in a BASIC environment If all goes well, the boot logo will appear after ten seconds and you will end up in MSX BASIC. To start the games you just downloaded from the MSX archive, open the menu via the F10 key. Then you choose Load ROM and scroll through the list of titles. Have fun! If all goes well, the boot logo will appear after ten seconds and you will end up in MSX BASIC. To start the games you just downloaded from the MSX archive, open the menu via the F10 key. Then choose Load ROM and scroll through the list of titles. Lots of fun!
Was your interest in MSX computers sparked after reading this article? Be sure to get acquainted with HCC!msx – one of HCC’s interest groups – via this link