
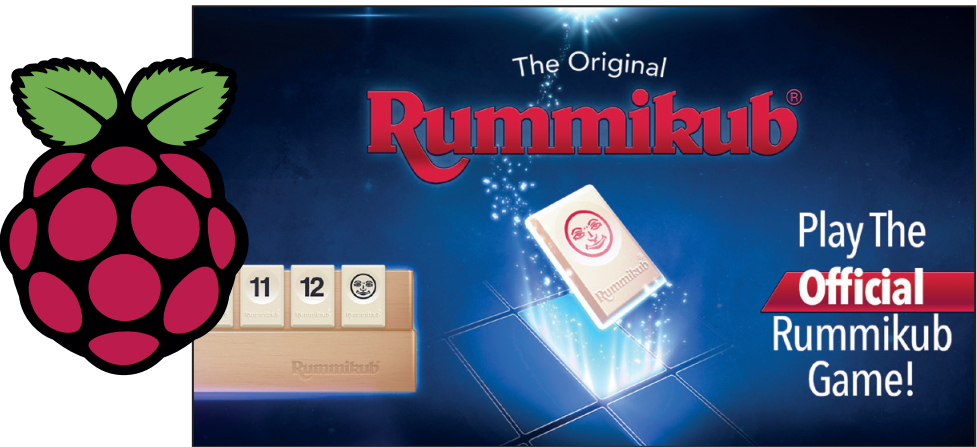
Are you also someone who can be found on a cold winter day for a game of Yahtzee, Monopoly or four in a row? But do you find opening the boxes, handing out the counterfeit money or drafting all pawns always such an annoying job? Then we have the solution here: build your own game board.
Wim Dewijngaert
I recently saw an electronic game board from Infinity on the internet. If you look at the product up close, you can see that it is a 32inch touchscreen With legs underneath. Up to four players can put themselves around the table and play on the screen classics such as Cluedo and Doctor Bibber – no boxes, no game board and no messing around with dice. Nice animations and sounds of course, and a new game with the push of a button; Cost price is unfortunately a good 900 euros.
Do it yourself: screen
Can you also craft such a game board yourself? Not with four legs then, but a model that you can put on the table? That is not that simple, because tablets are not made in such extremely large dimensions. Computer screens do, but these are often very expensive.
Eventually my eye fell on a prechen 24inch IPS monitor that is available for € 180 at Amazon in Germany. Admittedly: that’s not 32 inches, but affordable. The Full-HD screen has a field of vision of 180 degrees, built-in speakers and can detect up to 10 touches at the same time. But then you don’t have a computer that you not only need to turn the software, but also to convert the touches of your fingers into actions on the game board.
Raspberry Pi 5
Fortunately, I don’t have to go back to a full computer for this. One of the cheapest solutions is a Raspberry Pi 5 on which you install Android. This raspi is already available for just under € 70, the 4GB memory variant is sufficient. You also need a USB cable of about ten centimeters to the Touchscreen interface To connect with the Raspberry, and a short HDMI cable for the image and sound. On AliExpress these can be found for a few euros, while you also spend around € 4 for an SD card of 16 GB and around € 10 for a USB food, and the Setup is ready.
Shelf
If you put the monitor flat on the table and press the players with their hands on the sides, he will wobble a little because the back is bulging. To solve this problem, attach a board to the VESA confirmation on the back. Saw this to size from the screen and drill four holes in the middle at 10 cm away from each other. Afterwards you mill out the drill holes to not let the four screws with which you attach the board to the back of the screen. You may still use a layer of black paint as a finish.
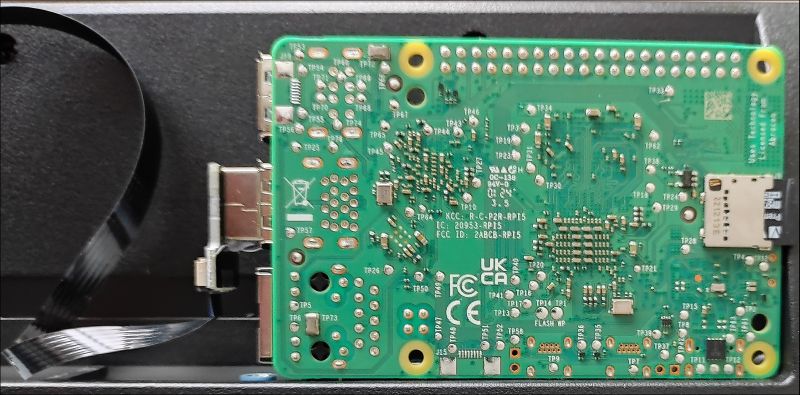 |
| The Raspberry Pi fits exactly in the recess of the monitor |
Fitting and measuring well to find the center, because the board preferably does not come out of the surface of the monitor. If all goes well, the Raspberry Pi just fits in the free space at the back of the screen where the connections are. With four mini screws you can finally attach them to the board.
The installation
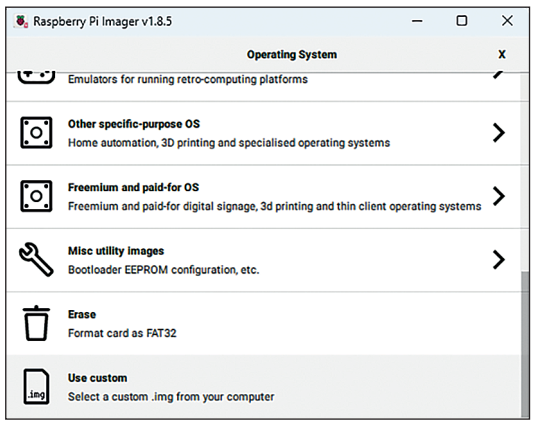 |
| When writing the image, choose Use custom |
As a basic software I use Lineaageos 21 that can be downloaded on the Kongstakang site (https://konstakang.com/devices/rpi5/lineAageos21). Please note: do not opt for the OTA version. The image itself is about 7 GB and when your SD card is larger, part of the capacity remains unused. We will soon resolve this problem.
You can write the OS away with the Raspberry Pi Imager (can be downloaded at https://www.rspberryPi.com/software). At OS just just choose Use custom (at the very bottom of the list) and then of course refer to the file that was just downloaded.
After writing, place the SD card in the grater, then connect the power supply, the USB cable and the HDMI cable and start the system. After a few minutes, the Lineageos installation wizard appears on the screen. Run through the wizardadd your WiFi network and choose a time zone. You can skip a backup and password if desired. The touch screen is automatically recognized, because Lineaageos has already ingrained the correct drivers.
|
|

Manually
Now you have to do two things manually. First, you will increase the space that the OS may use on the SD card. Second, you install a number of Google-libraries What many games use. To do this, open the browser in Lineaageos, this icon looks like a star. Go to https://konstakang.com/devices/rpi5/Lineaageos21 and download there kongstakang-rpi-resize and mindthegaps By simply clicking on the file name. Then you open it settings-screen by finger down swip choose from the top of the screen and the gear icon. Then tap System,, ” Buttons,, “ Power-menu and activate Advanced Restart.
Start up the OS again by down again swip And push the on the on-off button. Molar Restartthen Recovery And then you follow these steps:
- Install – Download Directory – molar Kongstakang -RPI -Resize – Swipe to Flash – Reboot – Recovery
- Install – Download Directory – molar MindThegaps – Swipe to Flash – Wipe Dalvik – Reboot System
When Android came back to life after the restart, you can install the games via the Play Store. You need a Google account for this.
We have already put together a list of some classics. For some games you have to pay a few euros, others are free.
After installation, the icons appear automatically on the Home Screen. Tapping is sufficient to launch the game. Have fun!
 |
| The end product, our game table |