Create booklets for special occasions from scratch with Word. Very nice!
A Word booklet
A personal, homemade booklet for a special occasion is fun to make. And with some instructions is not difficult at all. You need a printer, sturdy paper, your own texts and photos and the Word program. This article explains how to properly set up Word for formatting and printing a booklet.
Do you have a Word 2016, 2013 or 2010? Then you can broadly follow these steps. Buttons may look or be called slightly different.
The right settings
- Launch Word.
- click on Empty document.
- Click on the tab (Page layout.
- Look for the ‘Page Setup’ bar. Here is a box with an arrow
 . Click on that arrow.
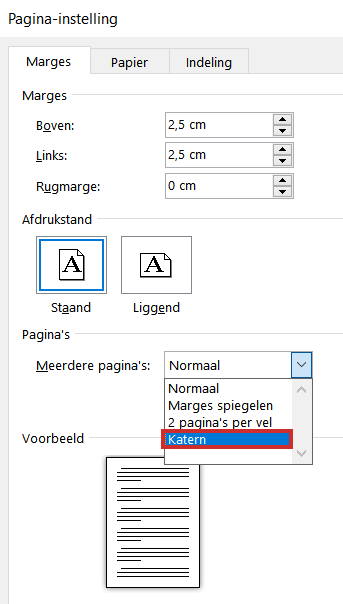
 - The ‘Page Setup’ window opens. Under the heading ‘Pages’ you will find ‘Multiple pages’. Click on the drop-down menu and select the option quire.

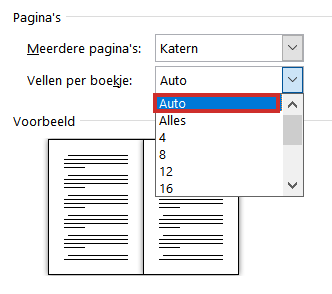
- At ‘Sheets per booklet’ select the option Car.

- click on OK.
- Add page numbers if necessary via the tab Insert > Page Number.
- Click on the desired position of the numbers.
- Click on the desired alignment.
Word is now set up to create a booklet. The page layout is landscape, so the pages in the document are actually half pages. Two of these half pages will appear side by side in the booklet.
Create a booklet
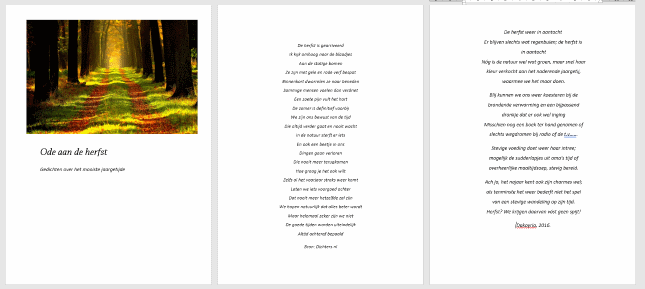
It is up to you to add the contents of the booklet. That can be texts and photos, or a mix. Of course, this depends on the subject of the booklet. Here’s a small example:

The more text and images, the more pages will appear.
Tips
- Booklets consist of an even number of pages and preferably a multiple of four pages. If you fold the booklet and possibly bind it, this will look best. If you do not arrive at the desired number of pages, try to play with the design. For example, enlarge or reduce images so that they fill more or fewer pages.
- The ‘Design’ tab offers various options for automatically embellishing the contents of your booklet. The ‘Insert’ tab allows you to add images or shapes or Smart Art (nicely designed words) to your document.
- For general free images please visit the site www.pixabay.com. Here you can download images that are free to use.
Print the booklet
When the booklet is ready, you can print. This requires a printer. Does it print double-sided? Then you’ll be ready in no time. If it prints on one side only, print all the front sides first, flip the paper in the printer and print the back sides. Let it dry, fold neatly and you’re done.
- click on File > Print.
- A menu for the print settings appears. click on Simplex Printing or on Duplex Printing (long short edge) if the printer can do it. If the printer cannot automatically print double-sided, read the article ‘Printing double-sided in Word’ how you can do this anyway.
- Click on the button at the top Print.
The booklet should come out of the printer properly. But just to be sure, try it out with four pages first.