Announced by Apple in mid-2023, support for VPN applications on Apple TV will however have to wait for the release of tvOS 17. In the meantime, a few tips allow you to take advantage of the main functionalities of virtual private networks on your connected TV. We explain how to achieve this.
Apple promised it: tvOS 17 will finally allow virtual private network providers to develop applications dedicated to Apple TV. Welcome news for users of VPN solutions who, until now, had to be more resourceful to take advantage of the benefits of their subscription on their TV box.
Despite everything, we will still have to wait until the release of tvOS 17 to start seeing VPN apps flourish on the App Store. In the meantime, there are several roundabout ways to protect your Apple TV using a virtual private network, and to circumvent the geographic filters imposed by streaming platforms.
Why use a VPN on Apple TV?
The first reason, common to all equipment connected to the Internet in general, obviously concerns the security of the device. Connected to the home network, the Apple TV is no exception to the rule and can, between two system updates, present exploitable vulnerabilities and constitute an open door for hackers.
By accessing the unencrypted traffic received and sent by your TV box, hackers are able to glean a whole lot of personal and sensitive data, such as your first and last name, address, your Apple IDs and passwords, as well as those entered to access applications installed on Apple TV, or your bank details, used to subscribe to services directly via your connected TV.
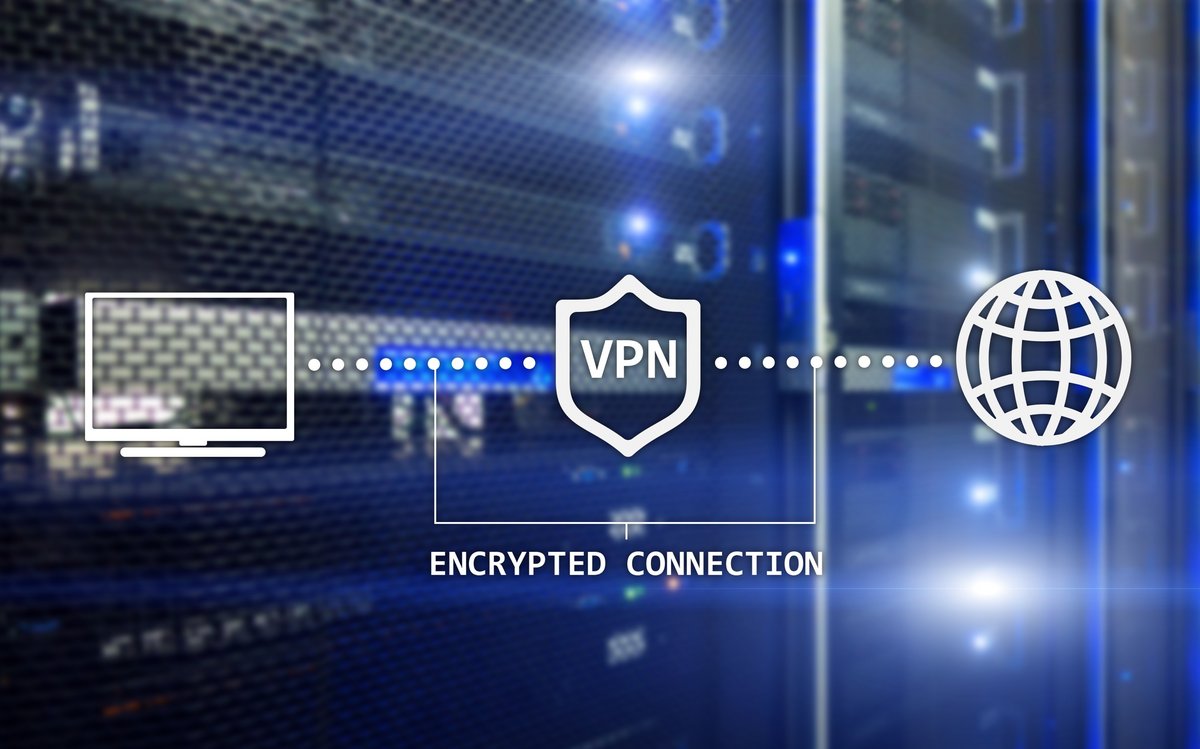
To prevent any leakage, the consequences of which could seriously harm you, VPNs implement a highly secure connection scheme. Concretely, this type of device encrypts your connection locally and passes it through a tunnel generated using a VPN protocol, isolated from the rest of the HTTP/HTTPS traffic, to a relay server, administered by the VPN company. . The connection is decrypted here before being redirected to the site or the web platform initially queried, this time passing through the public Internet network.
In this configuration, no one, not even the ISP, can access the content of the traffic circulating between the Internet user’s device and the VPN server, both inbound and outbound.
Another parameter of the equation: the modification of the IP address. When the transmitted traffic bounces on the VPN server, it borrows the IP address of said equipment. Consequently, web sites and platforms no longer access your real IP address, loaded with personal data of all kinds allowing you to be identified as a unique Internet user and to geolocate you, but to that of the VPN relay server.
We therefore see the emergence of a new interest in the use of a VPN on Apple TV. Indeed, because it replaces your real IP address with that of the intermediate server to which you connect, the virtual private network also changes your geographical location in the eyes of the websites consulted. Clearly, if you pass your connection through a VPN server located in the United States, the online services requested will believe you are on North American territory.
A boon to lure streaming platforms limiting access to their content based on your geographic location. In a very concrete way, you will thus be able to unlock foreign catalogs of services such as Netflix or Amazon Prime Video.
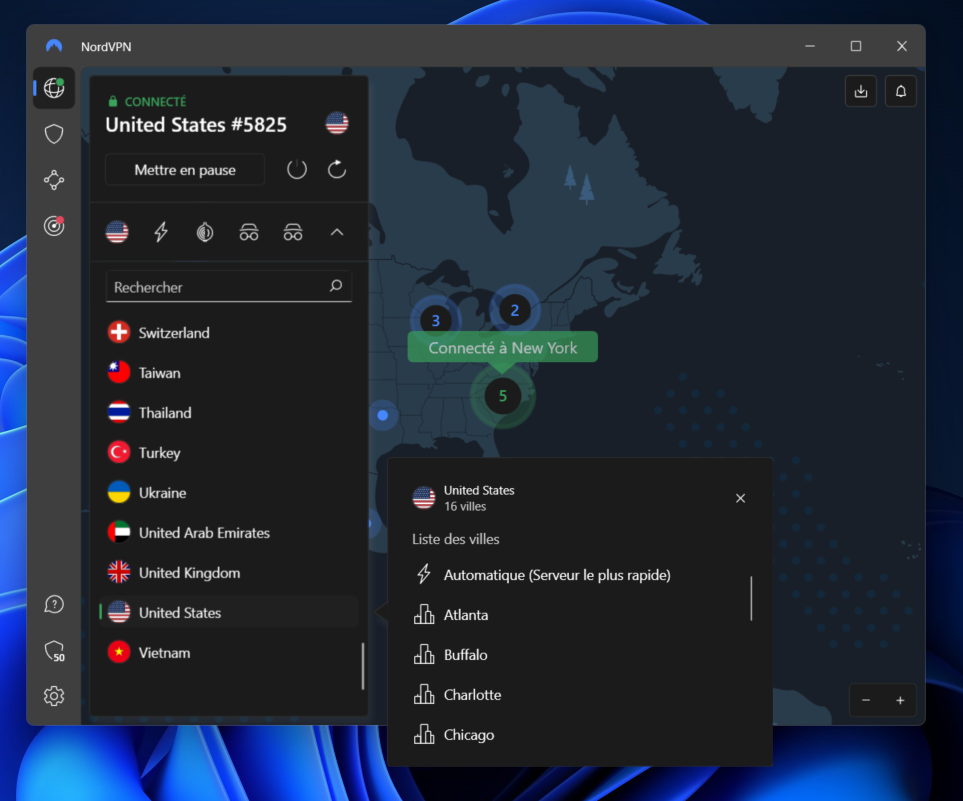
Considered one of the most effective solutions in terms of traffic security and circumvention of geo-restrictions, NordVPN is among the best VPNs capable of protecting your Apple TV. To achieve this, there are three configuration methods that we will detail for you.
Install NordVPN on a Router
The first way to enjoy a VPN on your Apple TV is to install NordVPN on your router. This method requires some computer skills on the part of Internet users, but it also has the advantage of protecting the entire network, and therefore all the equipment connected to it.
From a computer, smartphone or tablet, launch your browser and enter your router’s IP address in the address bar. Log in to the management interface using your username and password (provided by the manufacturer of your router or by your ISP).
The next configuration steps largely depend on your router manufacturer. Some offer built-in VPN options, while others require more detailed manual settings. Refer to your equipment manual.
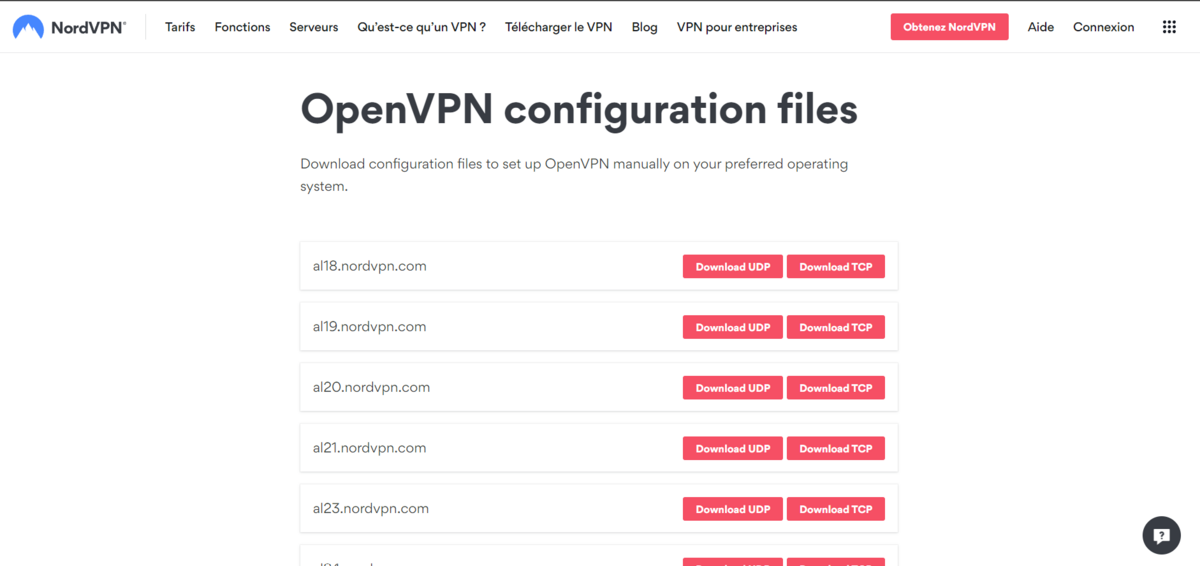
For example, on Freebox, you must first retrieve the *.ovpn configuration files of your choice (depending on the desired servers and connection locations), available on the NordVPN website.
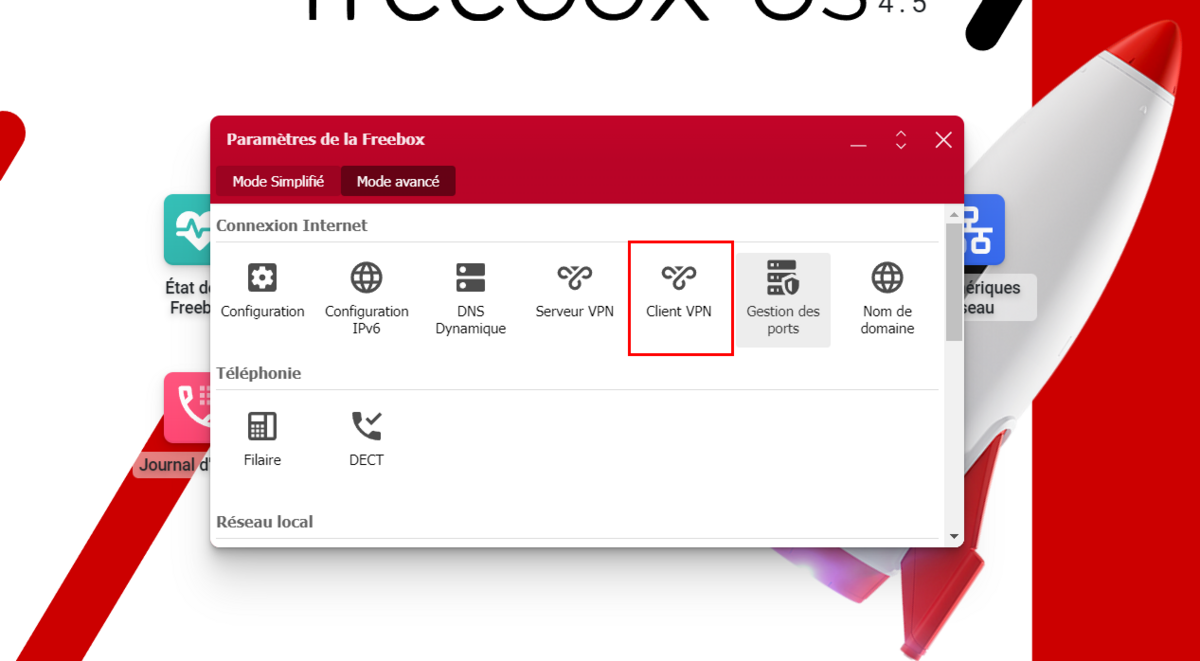
After connecting to your management interface, go to the Freebox Settings > Advanced mode > VPN client > VPN configuration > Add a connection.
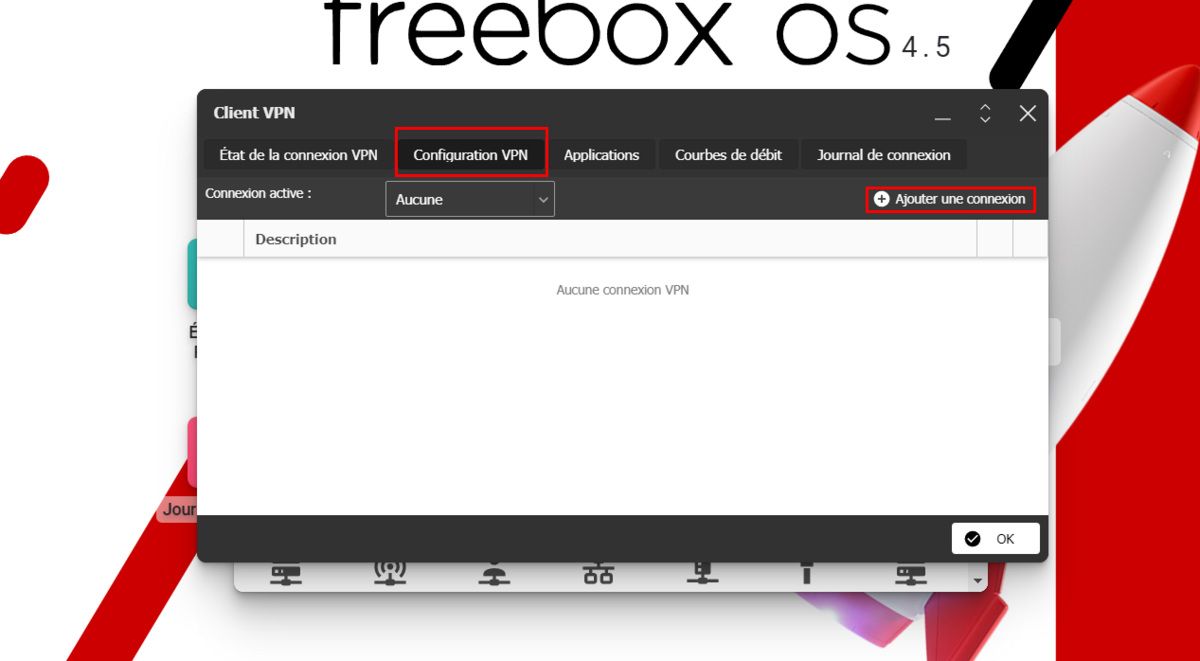
In the VPN Client Configuration window, fill in the fields as follows:
- Description: the name of your choice (e.g. NordVPN US)
- VPN server type: OpenVPN
- Username: Login assigned by NordVPN (different from email address) available in your Nord Account > NordVPN > Advanced Setup > Service Credentials (manual setup)
- Password: Password assigned by NordVPN available in your Nord Account > NordVPN > Advanced Setup > Service Credentials (manual setup)
- Configuration file: load the *.ovpn file just downloaded
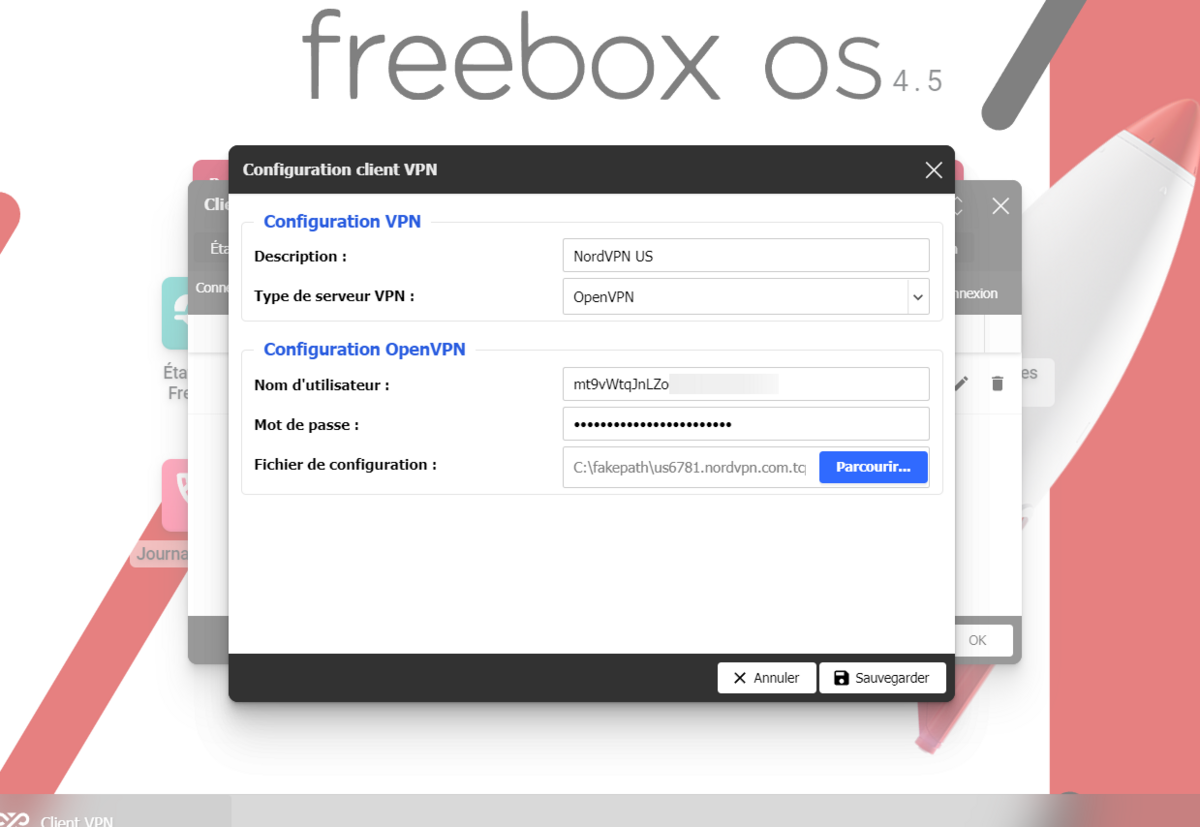
Finally, click Save to save your changes.
To start the NordVPN connection on your Internet box, now go to VPN Client > Active connection. Select the NordVPN client and click Apply then OK. Your home network, and therefore your Apple TV, are now protected by NordVPN.
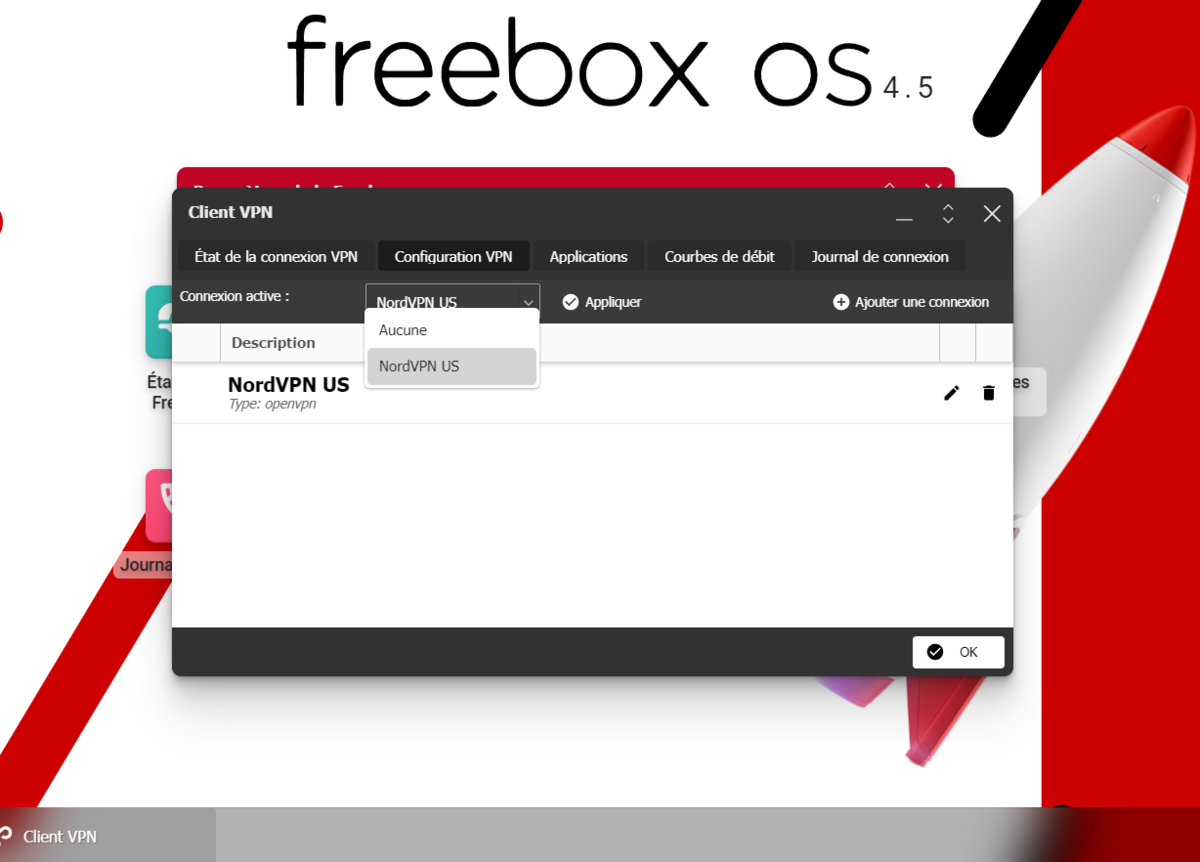
NB: this method requires repeating all the steps described above each time you want to change VPN server and/or geographical location.
Use NordVPN Tethering on Apple TV
Easier to implement, and acting like a VPN setup on the router, VPN tethering simply requires installing and activating NordVPN on a Windows PC.
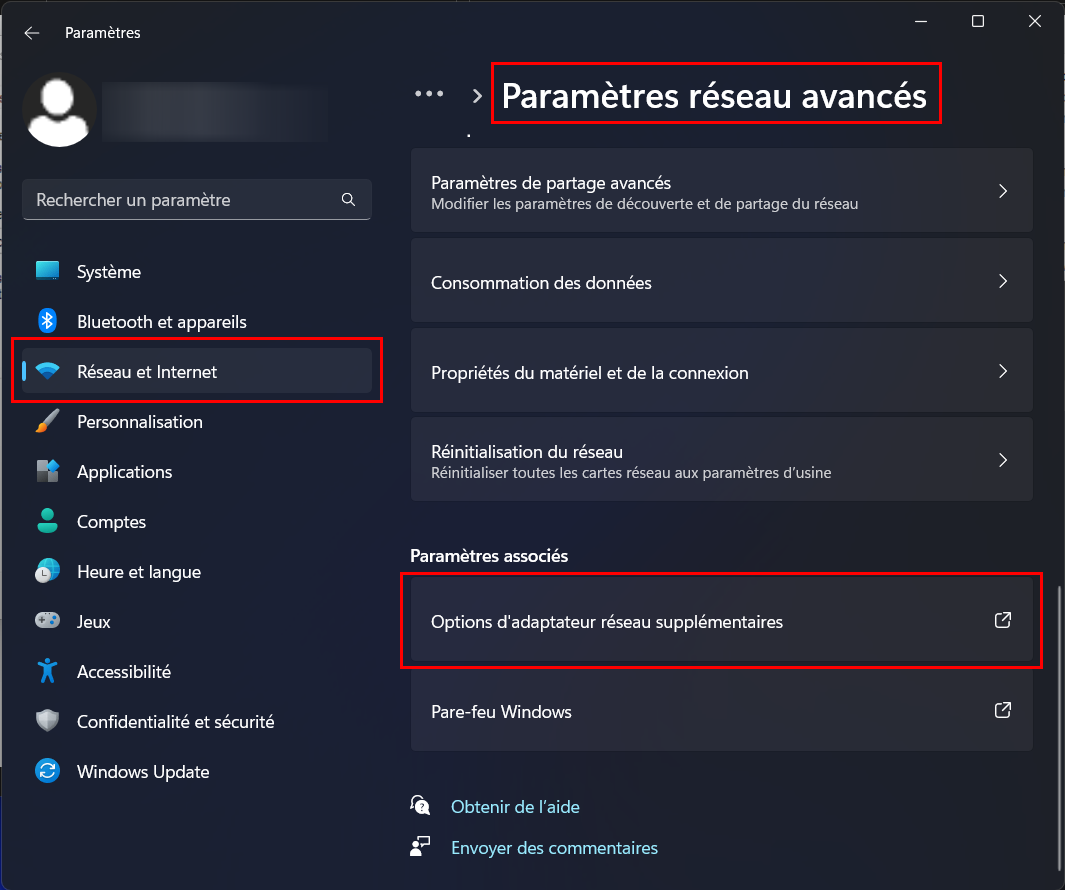
Once connected to the NordVPN server of your choice, go to Settings > Network & Internet > Mobile hotspot. Activate the switch.
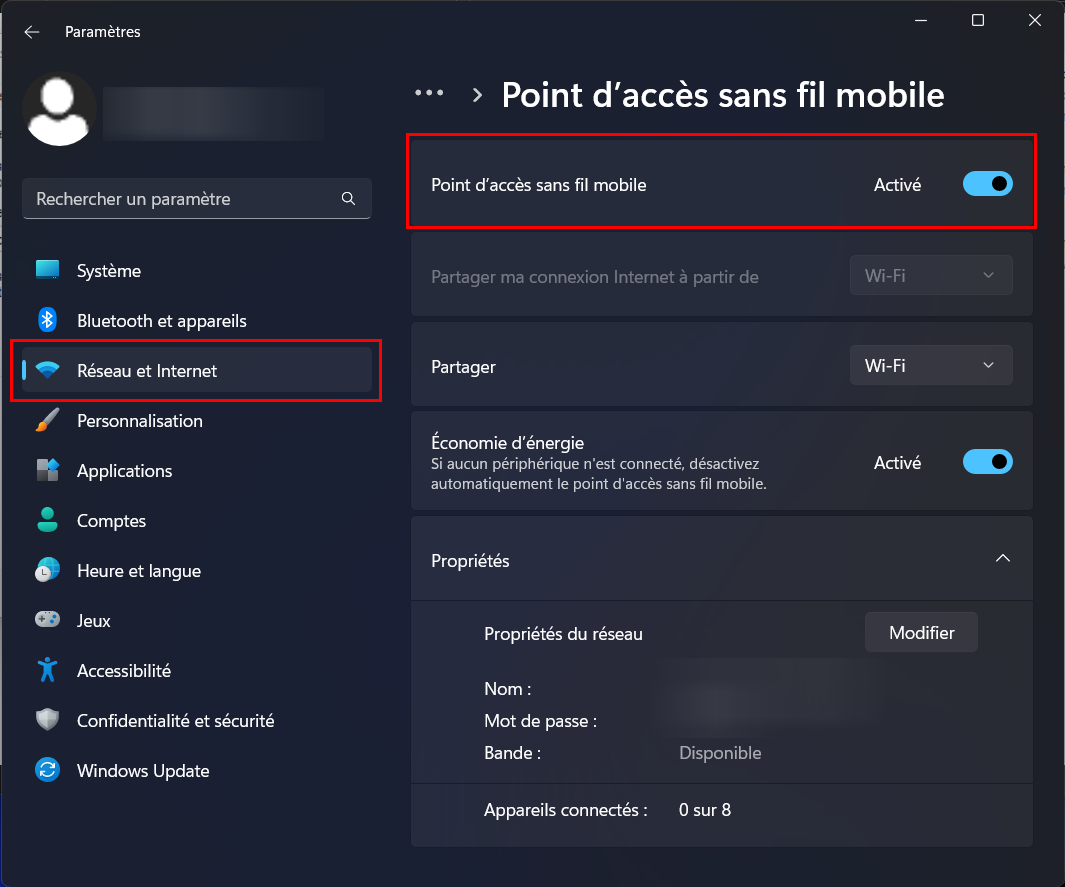
Go back to Settings > Network & Internet > Advanced network settings > Related settings > Additional network adapter options.
In the window that appears, right-click on the NordLynx adapter. Select Properties > Sharing > Allow other network users to connect through this computer’s Internet connection. From the drop-down menu, choose the connection linked to the NordLynx adapter. Save changes by clicking OK.
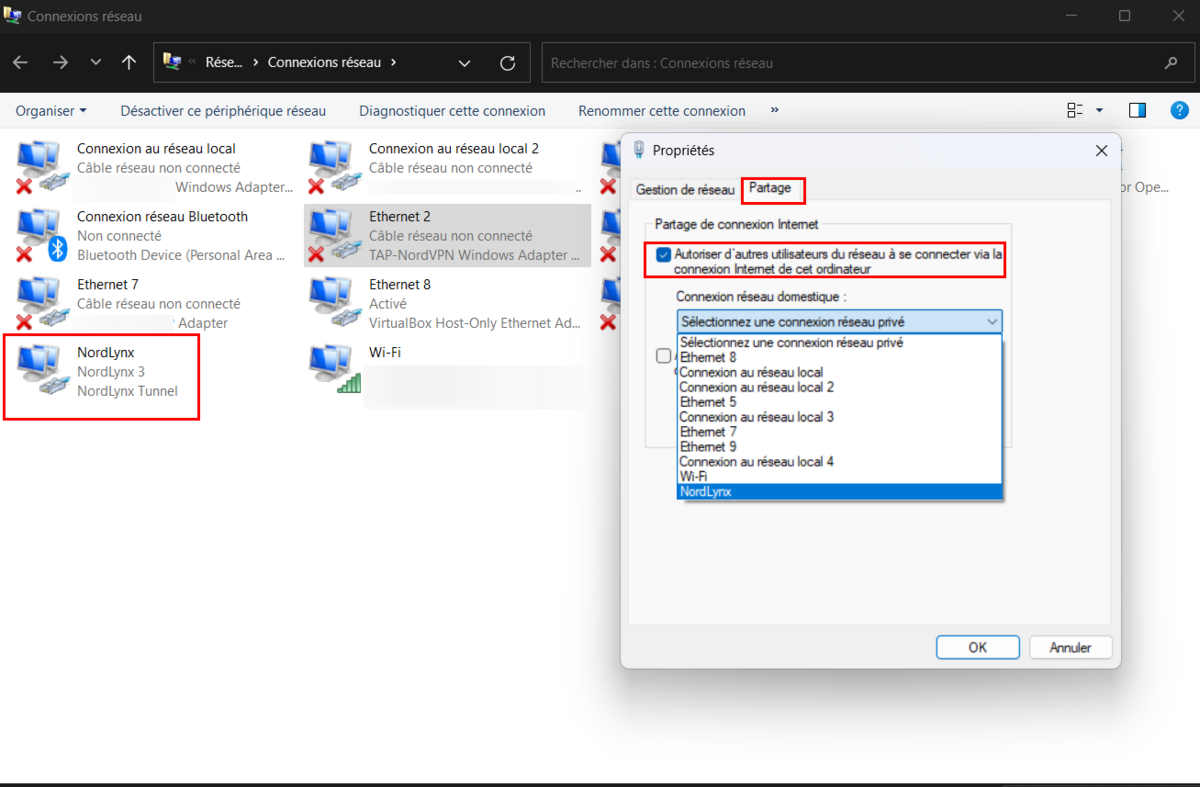
All you have to do is connect your Apple TV to the mobile hotspot you just created.
Set up SmartDNS to use NordVPN
SmartDNS activation is the easiest solution to set up. However, you should know that this technique does not allow you to encrypt your connection as the two previously detailed methods allow. On the other hand, it offers the possibility of very effectively circumventing the geo-restrictions imposed by streaming platforms by modifying your geographical location.
Connect to your online NordVPN space. In the left menu, click NordVPN. In the next step locate Additional Features > SmartDNS > Enable > Enable SmartDNS.

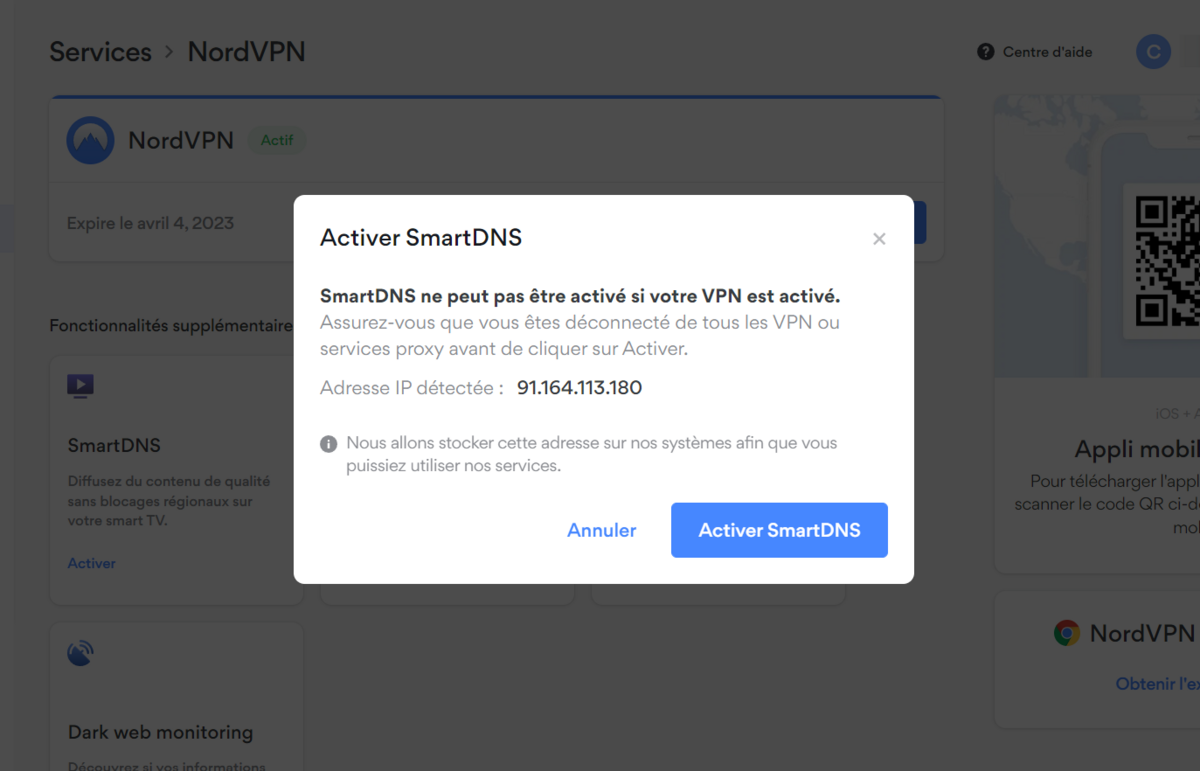
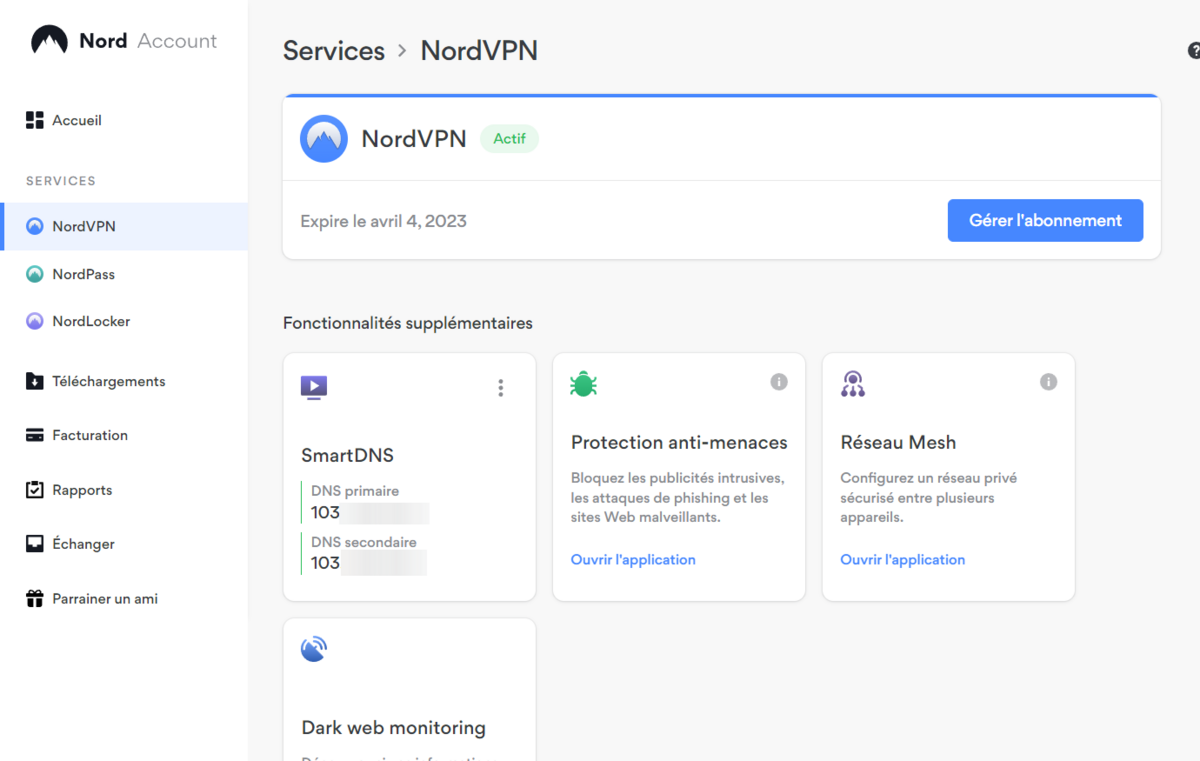
You receive an email confirming the activation of the service, accompanied by the primary and secondary DNS addresses assigned by the provider. You can also find these addresses on your online dashboard.
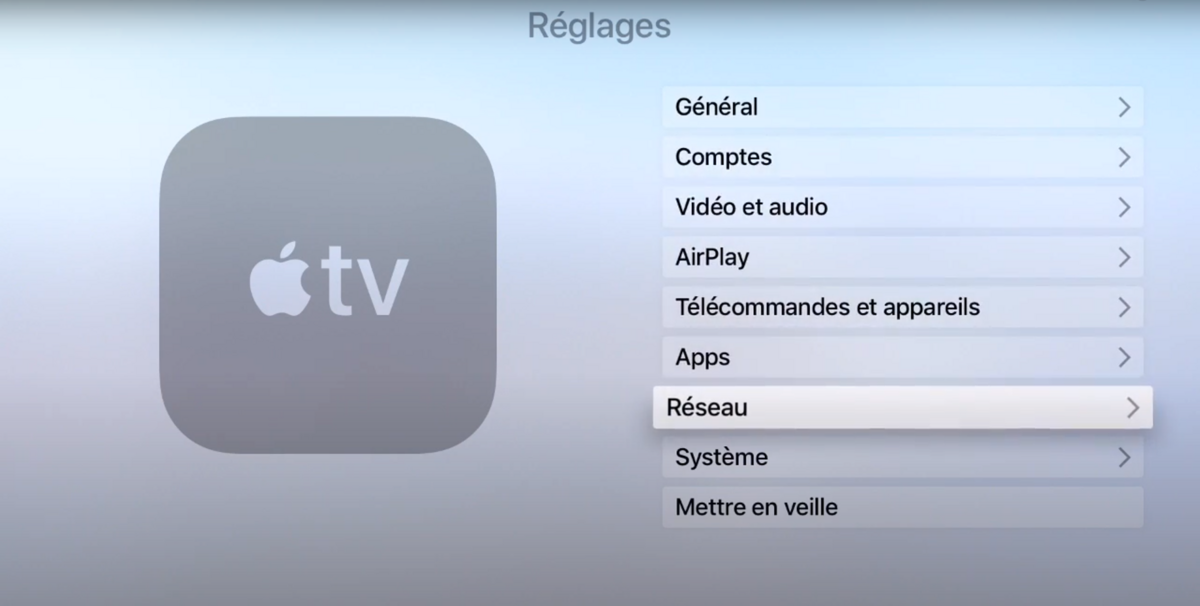
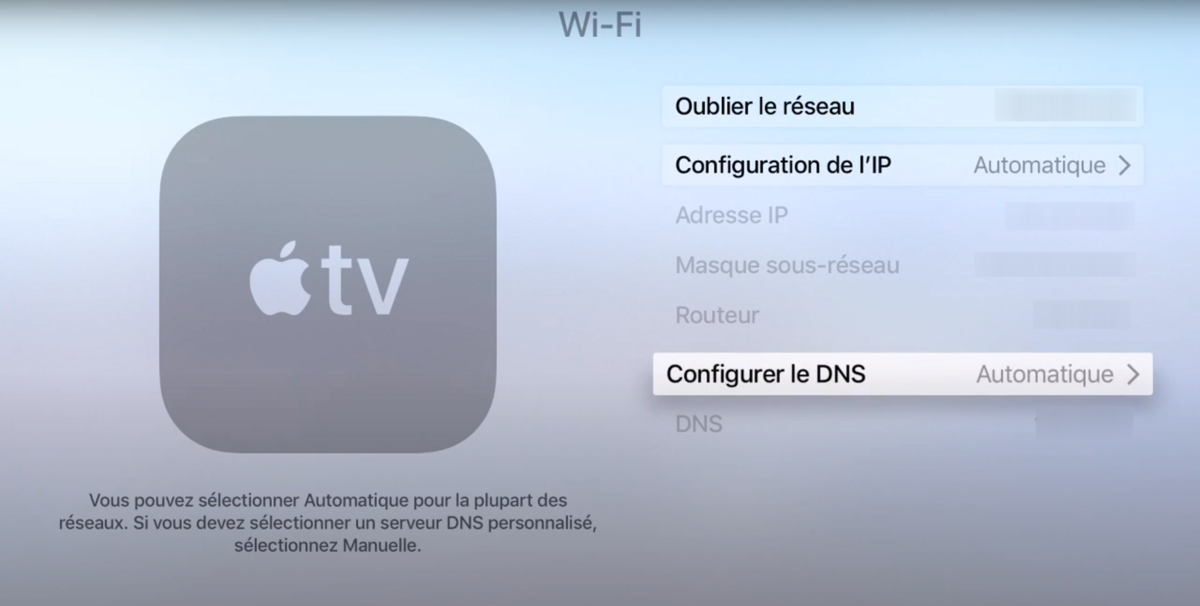
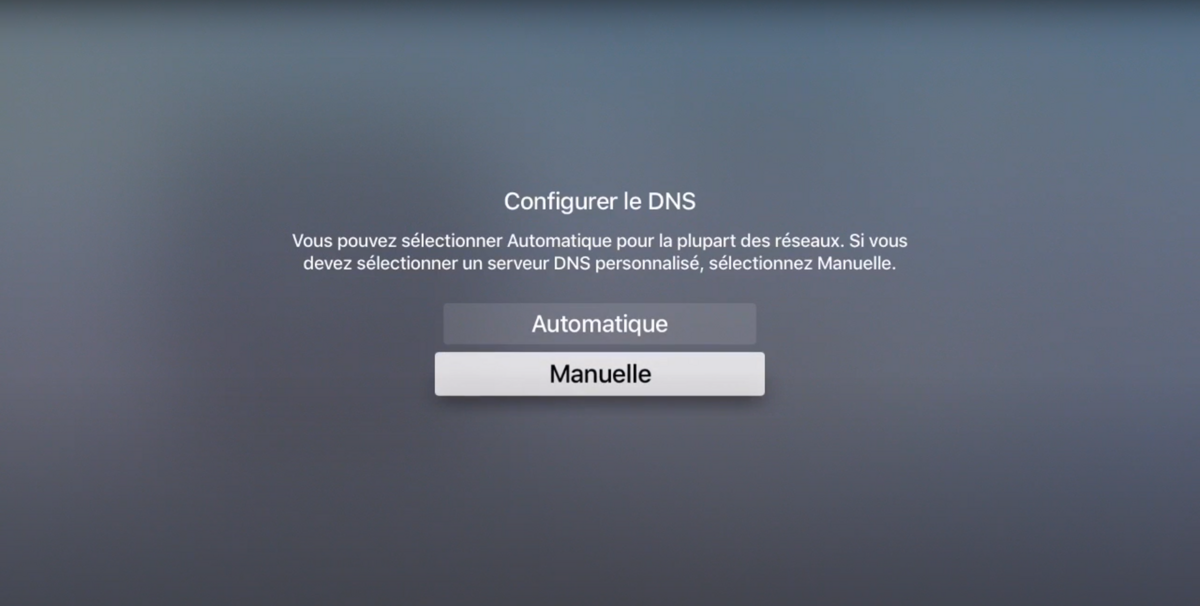
Start your Apple TV and go to Settings > Network > Select your network > Configure DNS. Choose Manual and enter one of the two previously retrieved DNS IPs in the dedicated field.
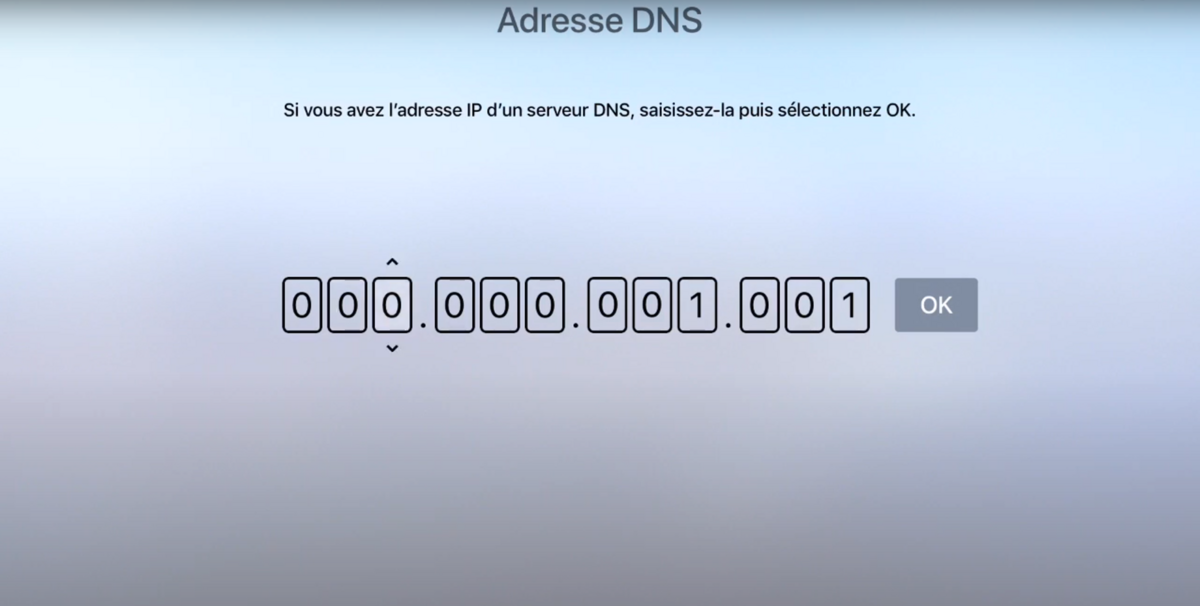
Click OK to save changes, and restart your Apple TV.

NordVPN Essential
-
storage
5799 servers
-
language
60 countries covered
-
lan
6 simultaneous connections
-
mood
Free trial 30 days
-
description
No data log
9.7
A figurehead of VPNs, NordVPN continues to evolve at a rapid pace. Its performance has gone up a notch thanks to the deployment of a fleet of 10 Gb/s RAM servers and its NordLynx protocol. In addition to well-built applications, it stands out for its very good performance and excellent stability. A service that we can only recommend and that seriously rivals ExpressVPN and CyberGhost in terms of value for money. NordVPN Advanced includes VPN + NordPass (password manager) while NordVPN Premium includes VPN + NordPass + NordLocker (Secure Cloud Storage)
Read the full test Try NordVPN Essential now!
- Excellent performance
- Very effective streaming (including US Netflix) and TV access
- Huge number of servers
- Managed collocated RAM servers
- Customer support responsiveness
- Complex router configuration
- No info on server load status