
 Photo and video editing programs play an extraordinary role in preserving precious memories. PC-Active 337 contained part 1 of the Video Editing workshop with KdenLive, here you will find part 2;
Johan van den Berg
It’s with that one keyframes (see the last part of part 1 in PC-Active 337) it is also often possible to change the settings on the track itself. But not only on the track itself, also in the Effect/composition stack. There you can add, remove and shift the keyframes and also set the value. In this case it is the contrast in the contrast bar under the blue line. But you also see a hand in the video track with the number 707. This means that you can also change on the video track. The blue level in the clip changes with the movement of the cursor.
Editing – sequences & image sequences
Sequences are actually different timelines containing separate clips. These are placed there so that they can be edited separately. They then appear as one object in the Project binwhich is then placed as one whole on the ‘main’timeline can be moved. This is useful when it comes to short-term clips on the one hand and long-term films on the other. You don’t have to keep stretching and contracting the timeline.
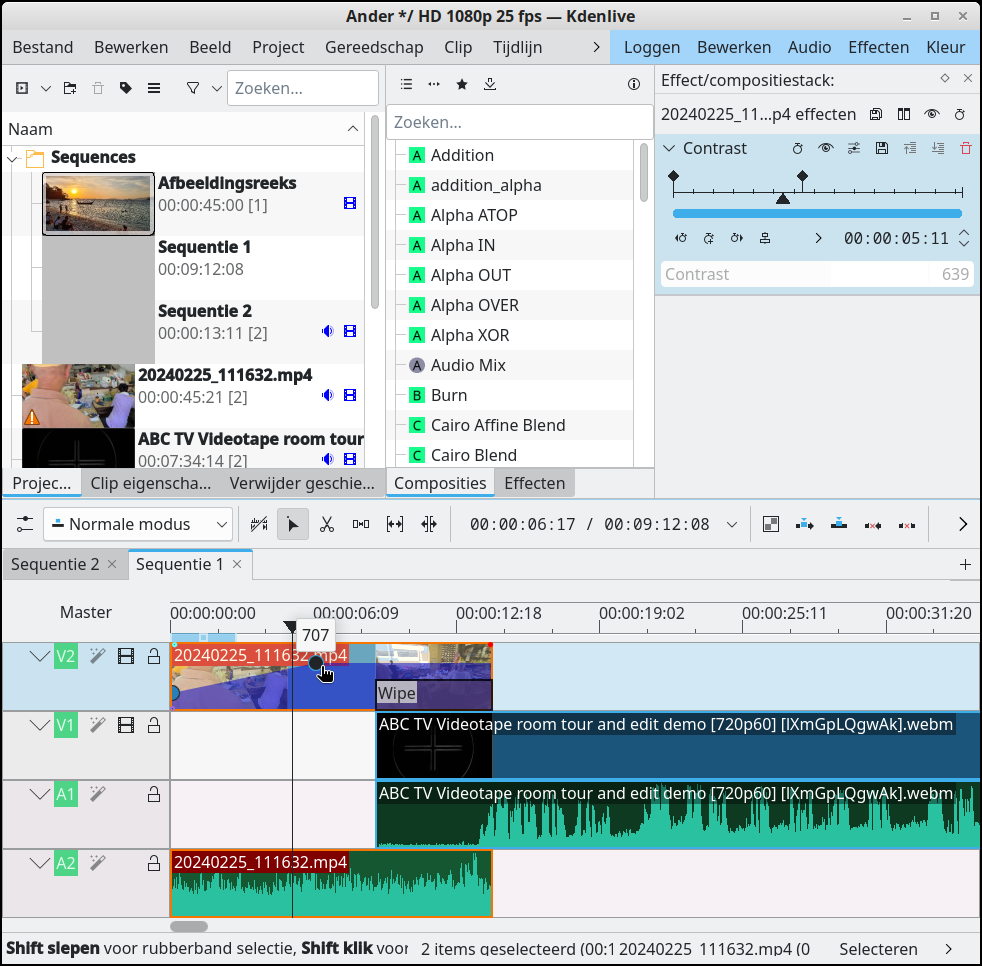
| Different contrast options /// |
Image sequences are actually a set of pre-selected images with a single selected transition between them. These transitions can consist of anything and have all kinds of delays. It is therefore necessary that those images are all in a separate directory, so that those transitions can only be defined for that set of images. You can choose between different formats (jpg, png, gif; here it is jpg) and then only that format is chosen. Once created, the image sequence will appear as a sequence in the Project bin and can then be used as one object.
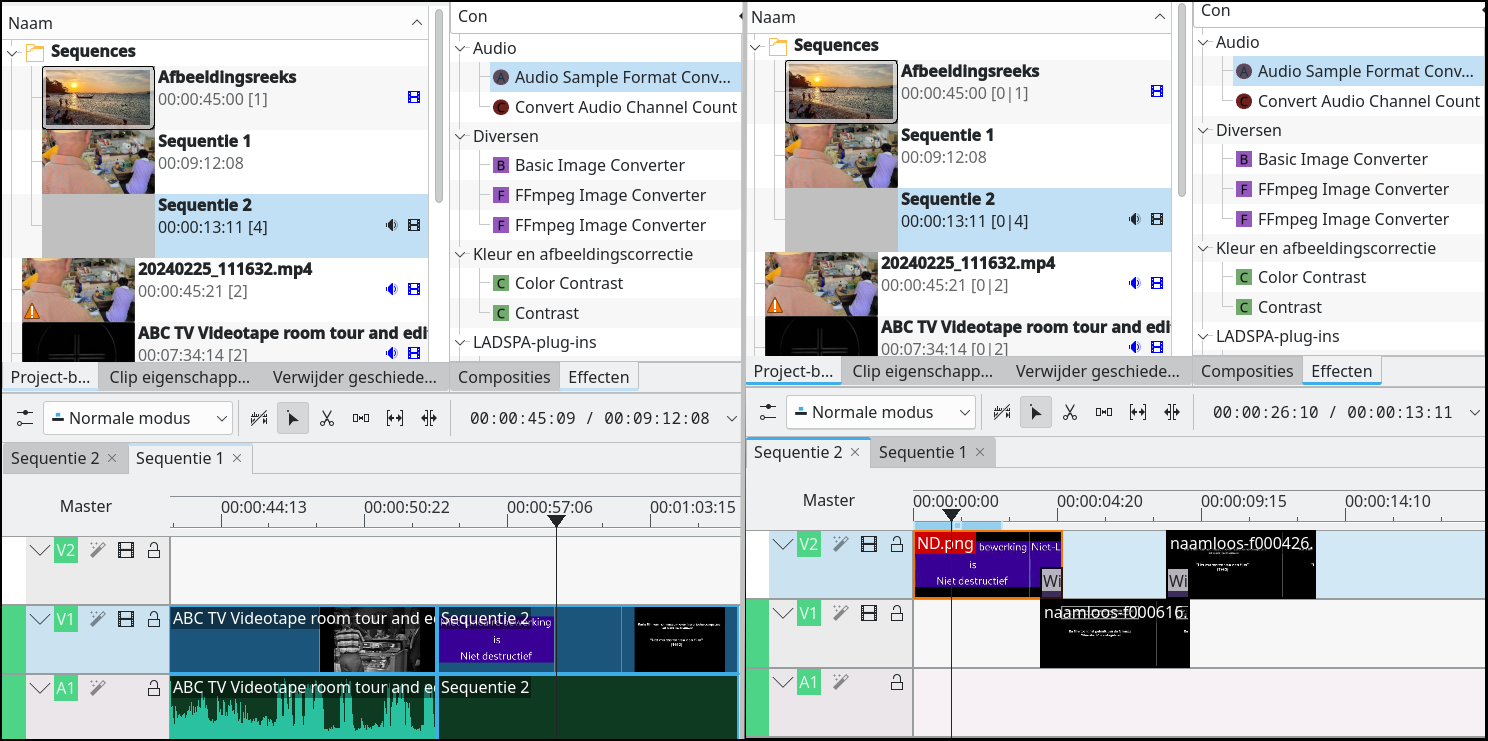
| Left Sequence 1. Right Sequence 2, consisting of 3 objects (right) forms one object in sequence 1 (left). |
Editing – time remap, title clips (with animation)
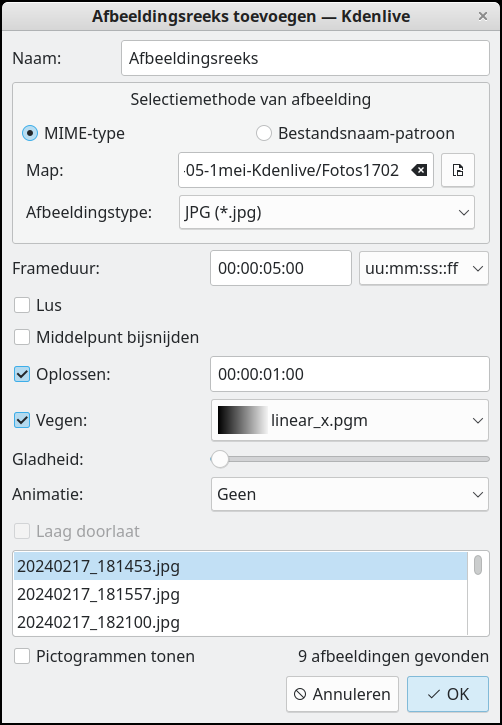 |
| Image series in separate directory |
If you want to partially change a clip, you must first right-click on the video track and then select Change video speed (time remap). You will then see an extra window.
As you can see in the image, this has been further elaborated, with the settings already made. You now see the progress, at a moment after the remap.
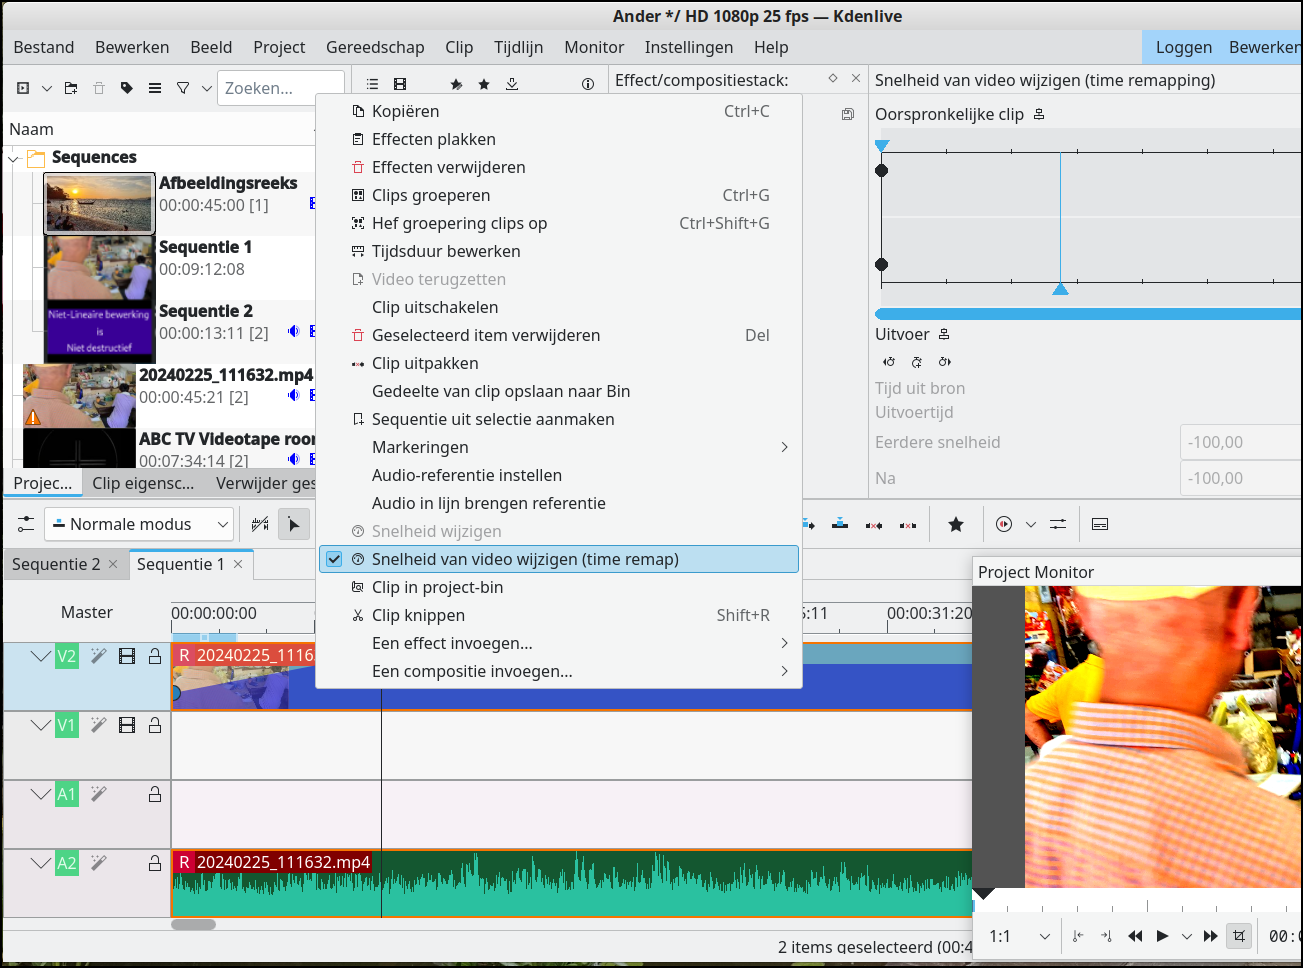
| Select _Time remap_, after right-clicking on the video track |
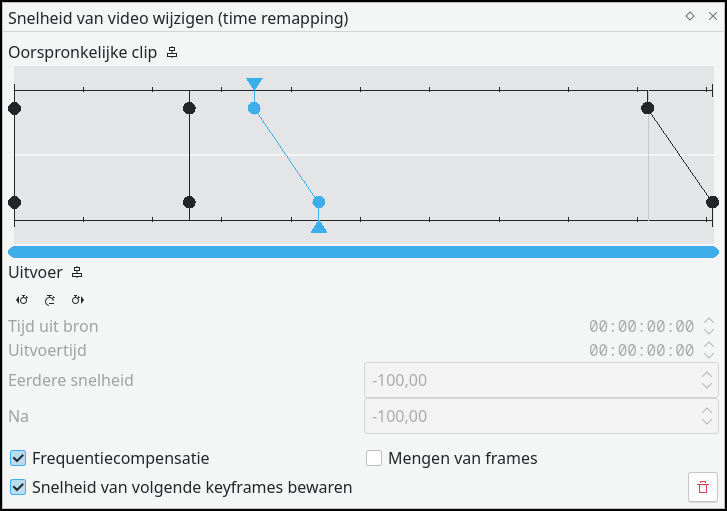 |
| Keyframes already applied, delay set |
The blue line indicates the moment of playback. The black vertical line to the right of it is a chosen moment (first keyframe) at which the delay should start. The second line (black) to the right indicates when the delay should end (second key frame). The diagonal line on the far right shows the total delay. The keyframes can be chosen randomly. This is all different in the beginning: the keyframes still have to be created:
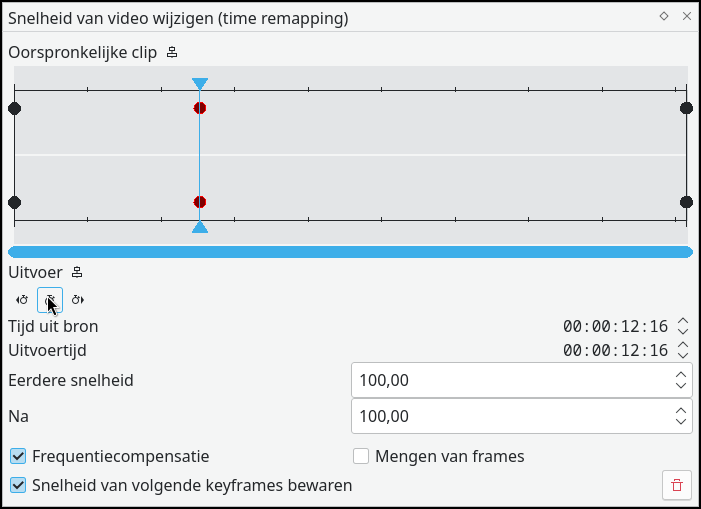 |
| First keyframe set |
 |
| Second keyframe, now the delay (in %) |
Here you see the creation of the first keyframe, in the second image the creation of the second keyframe. The time between the two keyframes, the so-called Previous speedmust therefore be slowed down by reducing the percentage. The scene between the two keyframes is then delayed, and the entire clip takes correspondingly longer.
Title clips
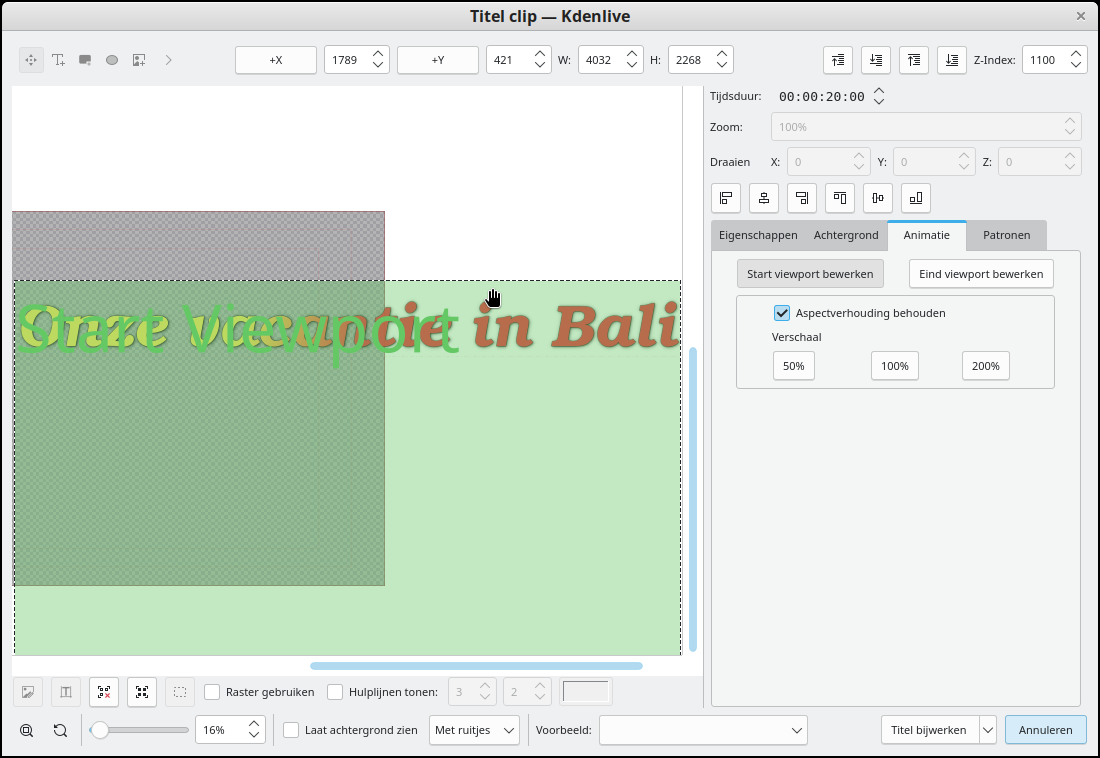
Title clips not only provide titles, they also provide options for animation. Here you see the title and an image floating over the video. The title goes from top left to bottom right, while the picture goes the other way.
 |
 |
| Text goes from top left to bottom right, becomes smaller |
…and the picture goes from bottom left to top right, gets bigger |
How is that possible? By placing two title clips on top of each other, in two extra tracks. In the image below you see the two purple title clips. A title clip offers, in addition to showing titles, also moving those titles. You do this by a start viewport and a end viewport in the title clip. And also by scaling it. In the example you see the text starting at the top left and ending at the bottom right. You do the same thing in a second title clip with a read-in image, but the other way around.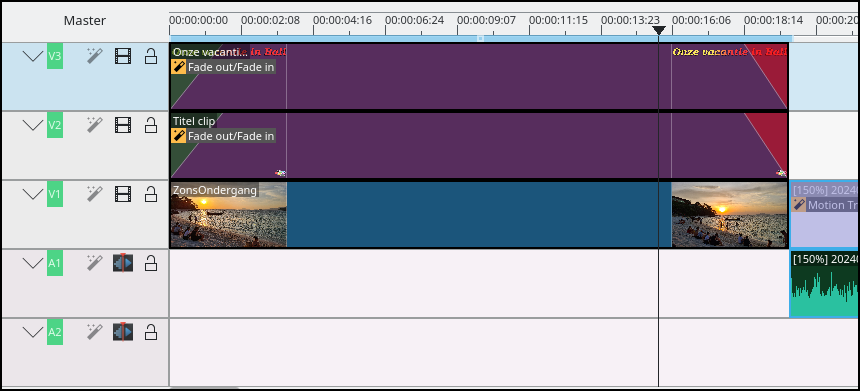
| Title clips (purple), the top one for the text, the bottom one for the image-2 |

We obtain our film or video by rendering everything that has been placed on the Timeline. The entire project on the Timeline is calculated step by step during rendering and the values of the pixels are determined frame by frame. Mp4 is the most commonly used format, but Webm is a newer format for high quality video. First you give the Output file a name and then you choose Render to File for the entire project.
| |
Want to know everything about Kdenlive?You will find useful information in these two places: |
|
.”