 The cloud service OneDrive is useful for storing files online. Manage and edit the files with the OneDrive app for iPad or iPhone.
Supplies
OneDrive users need an internet connection and a free Microsoft account. OneDrive also has a app for the iPad and iPhone.
login
To work with the OneDrive app, the user must first sign in with the Microsoft account:
- Tap the app OneDrive.
- Tap on Email or phone.
- Type the email address associated with the Microsoft account.
- On the keyboard, tap go.
- Tap on password and type the corresponding password.
- Tap on To register.
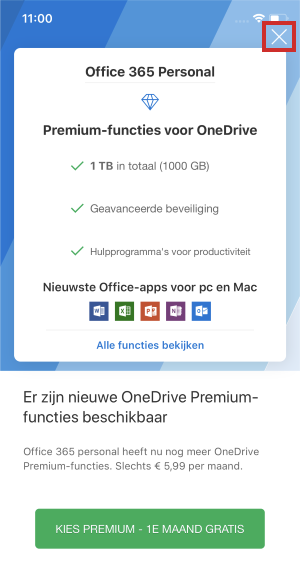
- Tap the cross in the top right to not use a paid version of OneDrive.

- On the screen that appears, also tap the cross not to use extra storage space.
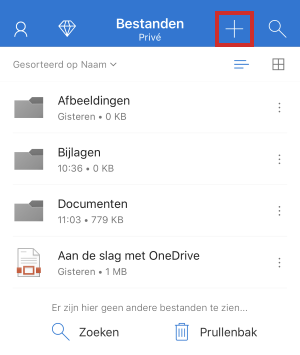
The overview with the files opens.
View file
The cloud service allows the user to store and view all kinds of files. Open a file in the app like this:
- An overview of recent files is image. Do you also want to view other files and folders? Then first tap at the bottom of the screen Files.
- Tap a file to open it.
- Tap the arrow at the top left to return to the overview of files.
Create folder
Folders are useful for organizing files. Create a new folder like this:
- Tap the tab at the bottom of the screen Files.
- Tap the plus sign at the top right.
- Tap on Create folder.
- Type the name of the folder.
- At the top right, tap To make.
The folder has been created.
upload file
The user cannot upload folders from the app. You can upload a file.
- Tap the plus sign at the top right.

- Tap on upload.
- Tap on To leaf through.
- Tap at the bottom Browse.
- Choose the desired location under ‘Locations’.
- If necessary, first tap the folder where the file is located and then tap the desired file.
The file is saved to OneDrive.
upload photos
Uploading a photo is slightly different than uploading other files.
- Tap the plus sign at the top right.
- Tap on upload.
- Tap on Photos and videos.
- OneDrive wants access to the photos. Tap on Give access to all photos.
- Tap the folder containing the photos.
- Tap the desired photos.
- Tap on Ready.
The photos are stored online.
Upload photos automatically
OneDrive also has the “Camera Upload” feature. This automatically saves all photos on the smartphone or tablet to the cloud service. Turn the feature on like this:
- In the menu, tap photos.
- If the option is not already enabled, the screen will show ‘Camera upload is disabled’. In addition, tap Switch.
All photos and videos are put in the OneDrive account.
Move file
Here’s how to move files to another folder in OneDrive:
- Tap the tab Files.
- If necessary, browse to the folder containing the file you want to move.
- Tap the icon with three dots after the file name.
- Tap on Move.
- Tap the desired folder.
- Tap on Move.
The file is now in the selected folder.
Delete file
Delete files you don’t want to keep from OneDrive. This frees up space for other files.
- Tap the tab Files.
- If necessary, browse to the folder containing the file you want to delete.
- Tap the icon with three dots after the file name.
- Tap on remove > remove.
The file will remain in the “Trash” folder for another 30 days.
Recover Deleted File
Deleted files remain in the “Recycle Bin” folder for another 30 days. With a work or school account, the files are automatically deleted after 93 days. Do you want to keep the file anyway? Then put it back.
- Tap on the top left with your initials or profile picture.
- Tap on Garbage can.
- Tap the icon with three dots after the file name.
- Tap on Put back.
The file is now back in its original location.
Share file
The user can share files and folders with others. Someone then gets access to the shared item. Share a file or folder via the app as follows:
- Tap the tab Files.
- Optionally, browse to the folder containing the file you want to share.
- Tap the icon with three dots after a file or folder name.
- Tap on To share.
- You can share the file or folder in several ways, including “Messages”, “Email”, “Copy Link”, or “Send Files”. Choose ‘Send files’ if you want to send the document as an attachment. The other person cannot edit the document in your OneDrive environment. We will further elaborate the option ‘E-mail. Tap on E-mail.
- Tap in the entry field behind ‘To’.
- Enter the recipient’s email address.
- Edit the subject and text in the email. Make sure that the link (the line that starts with https://) remains intact.
- Tap the blue round button with arrow at the top right.
The recipient will be notified that a file or folder has been shared.
Stop sharing file
If you no longer wish to share a shared file or folder, revoke the permission.
- Tap at the bottom of the screen Shared.
- Tap on Shared by me.
- Tap the icon with three dots after a file or folder name.
- Tap on Details.
- Here are the properties of the document. At the bottom it says ‘Shared with’. For example, it says “Anyone with this edit link can edit.” Tap this.
- Tap on Remove access.