Who remembers him, that old-fashioned tape recorder. But how do you connect it to your computer? We show it, in word and image.
 John Vandeart
A huge colossus with coils and a complex operating mechanism. At the time, a serious stereo was undeniably equipped with a tape recorder; in combination with a visual equalizer. Very honest: The cassette recorder was the tape recorder’s little brother, wasn’t it?
Workshop
The approach of this workshop is simple: Digitizing the sound that the reels of the tape recorder still produce. And then we’re talking about sound from the 50’s. Why history? We are talking about analogue sound carriers whose quality is gradually deteriorating, so perhaps it is high time to put the following into practice. So get to work technically and visually!
Technically first
If we look at the audio equipment of the 1970s/80s, the most important connections are (1) the 5-pin DIN (= Deutsches Institut für Normung) and (2) the 6.5 millimeter Audio Jack (= that big headphone plug). With every now and then also (3) RCA connections (= black/red or white/red). In all cases you can use the connections to physically pick up a stereo signal (= left and right separate sound). If we look at today’s computer, we no longer see such connections. The connections we have (whether or not via USB) are made in 3.5 millimeter mini-Jack, with the common denominator being the colors green (= Line Out), blue (= Line In) and pink (= Mic In) .
A comment should be made on the latter, because the blue connection – the one with the Line In – is increasingly disappearing. Only green (= Line Out) and pink (= Mic In) still seem to have a right to exist. That right to exist is due to the versatility of the hardware, because with the help of associated tooling the connections can be manipulated. For example, you can use the green connection for either the use of headphones or the connection to, for example, the sound system. The same also applies to the pink connection that can handle the incoming sound from the microphone and the – because that’s what it is – Line Out of the tape recorder.
Create link
To make the link between the old tape recorder and the new computer, we have to go from (1) DIN to 3.5 millimeter mini-Jack or from (2) 6.5 millimeter Audio Jack to 3.5 millimeter mini-Jack. That doesn’t sound too complicated and it isn’t. Although? On the usual websites such as www.kabels.nl and www.allekabels.nl it is sometimes a good search for the right products. Finally: let’s get started! This in the form of a photo strip, where we start with the cabling. So the visual part!
|
Figure 1: This is a 6.5 millimeter Audio Jack (‘Male’) on one side and a 3.5 millimeter mini-Jack (‘Female’) on the other side. This large plug will soon go into the headphone jack of the tape recorder. |
|
|
Image 2: This is a 6.5 millimeter Audio Jack (‘Male’) on one side and a 3.5 millimeter mini-Jack (‘Female’) on the other side. This large plug will soon go into the headphone jack of the tape recorder.
|
|
|
Image 3: And if we put together the two parts shown earlier, the final cabling we need to connect the tape recorder to the computer is created. Admittedly, this option is undoubtedly for sale as one complete cable, but then you can no longer combine them afterwards. Because you may have to facilitate a slightly different setup in the future and then you will benefit from the loose cables! |
|
|
|
Now the second possibility to go from tape recorder to computer. The cable you see here provides the connection from 5-pin DIN (‘Male’) to 2 x 2-pin Tulip (‘Female’). With which, but that aside, you immediately have the option to connect the tape recorder to the amplifier that you have in your audio tower. |
|
With here again the extra intermediate piece, namely the connection from 2 x Tulip (‘Male’) to 1 x 3.5 millimeter mini-Jack (‘Male’). |
|
|
|
And if we put these two items together (= put them together), then we can go from 5-pin DIN to 3.5 millimeter mini-Jack. And that’s how we get back to the computer. |
|
Admittedly, the computer may be equipped with audio connections and you can use those for this workshop. Nevertheless, we would like to draw your attention to USB solutions for audio. Here is a mini solution that you can connect to a USB port of the computer. This is very useful in practice if the audio connections are on the back of the computer; while you have a USB port on the front of that computer. |
|
|
|
Image 8: Here’s another audio solution for USB. It is true that it is slightly larger and more robust, and also comes with a USB cable. That’s nice if the computer’s USB port is ‘around the corner’. Don’t worry, you don’t have to suffer poverty, because even if you buy all the items shown here, it’s still a tenner job. By the way: first take a good look in your receptacle with leftover wires and plugs. You never know! |
|
Option 1. This way the headphone output of the tape recorder goes to the computer. Admittedly, via that handy USB interface. With which the contours of this workshop have suddenly become visible. |
|
|
|
Option 2. Here you can see how the 5-pin DIN connection of the tape recorder ends up at the computer. In fact a completely different variant, but the connection result is almost identical. |
|
Which brings us to the tape recorder. As you can see, this is a hellish device from a bygone era. At the time, stereo sound was ultramodern, hence the two striking knobs and meters with which you could fine-tune that stereo sound. We look at the front of the tape recorder and that is where the connection for the headphones is located. |
|
|
|
Image 12: So the headphones… In it we put the combination we made to get from 6.5 millimeter Audio Jack to 3.5 millimeter mini-Jack. |
|
You could do this anyway: connect headphones to the tape recorder. The 3.5 millimeter mini-Jack of the (modern) headphones then goes into the 6.5 millimeter Audio Jack connector shown earlier. You will see (= hear) that this works fine and then you also have a way to try out the tape recorder. |
|
|
|
Image 14: We continue by connecting the tape recorder to the computer via the USB sound block. And then you immediately see why it is so useful to do that via USB: that saves you some hassle with the audio connections of the computer itself. There is a good chance that in the future you will no longer see any mini-Jack connections on modern laptops, because all headsets are now USB. |
|
Voila: let’s get started! The tape recorder is connected to the computer and from this point on it has become a software issue. That is, you need audio software that allows you to record the sound from the tape recorder. Or better: with which you can digitize that sound! |
|
|
|
Still showing the second way: the connection that runs over the 5-pin DIN plug. This takes place on the back of the tape recorder. Which also makes it immediately clear why you prefer to use the headphone option: then you can see better what you are doing. |
|
From 5-pin DIN to USB solution to the computer again. Yes, you can also make the connection this way. |
|
|
|
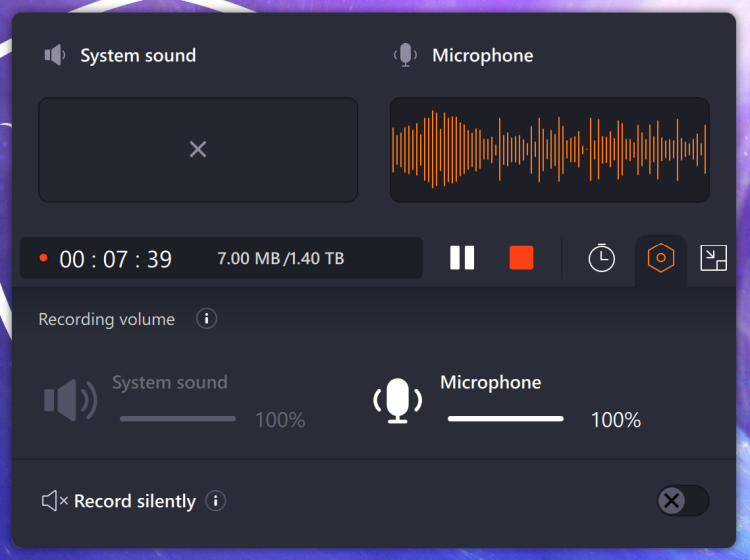
Figure 18: Now the software side of this tape recorder business. You need a recording program and they come in all shapes and sizes. From the more or less standard sound recorder you can find in the Microsoft Store to the versatile Audacity (www.audacityteam.org). You could even use the VLC Media Player (www.videolan.org). We make – for now – another choice: EaseUS RecExperts (recorder.easeus.com). Admittedly, the ultimate instinct is to purchase the paid version, but in the meantime you quickly and easily get a good insight into adjusting and recording the sound that the tape recorder produces. In concrete terms: you let the tape recorder run, you select the sound from the microphone and after some fine-tuning the recording starts. Yes, it can be that easy.
|
|
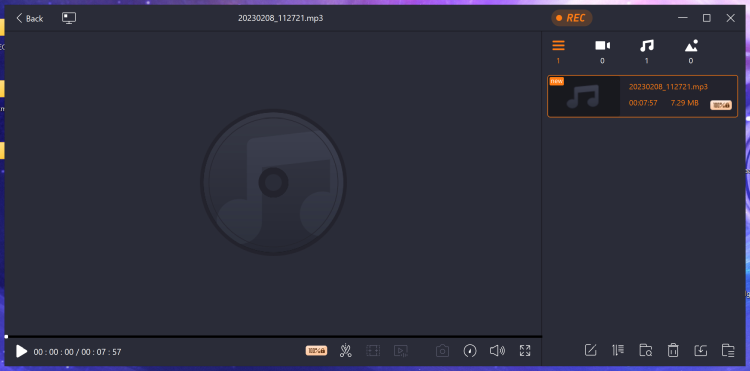
Figure 19: And once recorded you can have the sound written as – for example – mp3 to your hdd/ssd. Whereby that final instinct should be mentioned, because the free version is limited in terms of storage. Two options: (1) go back to open source software or (2) buy EaseUS RecExperts anyway… If recording tape recorder sound is more than just an experiment, then EaseUS RecExperts is well worth the money. Good luck! |
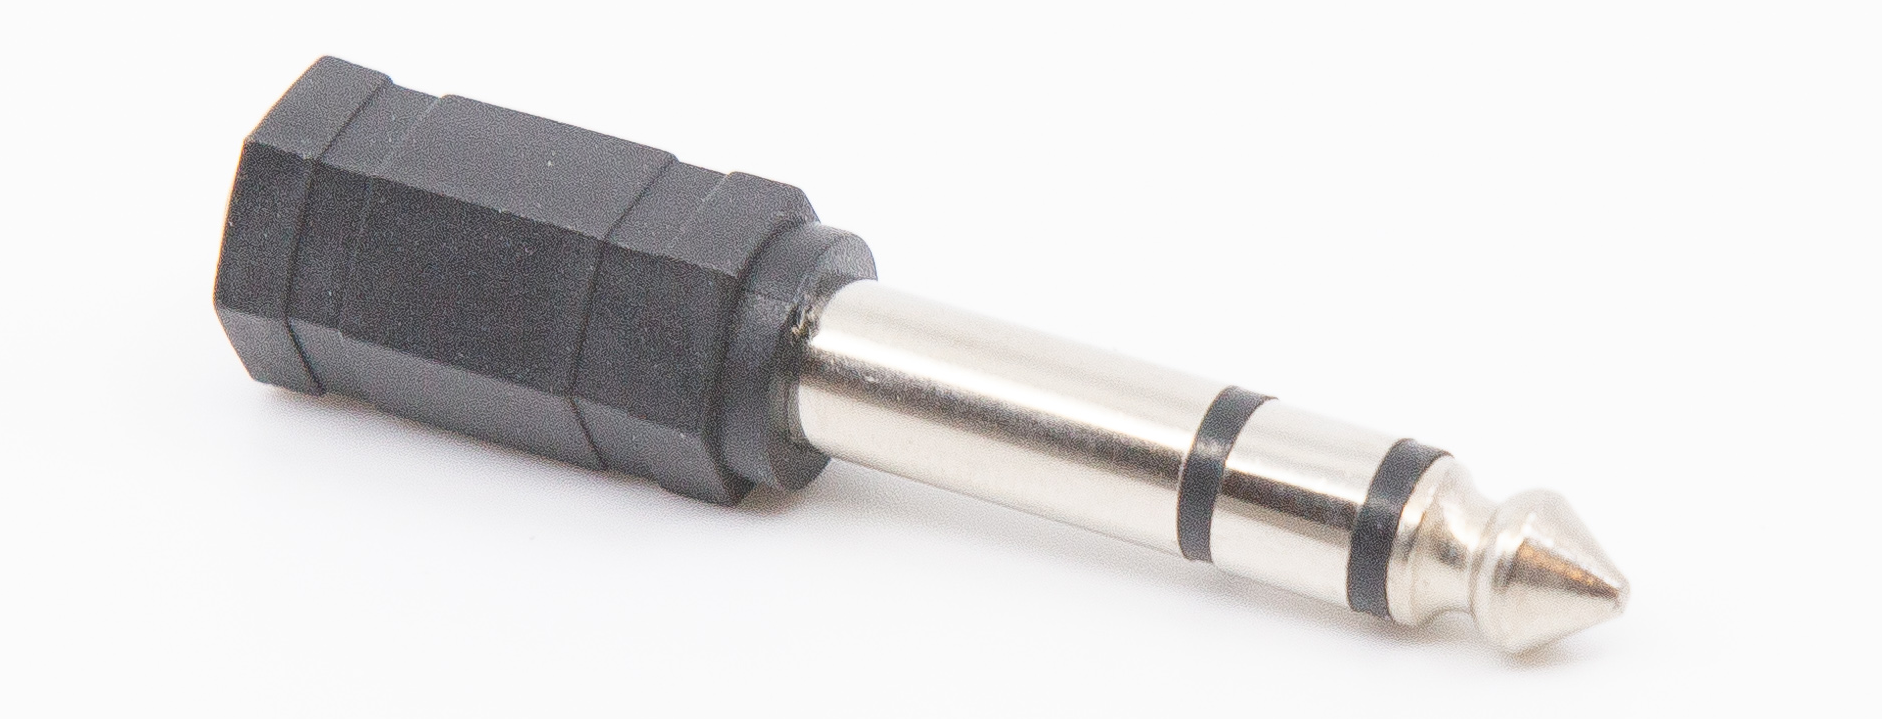
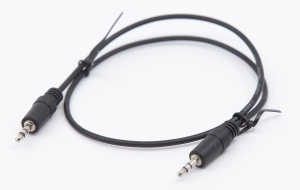

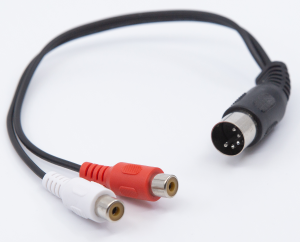
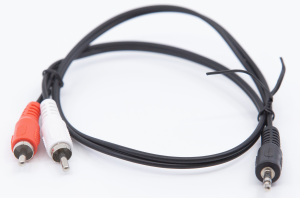 Image 5:
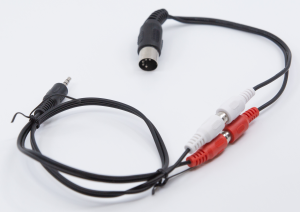
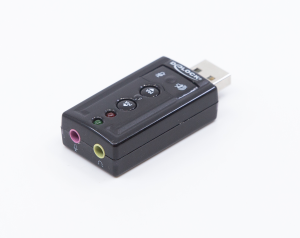
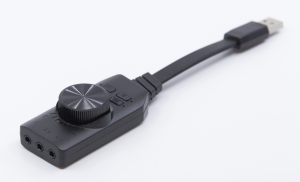
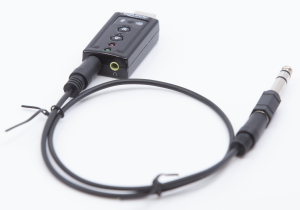 Image 9:
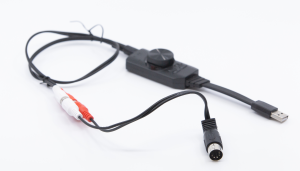
 Image 11:
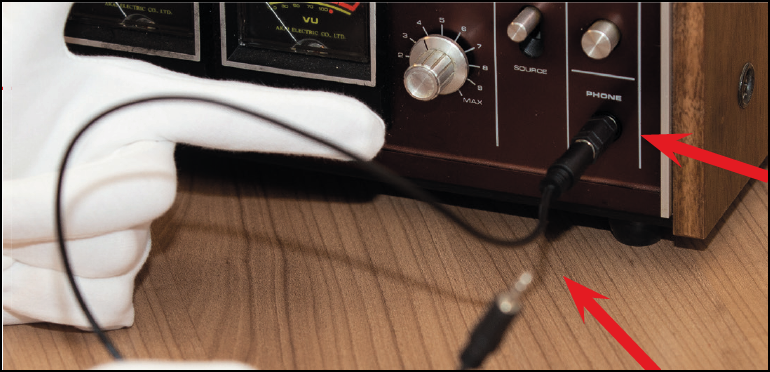
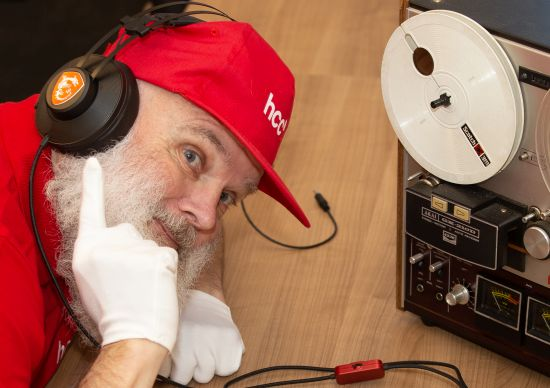 Image 13:
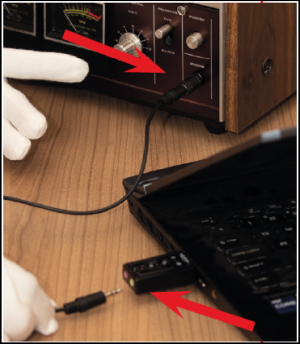
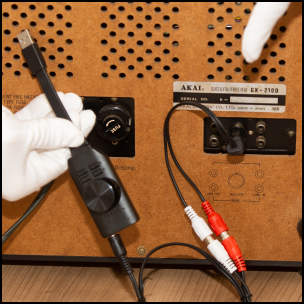 Image 15:
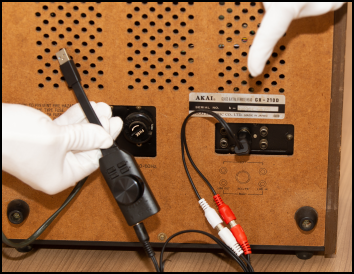
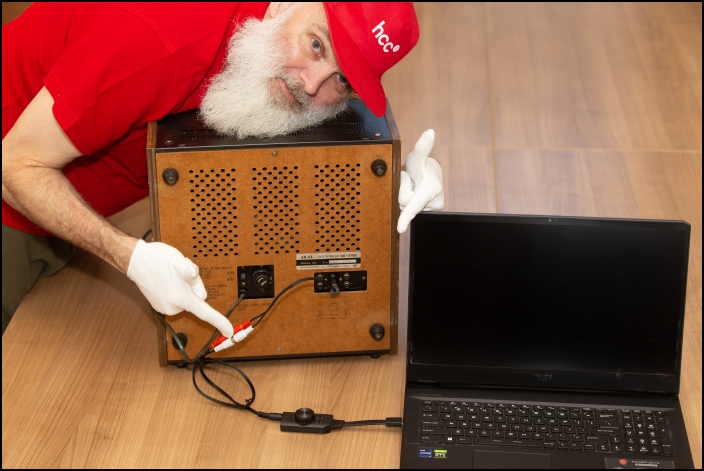 Figure 17: