
Liven up your Zoom meetings by setting up the video conferencing app to apply filters to your face in real time.
For nearly a year now, hundreds of thousands of workers have tasted the joys of participating more or less often in videoconference meetings. If most of the time these work meetings are quite formal, it is possible to lighten the atmosphere a little and laugh a little with colleagues by using filters.
Applied in real time, these augmented reality effects are sometimes integrated directly into applications. This is the case, for example, of Zoom, which already had a certain number of filters, but which has just added a new function, Effects Studio, to allow you to modify certain features of your face.
But it is also possible to go even further by configuring a third-party application entirely dedicated to filters such as Snap Camera, a Snapchat application, which can be integrated into your meeting software.
Download Zoom for Windows (Free)
Download Zoom for macOS (Free)
Download Zoom for Linux (Free)
1. Access filters during the meeting
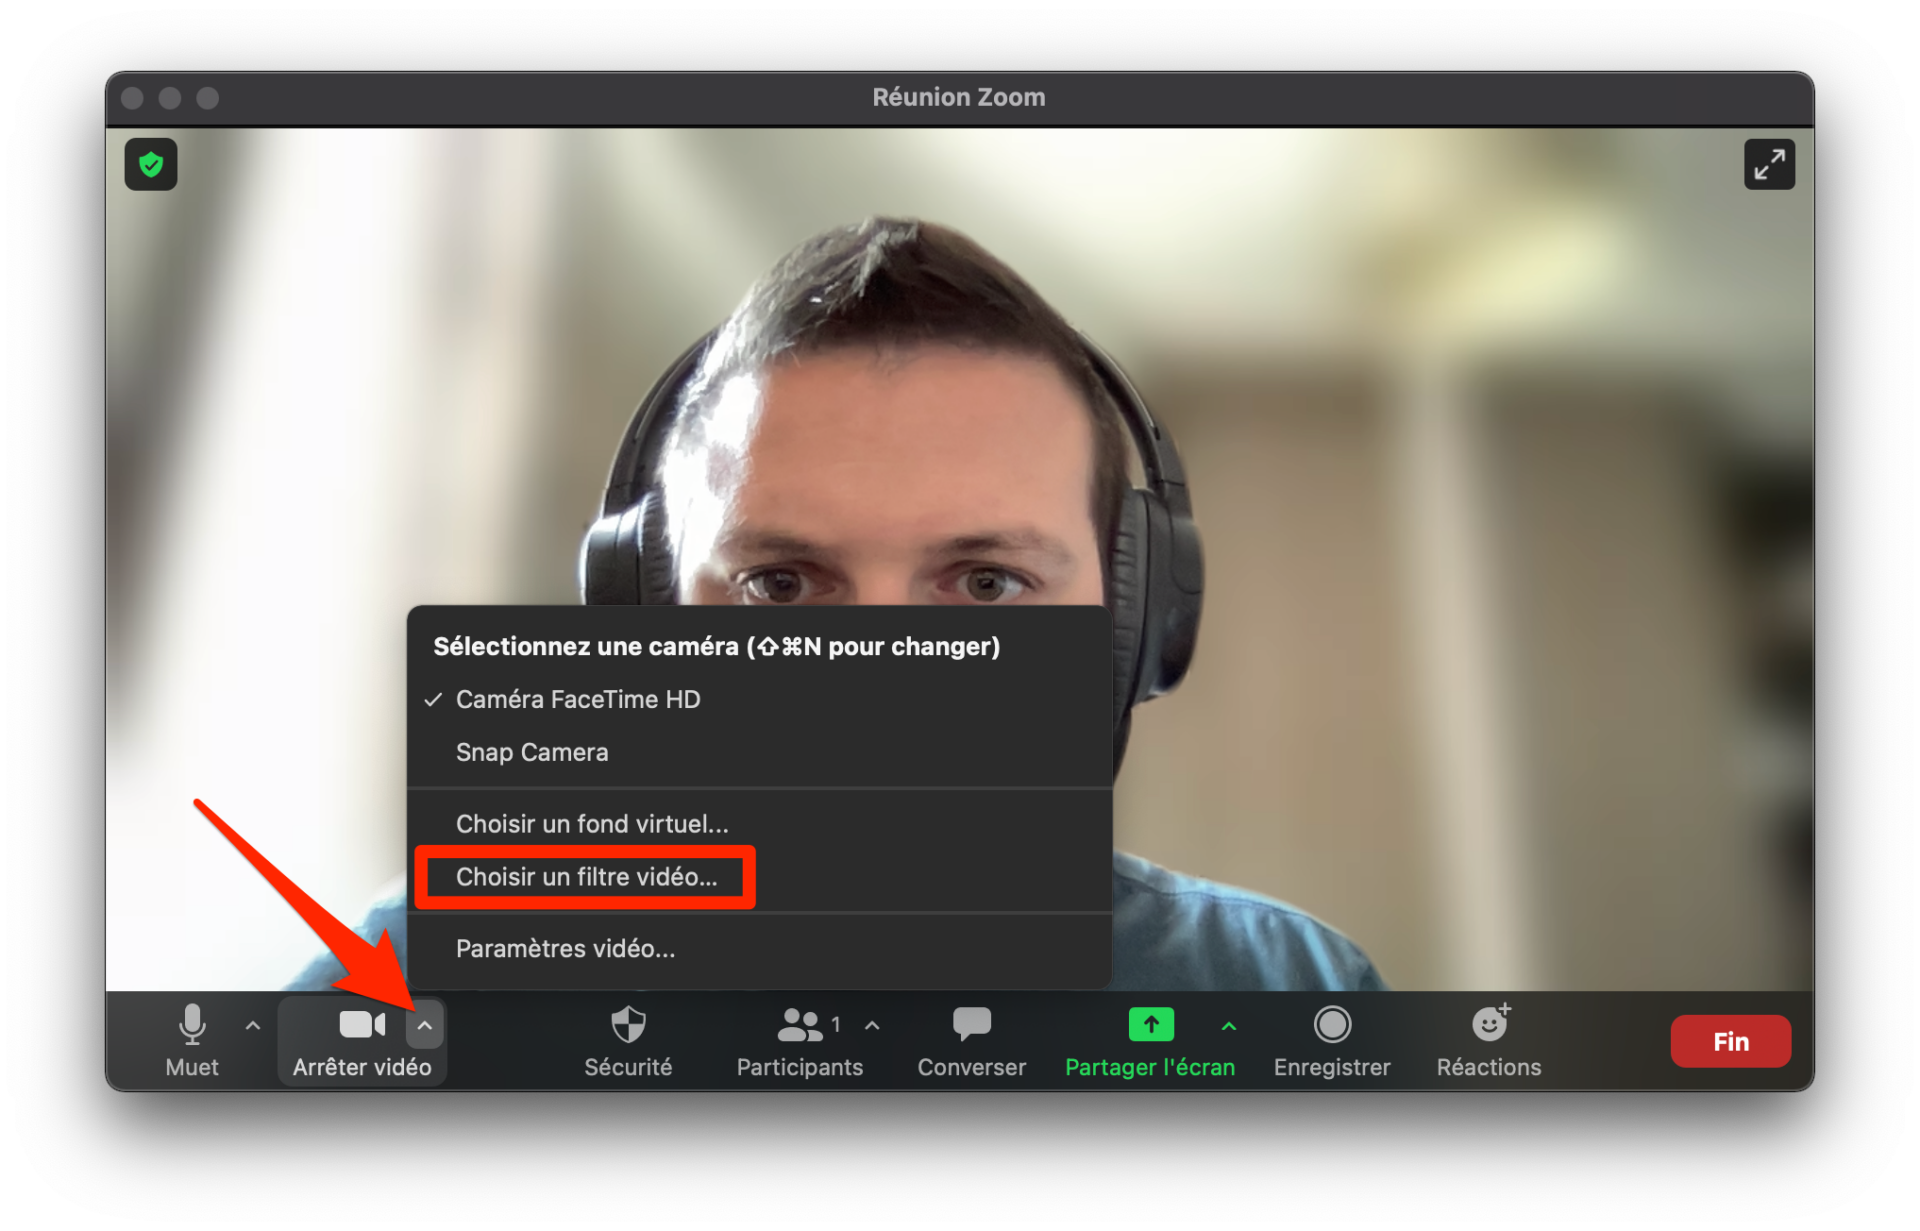
Launch Zoom and create or join a video meeting. At the bottom left of the window, click on the drop-down menu associated with the camera icon, and go to Choose a video filter.
2. Apply a filter to your video
In the Settings window that appears on the section dedicated to Background and filters, you can select a virtual background (or blur the background) or select one of the Video filters included in Zoom.
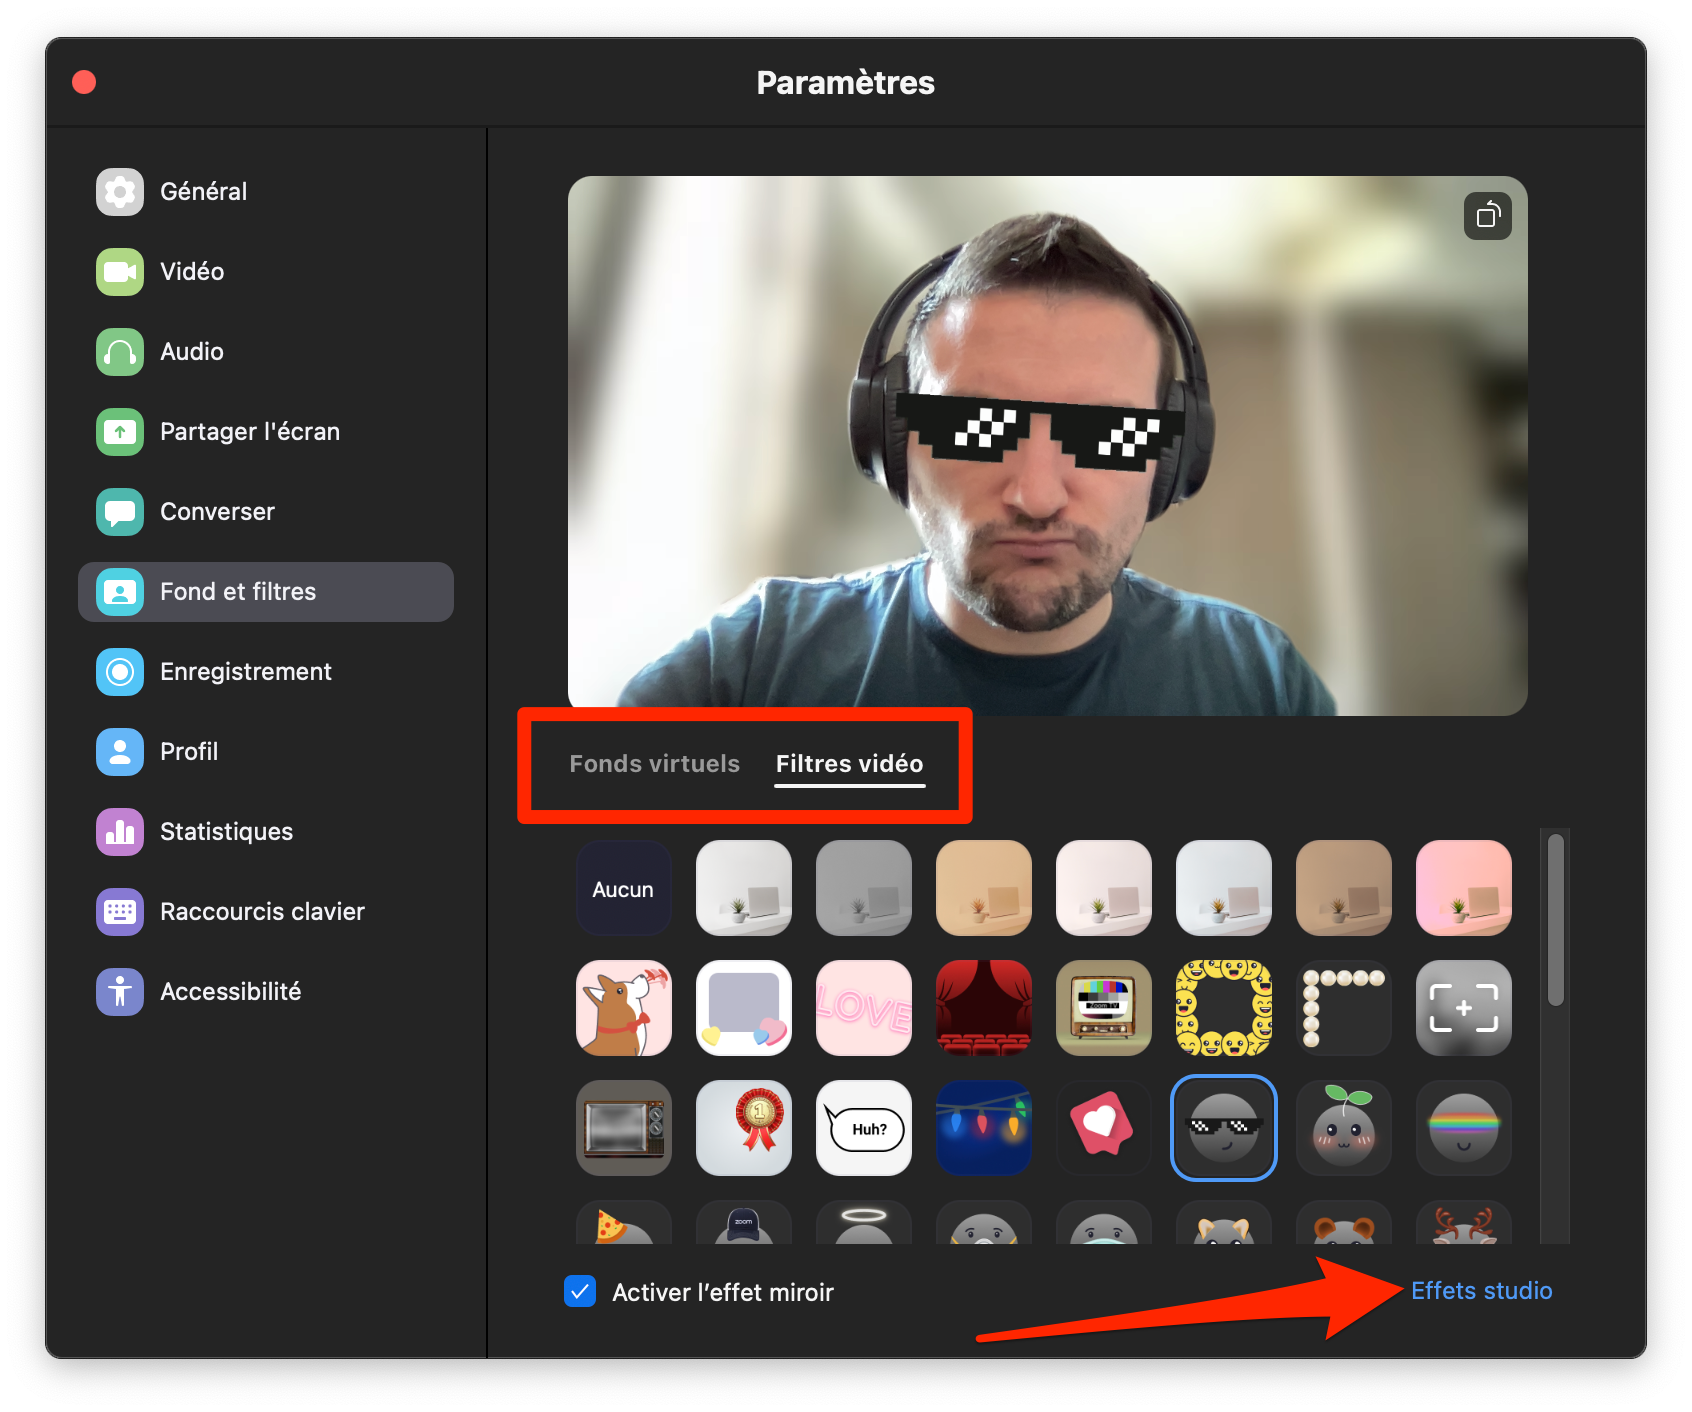
Now click on the Studio Effects menu at the bottom left of the window to open the pane dedicated to the new Zoom function. Remember to uncheck the box Apply to all future meetings (to avoid unpleasant surprises), choose your eyebrows, mustache and beard and possibly a lipstick and change the color of each one. All the elements you have selected are automatically modified in real time on your video feed, visible to other participants in the meeting.
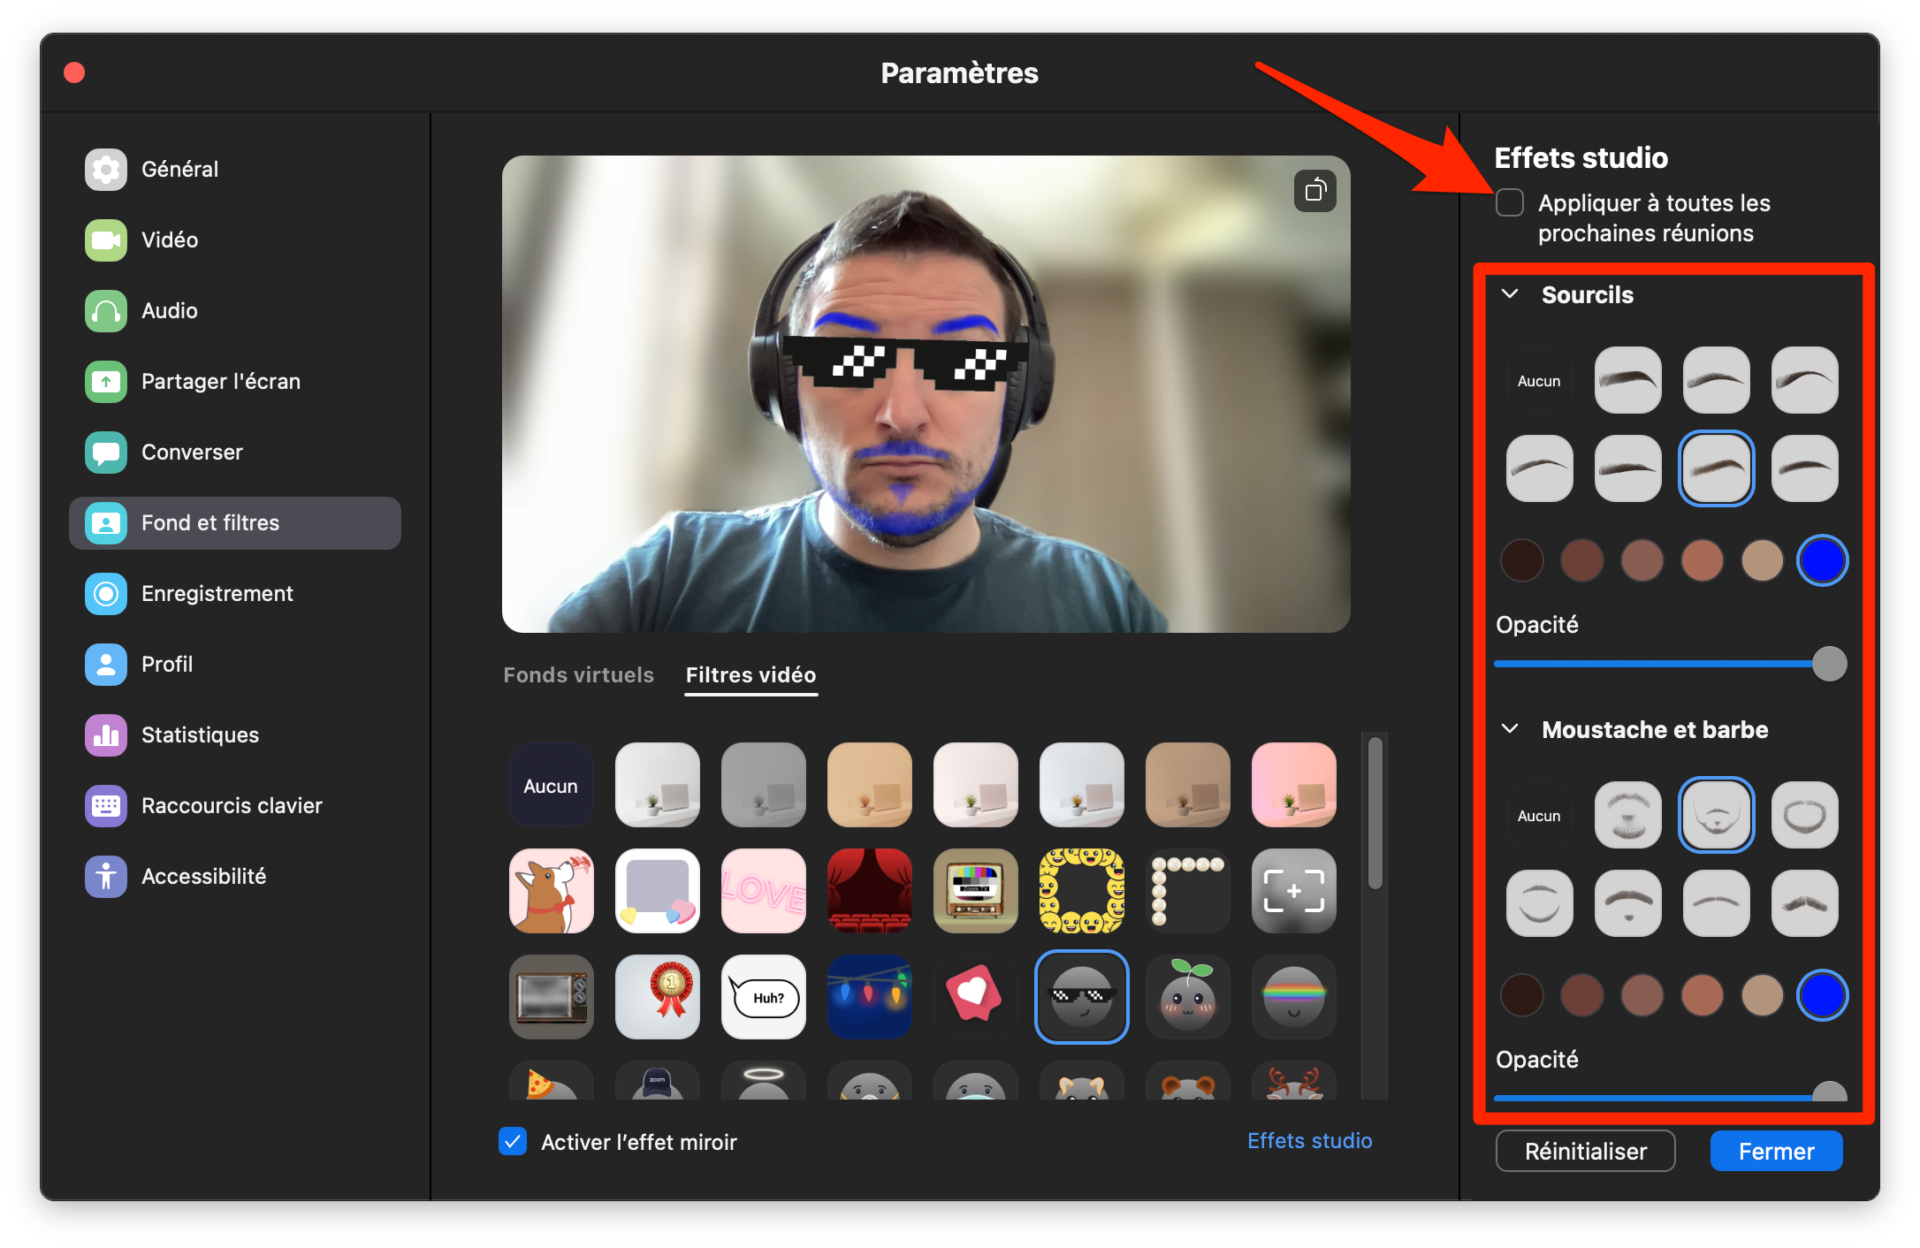
You can cancel these effects at any time by returning to this same menu to choose None instead of the selected filters.
3. Use SnapChat filters
The native filters offered in Zoom being neither original nor particularly successful, it is possible if you wish to use the SnapChat filters directly in the application. For this, start by downloading and installing the Snap Camera application on your machine.
Download Snap Camera for Windows (Free)
Download Snap Camera for macOS (Free)
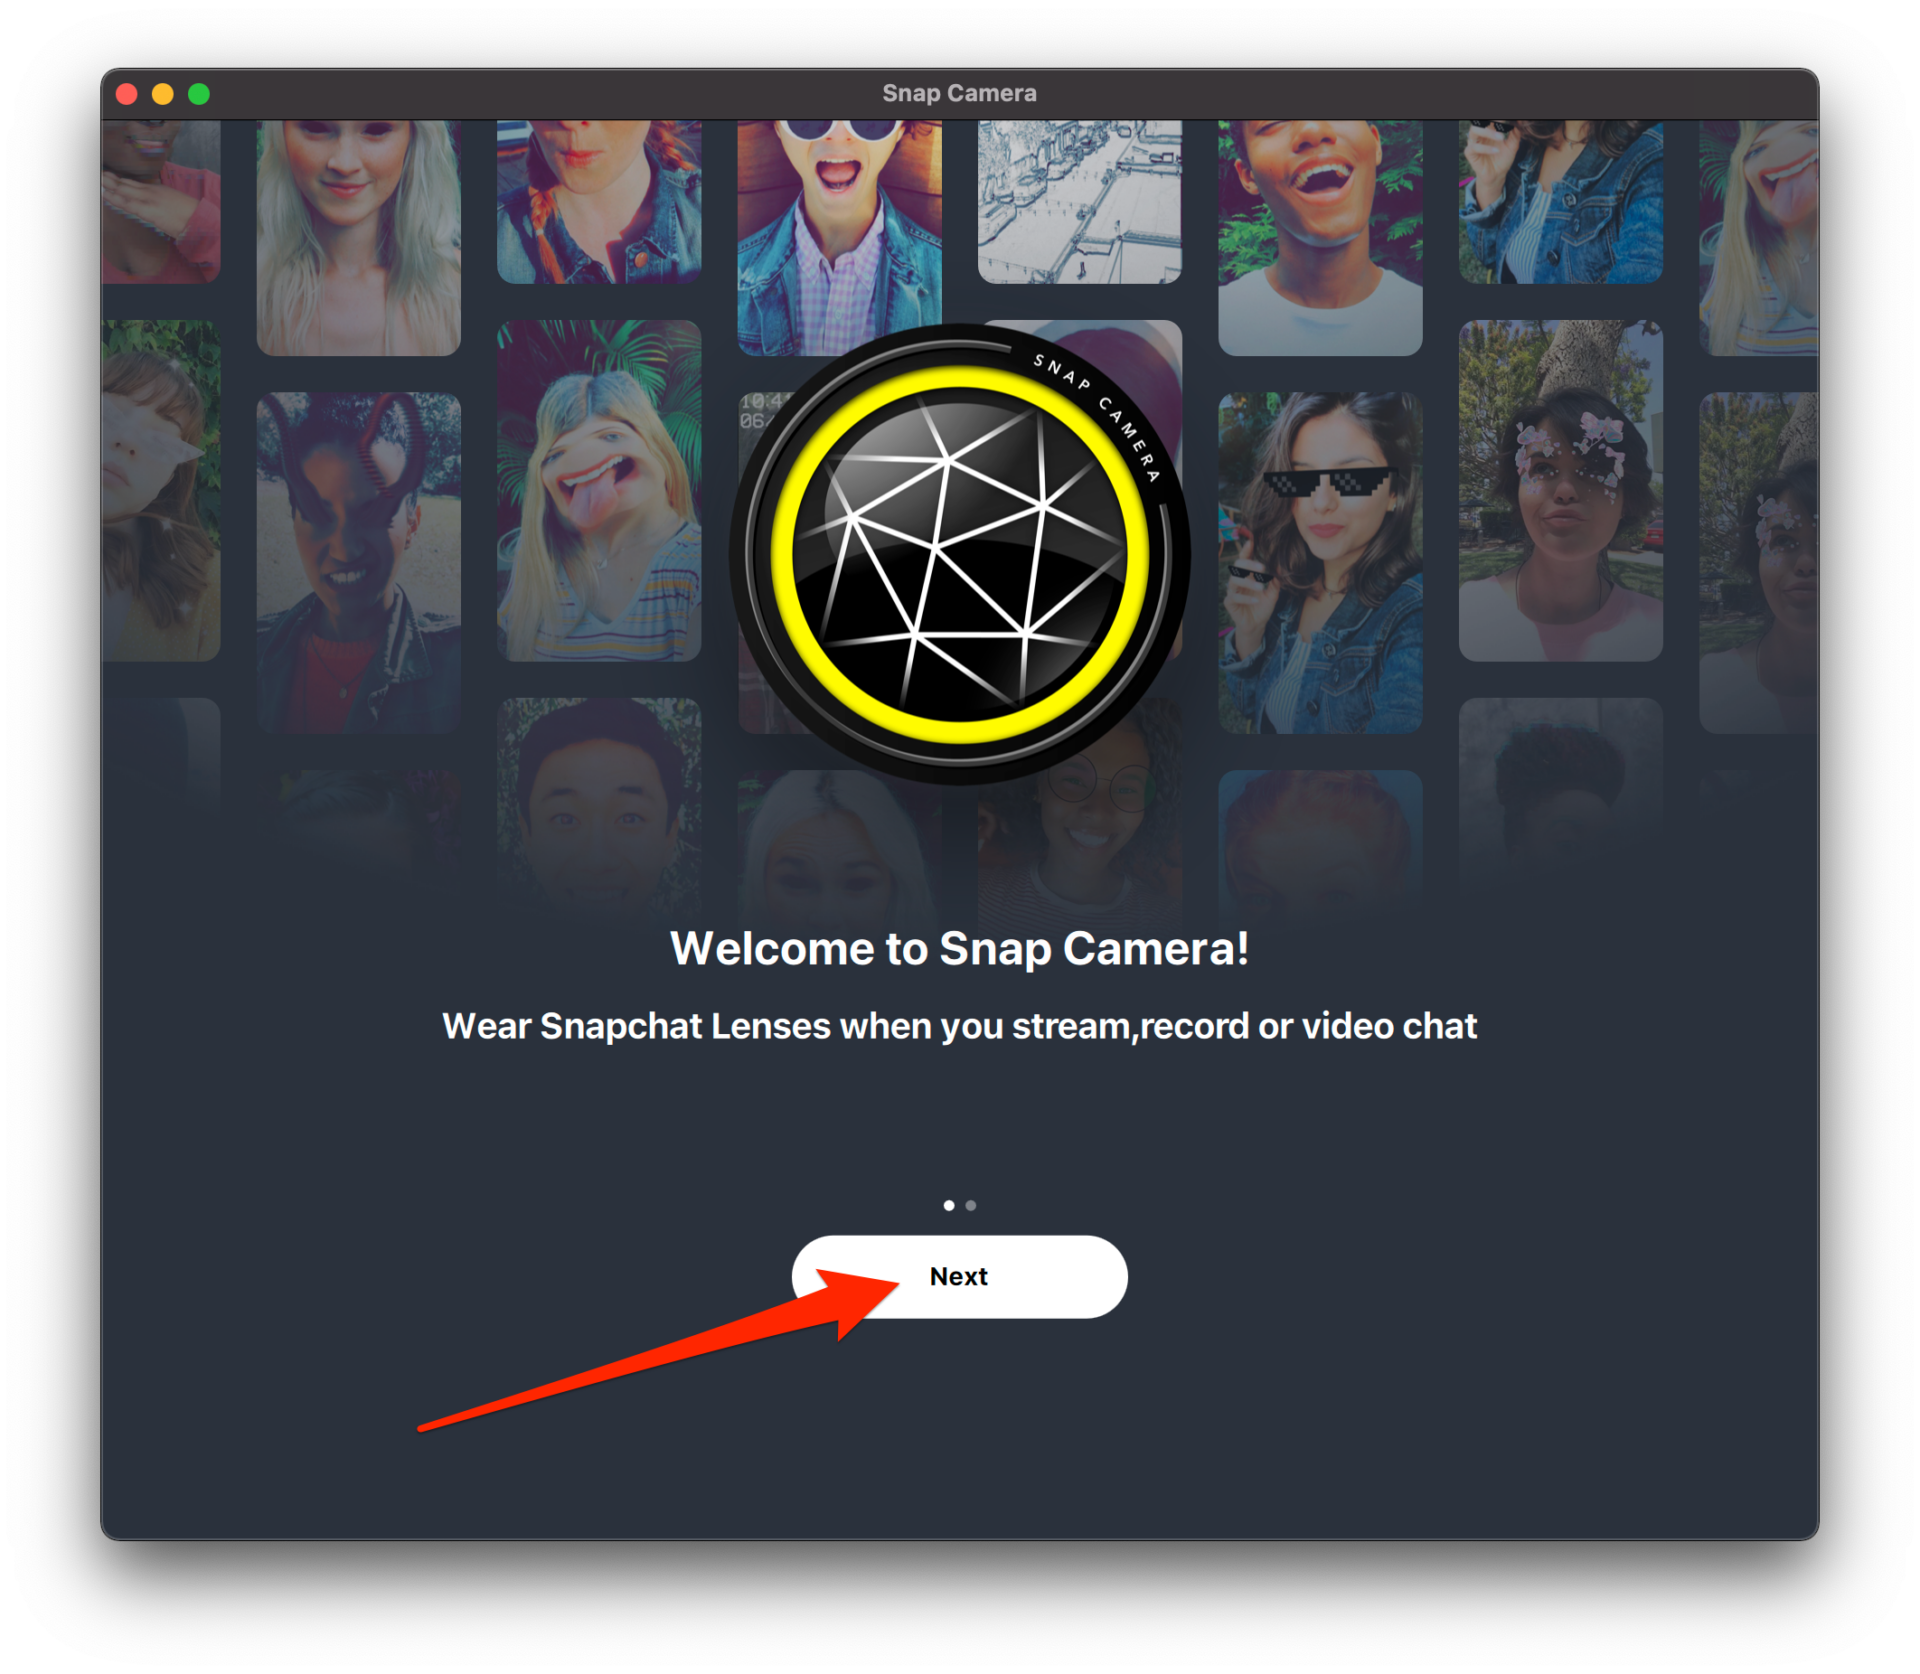
Launch Snap Camera and skip the app overview screens by clicking Next. Explore the many filters offered in the app and choose the one you want to apply on your face.
If you haven’t already, start a Zoom meeting then, at the bottom of the screen, click on the drop-down menu associated with the Camera icon and, in the Select a camera area, choose Snap Camera.
Logically, the filter you’ve enabled in Snap Camera should automatically trickle down to your Zoom video. You are now ready to put a little atmosphere and loosen up your usual meetings a little plan-plan during your next weeks of teleworking.